ScanMaker i700 Supplement 17
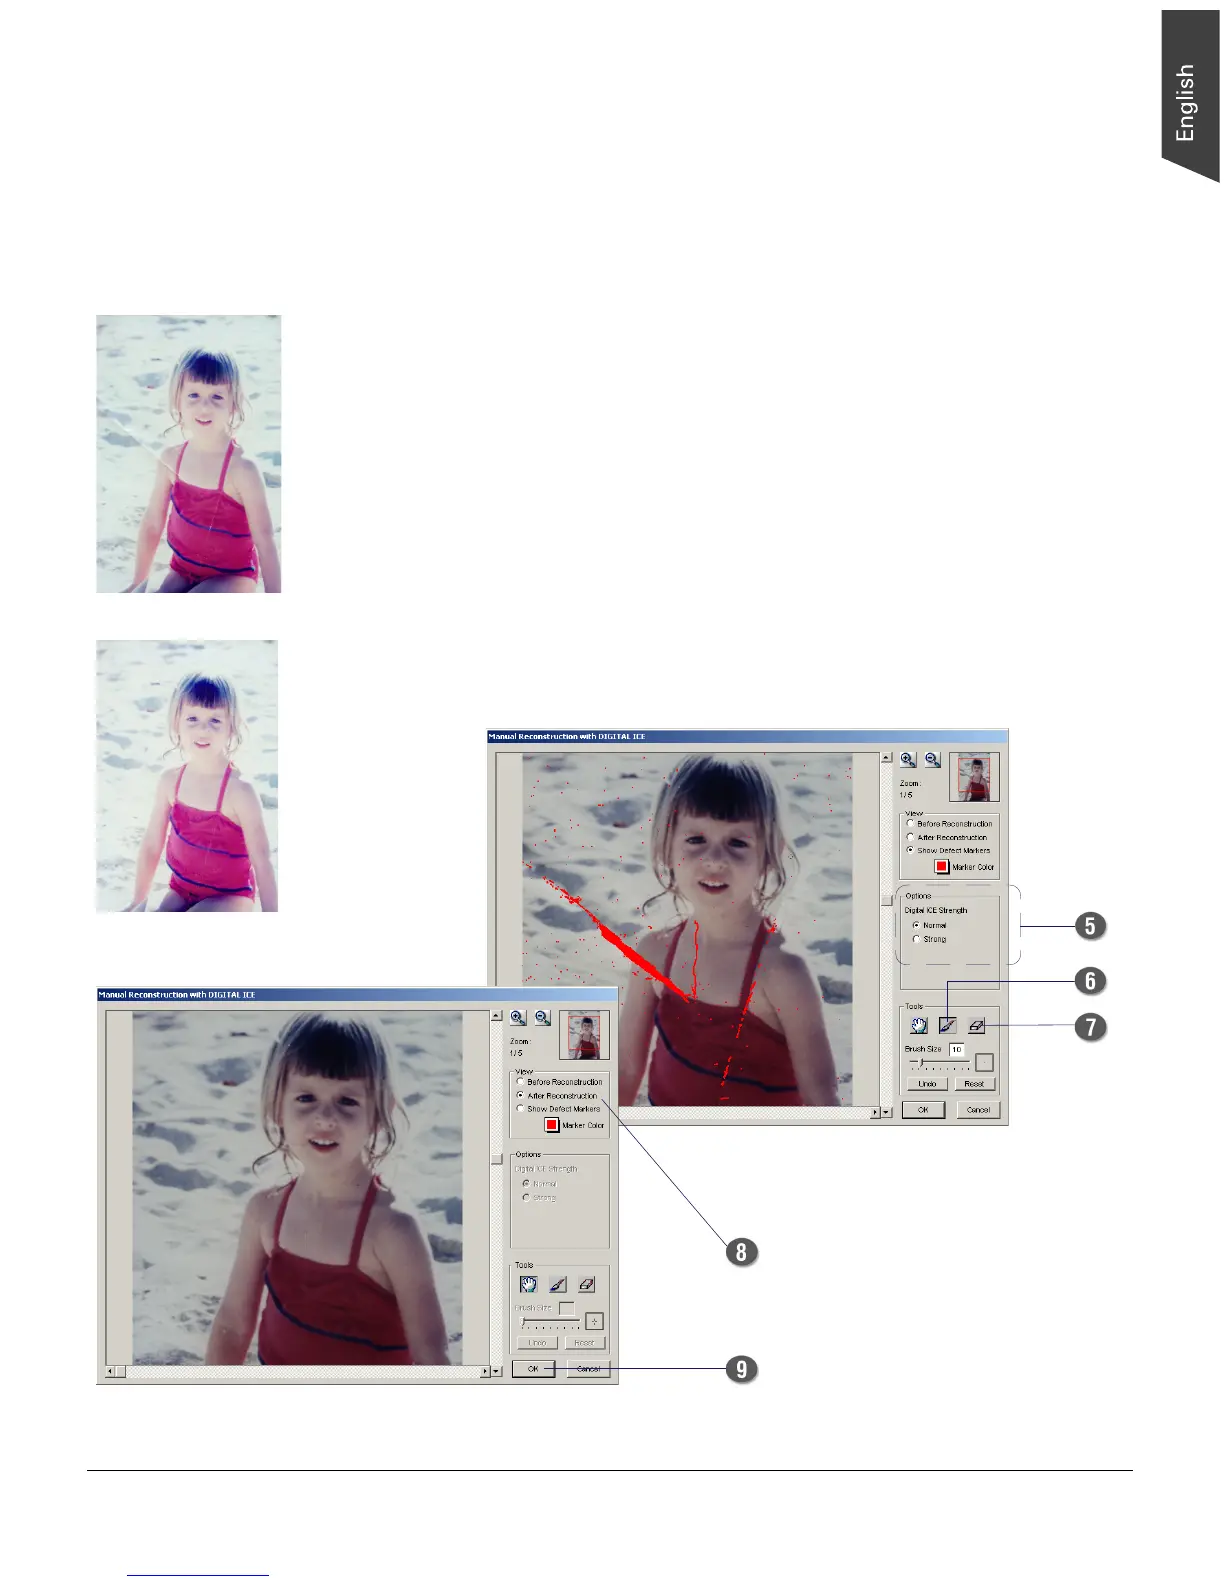
When the “Manual Reconstruction with DIGITAL ICE” window is launched the
first time, the scanned image appears with defect markers. This option is checked
automatically. You can change the color of the defect marker to get a better view
of the defects by clicking the Marker Color icon.
5. Choose the “DIGITAL ICE Strength” option that works best for you for repairing
surface defects. Select from Normal or Strong.
6. If necessary, use the Brush tool to add defects which cannot be detected by the
scanner after the scan but are otherwise visible in the damaged print and which
you want to remove from the image.
7. If necessary, use the Eraser tool to remove any false or unwanted defect, which
can be detected by the scanner after the scan.
8. Check the “After Reconstruction” option, the defect correction applies to the
Defect Map area in real time.
9. Click the “OK” button to perform the defect fixing according to the settings
specified under this window; the scanned image is saved with the settings for
defect fixing.
Before
After