16 ScanMaker i700 Supplement
C. Scanning with Manual Reconstruction
With the Manual Reconstruction option, the damaged photo is restored through the
use of manual settings and procedures. This is a more complicated and involved
procedure, but Manual Reconstruction gives you greater control in fine-tuning the
degree of correction you would like. It also allows you to include areas of damage
that may not be “seen” through the automatic reconstruction process but which you
can detect with the naked eye or which you know are there.
1. Follow the procedures (steps 1 through 7) for scanning damaged photos in
previous section “Scanning in Automatic Reconstruction” to carry out scanning.
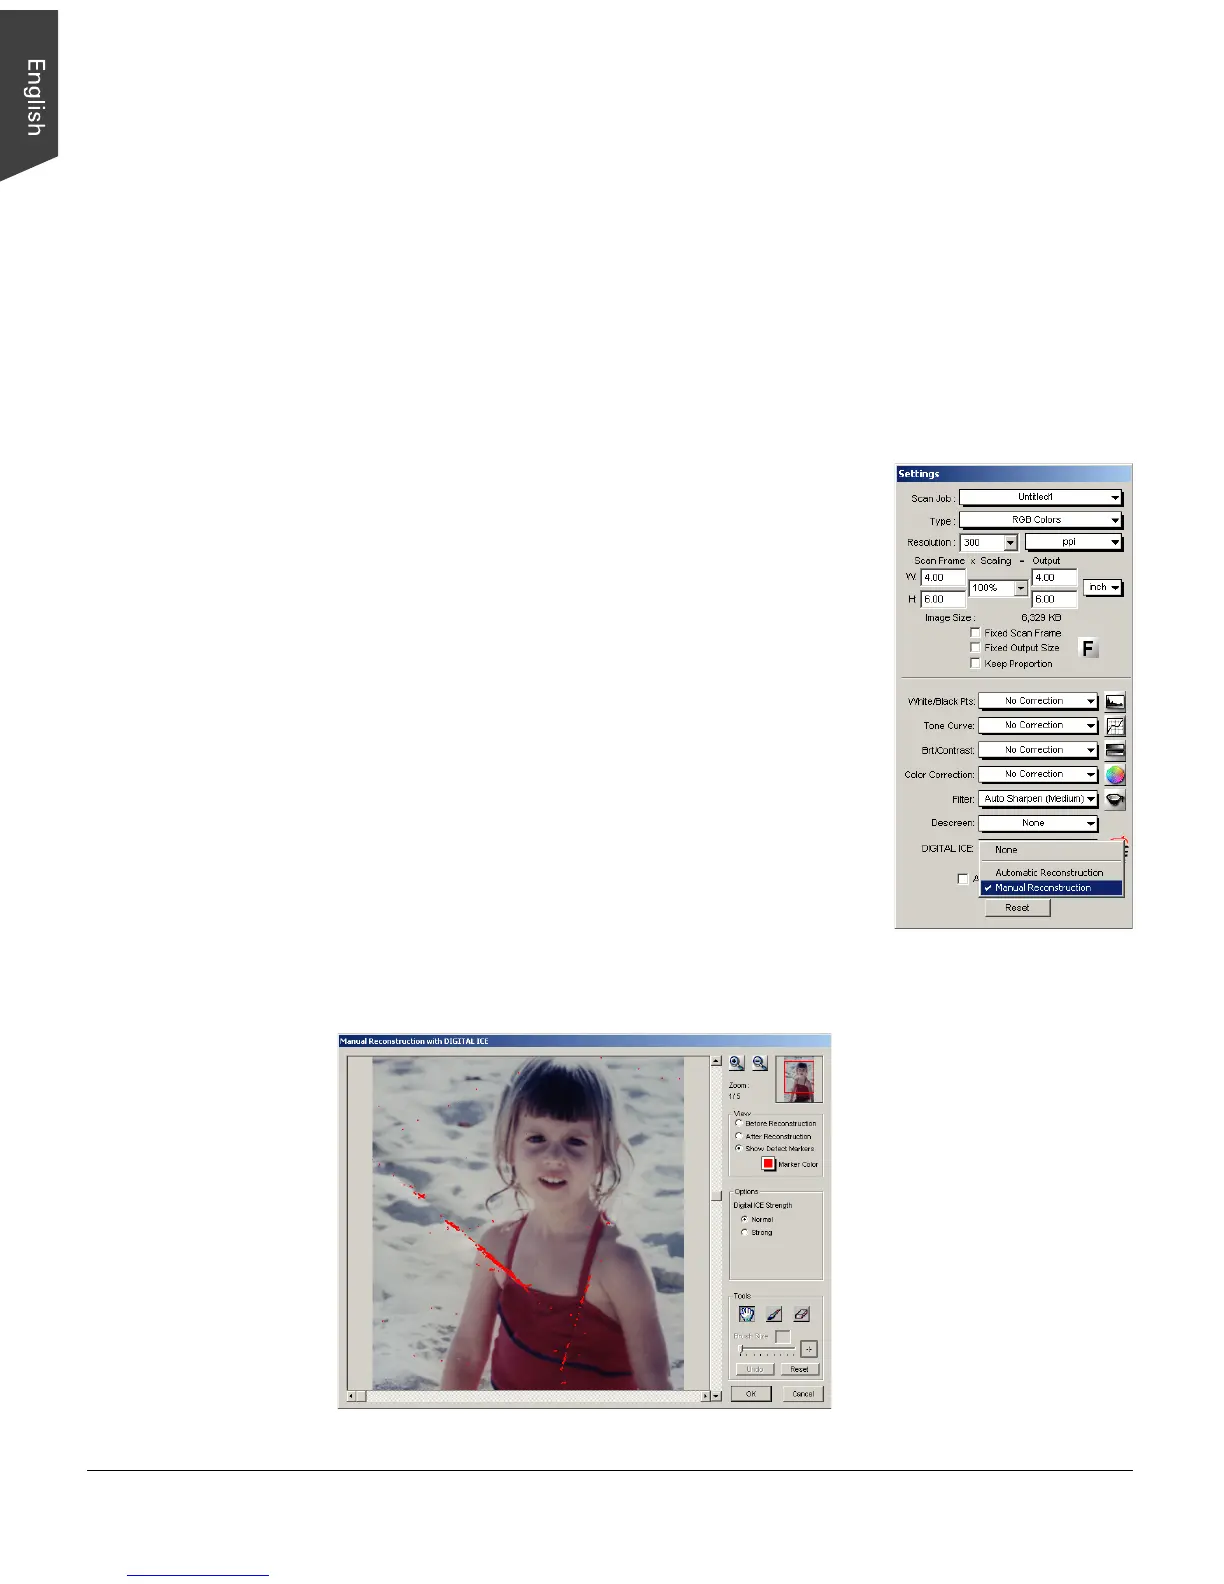
2. In the Settings window, choose “Manual
Reconstruction” from the DIGITAL ICE options menu.
A message appears, indicating that the correction of
defects will be implemented according to manual
settings after the image is scanned.
3. In the Preview window, click the “Scan To” button to
perform scanning.
4. When the “Scan To” button is pressed, the Save As
dialog box appears. Specify the necessary settings for
the output image, then click “Save”.
At this point, scanning of the damaged photo begins
and a defect map is created in the process. This may
take a few minutes.
A “Manual Reconstruction with DIGITAL ICE”
window then appears, with a preview of the scanned
image and corresponding function tools.