EasyManua.ls Logo

Midea WQP6-3207A - User Manual

Midea WQP6-3207A
23 pages
Print Icon
To Next Page IconTo Next Page
Loading...
Technical Service Guide
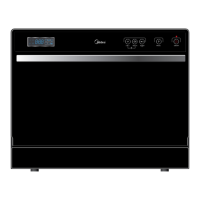
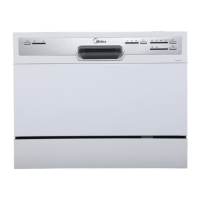
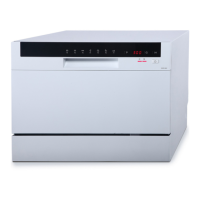
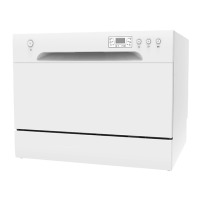
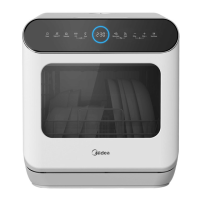
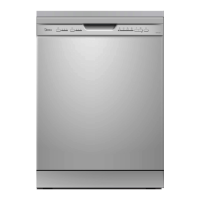
Compact Dishwasher
MODEL SERIES:
WQP6-3207A
IMPORTANT SAFETY NOTICE
The information in this service guide is intended for use by individuals possessing adequate backgrounds of
electrical, electronic, and mechanical experience. Any attempt to repair a major appliance may result in personal
injury and property damage. The manufacturer or seller cannot be responsible for the interpretation of this
information, nor can it assume any liability in connection with its use.
WARNING
To avoid personal injury, disconnect power before servicing this product. If electrical power is required for diagnosis
or test purposes, disconnect the power immediately after performing the necessary checks.
RECONNECT ALL GROUNDING DEVICES
If grounding wires, screws, straps, clips, nuts, or washers used to complete a path to ground are removed for
service, they must be returned to their original position and properly fastened.
MIDEA CONSUMER PRODUCTS
T
ECHNICAL SERVICE GUIDE
COPYRIGHT.
2003
A
LL RIGHTS RESERVED. THIS SERVICE GUIDE MAY NOT BE REPRODUCED IN WHOLE OR IN PART, IN ANY FORM, WITHOUT
WRITTEN PERMISSION FROM THE MIDEA DISHWASHER MANUFACTURING
COMPANY.
CONTENTS
Introduction.............................................................................................................................................................3
Specification...........................................................................................................................................................3
Control Panel Features.........................................................................................................................................3
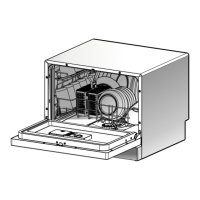
Component Locator Views...................................................................................................................................4
Dishwasher Components.....................................................................................................................................5
Main control board.........................................................................................................................................6
Outer Door......................................................................................................................................................6
Dispenser........................................................................................................................................................7
Door Handle Assembly.................................................................................................................................8
Microswitch (door handle assembly)..........................................................................................................9
Inner Door.......................................................................................................................................................9
Shell...............................................................................................................................................................10
Operating board...........................................................................................................................................11
Air Breather Assembly................................................................................................................................11
Siphon...........................................................................................................................................................
12
Pressure switch............................................................................................................................................12
Tank assembly.............................................................................................................................................13
Sump assembly............................................................................................................................................15

Questions and Answers

Overview

This document provides a comprehensive technical service guide for the Midea WQP6-3207A compact electrical dishwasher, outlining its functions, usage features, and detailed maintenance procedures. It is intended for individuals with adequate electrical, electronic, and mechanical experience to ensure safe and effective servicing.

The WQP6-3207A is a compact electrical dishwasher designed to offer good washing performance across six washing cycles, catering to various washing requirements. Its electronic control system is user-friendly and convenient to operate. The dishwasher features a rack capable of holding up to six sets of dishes. Its compact dimensions allow it to fit easily into various kitchen spaces, with a recommendation to place it where the water hose connection is readily accessible.

Control Panel Features

The dishwasher's control panel is designed for intuitive operation, featuring several buttons and a digital display:

  • Power Button: Used to turn the dishwasher's power supply on or off.
  • Delay Button: Allows users to set a delay time for the wash cycle, ranging from 0 to 24 hours.
  • Display: A digital screen that shows various information, including delay time, salt warning, rinse-aid warning, countdown of the washing cycle's time, the selected program, and child lock function status.
  • Washing Program Selector: This button is pressed to select from the available wash cycles.
  • Child Lock Function: Activated by pressing the program function button and the start/reset button simultaneously, this feature prevents unintended operation by children.
  • Start/Reset Button: Used to start or pause the dishwasher's operation.

Dishwasher Components and Maintenance

The service guide provides detailed instructions for the removal, installation, and replacement of various dishwasher components, emphasizing safety precautions.

Main Control Board:

  • Function: Controls all electrical elements within the dishwasher.
  • Maintenance: Located in a protective box at the bottom of the machine, it is designed for easy replacement if it malfunctions.
  • Removal and Replacement: Requires disconnecting power, removing the cutlery basket, basket, and filter system, turning the machine, removing the protective box cover, and carefully detaching all housings and terminals. It is crucial to mark the positions and colors of all housings and terminals before removal.

Outer Door:

  • Function: Covers the inner door and protects the detergent dispenser.
  • Maintenance: Can be removed for access to internal components.
  • Removal and Installation: Involves opening the door, removing screws fixing the outer door assembly, and then removing screws for the operating board.

Dispenser:

  • Function: Automatically dispenses detergent and rinse agent at specific times during the wash cycle, typically twice per cycle. It includes a magnetic sensor connected to the rinse aid warning light on the control panel, indicating when more rinse aid is needed.
  • Maintenance: Accessible for removal and replacement.
  • Removal and Replacement: Requires removing the outer door assembly, detaching all terminals, and unscrewing the dispenser.

Door Handle Assembly and Microswitch:

  • Function: The door handle assembly facilitates opening and closing the door. The microswitch, connected in series with all dishwasher loads, ensures that the machine stops when the door is opened, providing a safety mechanism.
  • Maintenance: Both components can be serviced or replaced.
  • Removal and Replacement: Involves disconnecting power, removing the outer door assembly, unfitting snap-fits, and pulling out the microswitch. Screws fixing the door handle assembly are then removed.

Inner Door:

  • Function: The internal part of the door, which forms part of the wash chamber.
  • Maintenance: Can be removed for deeper access to the dishwasher's interior.
  • Removal and Replacement: Requires removing the outer door assembly, detaching all terminals from the dispenser and microswitch, and then removing screws fixing the inner door. Caution is advised due to sharp edges.

Shell:

  • Function: The outer casing of the dishwasher.
  • Maintenance: Removable for comprehensive access to internal components.
  • Removal and Installation: Involves removing the cutlery basket, basket, and filter system, unscrewing the shell from the tank assembly, backboard, and bottom board, and unfitting various snap-fits.

Operating Board:

  • Function: Contains the controls and display for the dishwasher.
  • Maintenance: Can be removed for servicing.
  • Removal and Replacement: Requires removing the shell, corner boards, absorber sound, backboard, hollow plate, screws for the protecting box cover, and detaching all housings and connecting lines.

Air Breather Assembly:

  • Function: Part of the dishwasher's ventilation system.
  • Maintenance: Can be removed for inspection or replacement.
  • Removal and Replacement: Involves removing the shell, corner boards, absorber sound, backboard, hollow plate, contrarotating the nut of the air breather, and removing its gasket and connecting hose clamp.

Siphon:

  • Function: Part of the drainage system, often including a one-way valve.
  • Maintenance: Can be removed for cleaning or replacement.
  • Removal and Replacement: Requires removing the shell, corner boards, absorber sound, backboard, hollow plate, contrarotating the nut of the siphon, and removing its one-way valve, gasket, and connecting hose clamps.

Pressure Switch:

  • Function: Monitors water level in the dishwasher basin. When water pressure reaches a set value, it signals the main control board to initiate draining.
  • Maintenance: Can be serviced or replaced if it malfunctions.
  • Removal and Replacement: Involves removing the shell, corner boards, absorber sound, backboard, hollow plate, unfitting the sheet copper fixing the hose, and detaching the hose and all terminals.

Tank Assembly:

  • Function: The main wash chamber of the dishwasher.
  • Maintenance: Extensive removal process to access deep internal components.
  • Removal and Installation: A complex procedure involving removing the cutlery basket, basket, filter system, shell, corner boards, absorber sound, backboard, hollow plate, protecting box cover, outer door assembly, and all terminals connected to the microswitch, dispenser, and door hinges. Ground line terminals must also be detached.

Sump Assembly:

  • Function: Collects water at the bottom of the dishwasher, housing the motor pump, drain pump, heater elements, and thermal resistor.
  • Maintenance: Central to the dishwasher's washing and draining functions, requiring careful handling during service.
  • Removal and Installation: Requires removing the cutlery basket, basket, filter system, shell, corner boards, absorber sound, backboard, hollow plate, tank assembly, and all terminals and housings connected to the drain pump, motor pump, heater elements, and thermal resistor. Connecting hoses must also be detached.

Drain Pump Assembly:

  • Function: Pumps water out of the dishwasher.
  • Maintenance: Can be replaced if drainage issues occur.
  • Removal and Replacement: Involves taking out the sump assembly, removing screws fixing the drain pump, and contrarotating it to remove.

Motor Pump Assembly:

  • Function: Drives the water circulation during wash cycles.
  • Maintenance: Replaceable if the motor malfunctions.
  • Removal and Replacement: Requires taking out the sump assembly and removing screws fixing the sump pump assembly.

Heater Elements Assembly:

  • Function: Heats the water during wash cycles.
  • Maintenance: Replaceable if heating issues arise.
  • Removal and Replacement: Involves taking out the sump assembly, removing screws fixing the heater elements assembly, and detaching nuts and gaskets.

Heater Elements Support Assembly:

  • Function: Provides structural support for the heater elements.
  • Maintenance: Can be replaced.
  • Removal and Replacement: Requires taking out the sump assembly, heater elements assembly, and the gasket of the support assembly.

Thermal Resistor:

  • Function: Monitors temperature within the dishwasher.
  • Maintenance: Replaceable if temperature regulation issues occur.
  • Removal and Replacement: Involves taking out the sump assembly, turning it, and removing screws fixing the thermal resistor.

Check Plate:

  • Function: Likely part of the water flow or filtration system.
  • Maintenance: Replaceable.
  • Removal and Replacement: Requires taking out the sump assembly and pulling out the check plate holder assembly.

Flowmeter:

  • Function: Monitors and measures the rate of water flow. The main control board uses its signal to control the inlet valve.
  • Maintenance: Replaceable if flow measurement is inaccurate.
  • Removal and Installation: Involves removing the cutlery basket, basket, filter system, shell, corner boards, absorber sound, backboard, hollow plate, tank assembly, plug housing for the male terminal, and all clamps for connecting hoses.

Inlet Valve:

  • Function: Controls the entry of water into the dishwasher.
  • Maintenance: Replaceable if water intake issues occur.
  • Removal and Replacement: Requires removing the cutlery basket, basket, filter system, shell, corner boards, absorber sound, backboard, hollow plate, tank assembly, locking terminals, and the inlet valve block and clamp.

Floater Assembly and Microswitch (Floater Assembly):

  • Function: The floater assembly detects high water levels to prevent overflow. The microswitch within the assembly signals the control board when a high water level is detected.
  • Maintenance: Replaceable if overflow protection fails.
  • Removal and Installation: Involves removing the cutlery basket, basket, filter system, shell, corner boards, absorber sound, backboard, hollow plate, tank assembly, and screws fixing the floater assembly. All locking terminals for the microswitch must be pulled out.

Water Softener:

  • Function: Softens hard water, used in some models depending on local water conditions.
  • Maintenance: Replaceable.
  • Removal and Replacement: Requires removing the cutlery basket, basket, filter system, shell, corner boards, absorber sound, backboard, hollow plate, tank assembly, air breather, O-rings, gasket, connecting hose, and all terminals.

Troubleshooting:

The guide includes a comprehensive troubleshooting section that lists common symptoms, checks to perform, and recommended remedies. This section is invaluable for diagnosing and resolving issues, ranging from water fill problems and heating failures to pump malfunctions and leaks. It emphasizes checking components like the main control board, drain pump, thermal resistor, pressure switch, door handle assembly, motor, and various seals and hoses. For instance, if the dishwasher does not fill with water, checks include the water supply, water fill valve, water pressure, and wiring. If the motor hums but doesn't start, the motor bearings, capacitor, and wiring are checked.

General Safety and Maintenance Notes:

  • WARNING: Always disconnect power before servicing any electrical component. If power is needed for diagnosis, disconnect it immediately after checks.
  • Grounding: Ensure all grounding devices (wires, screws, straps, clips, nuts, washers) are returned to their original positions and properly fastened after service.
  • Voltage Checks: Use a voltmeter with a full-scale range of 250 volts or higher for all voltage checks.
  • Post-Service: After service, confirm all safety grounding circuits are complete, electrical connections are secure, and access panels are in place.
  • Component Variations: Features and appearance may vary by model.
  • Terminal Marking: Mark all housings and terminals' positions and colors before pulling them out, especially for locking terminals, to ensure correct reassembly.
  • Sharp Edges: Exercise caution when handling inner door components due to sharp edges.

This service guide serves as an essential resource for technicians, enabling them to effectively diagnose, repair, and maintain the Midea WQP6-3207A compact dishwasher, ensuring its continued optimal performance and longevity.

Midea WQP6-3207A Specifications

General IconGeneral
TypeFreestanding
Capacity6 place settings
Energy Efficiency ClassA+
Noise Level49 dB
Number of Programs6
Control TypeElectronic
Annual Energy Consumption174 kWh
Delay StartYes
Half Load OptionYes
Child LockNo
Dimensions (H x W x D)438 x 550 x 500 mm
Power Supply220-240V, 50Hz
Power Consumption1280 W

Related product manuals