OM-626 Page 16
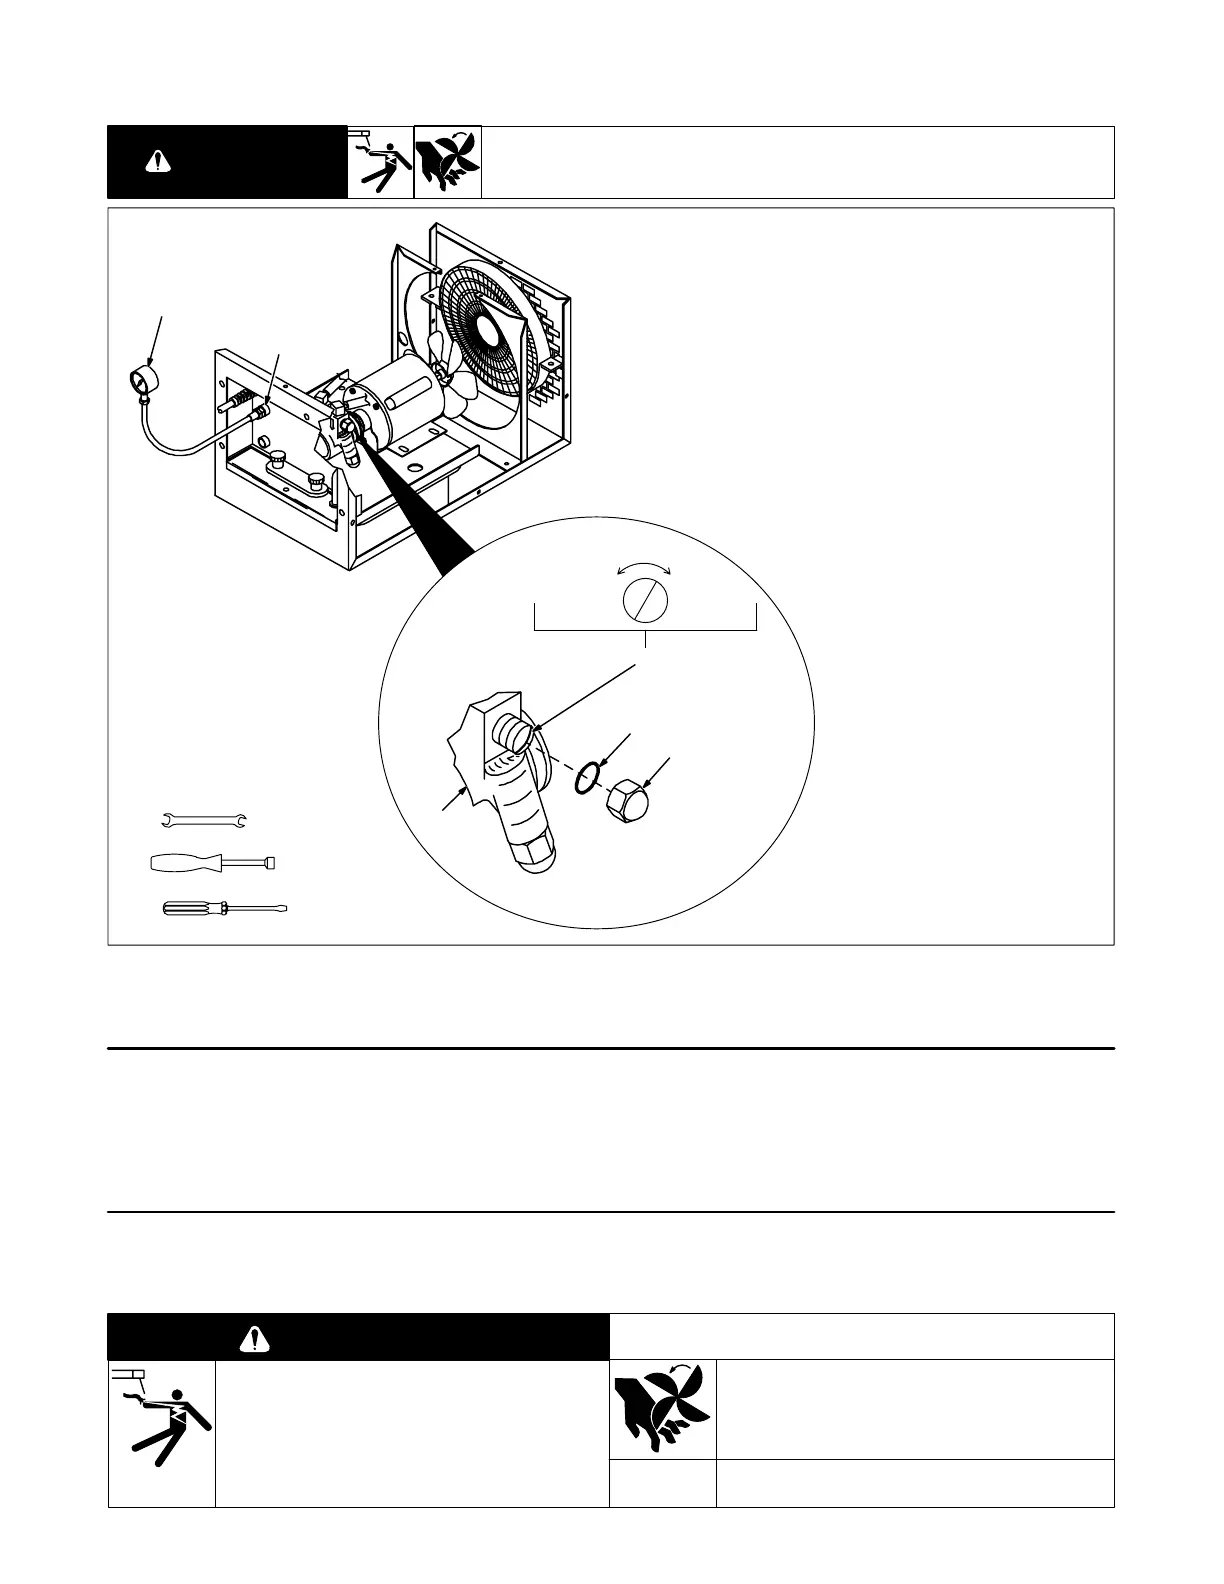
5-4. Adjusting Relief Valve
READ SAFETY BLOCKS at start of
Section 5 before proceeding.
WARNING
Ref. ST-159 334 / Ref. ST-159 301
If hoses become clogged, the relief
valve protects the unit for less than
two minutes by returning coolant
back to the pump.
Relief valve is factory set to open at
60 psi (414 kPa). Adjust relief valve
only if pump is replaced. To adjust,
obtain pressure gauge and proceed
as follows:
Turn Off and unplug unit.
1 Coolant Out Fitting
2 Pressure Gauge
Connect gauge to Coolant Out fitting.
Block or plug any output fitting on
gauge.
3 Coolant Pump
4 Acorn Nut
5 Washer
6 Relief Valve Adjustment Screw
Plug in and turn On unit.
Set pressure to required level. Do not
set pressure above torch/gun man-
ufacturer’s recommended maximum
pressure rating.
Turn Off and unplug unit.
Disconnect gauge, and reinstall
parts. Reinstall wrapper.
Tools Needed:
3/4 in
1
2
3
4
5
6
IncreaseDecrease
3/8 in
Figure 5-4. Adjusting Relief Valve
5-5. Thermal Protection
A bimetallic strip protects the unit from damage due to overheating. If motor gets too hot, the motor stops. When the
motor cools down, it will start running.
5-6. Troubleshooting
WARNING
ELECTRIC SHOCK can kill.
• Do not touch live electrical parts.
• Turn Off unit and disconnect input power plug from
receptacle before inspecting, maintaining, or
servicing.
MOVING PARTS can cause injury.
• Keep away from moving parts.
Maintenance to be performed only by qualified persons.