Machine test and Material List
5-1
Chanpter5 Machine test and Material List
5.1 Test Procedure
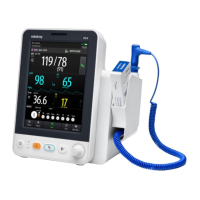
Connect the simulators, power and fixture to the VS-800 and power it on. The LED and LCD
modules should display correctly
5.1.1 Button Function Test
Press each button on the keypad. The VS-800 should give corresponding response and
perform corresponding function. Refer to the VS-800’s Operation Manual.
5.1.2 NIBP Test
After connecting the NIBP simulator, adult cuff and accessories properly, connect the cuff to
the CUFF connector on the monitor and tighten it by turning clockwise.
1. After self-tests pass, press ENT to enter the ADULT mode. Set the simulator to the
blood pressure 255/195/215 mmHg, SHIFT +15 and HR 80BPM, and the VS-800 to the
ADULT mode. Press START for around 30 seconds, and the results will be calculated.
The test results are 270±8mmHg, 210±8mmHg and 230±8mmHg.
2. Press ECS and↓ on the simulator to enter the NEONATE mode. Set the simulator to the
blood pressure 120/80/90 mmHg and HR 120 BPM, and the VS-800 to the NEONATE
mode. Press START for around 30 seconds, and the results will be calculated. The test
results will be 120±8mmHg, 80±8mmHg and 90±8mmHg respectively.
3. Press ESC and ↓ on the simulator to enter the NEONATE mode. Set the simulator to the
blood pressure 60/30/40 mmHg, SHIFT—20 and HR 120 BPM, and the VS-800 to the
NEONATE mode. Change the simulator accessory to a neonatal cuff. Press START for
around 30 seconds, and the result displayed should be 40±8mmHg, 10±8mmHg and
20±8mmHg.
5.1.3 SpO2 Test
Insert a finger into the SpO2 sensor. The screen should display the values of PR and SpO2
correctly. The normal SpO2 should be above 97%.
 Loading...


