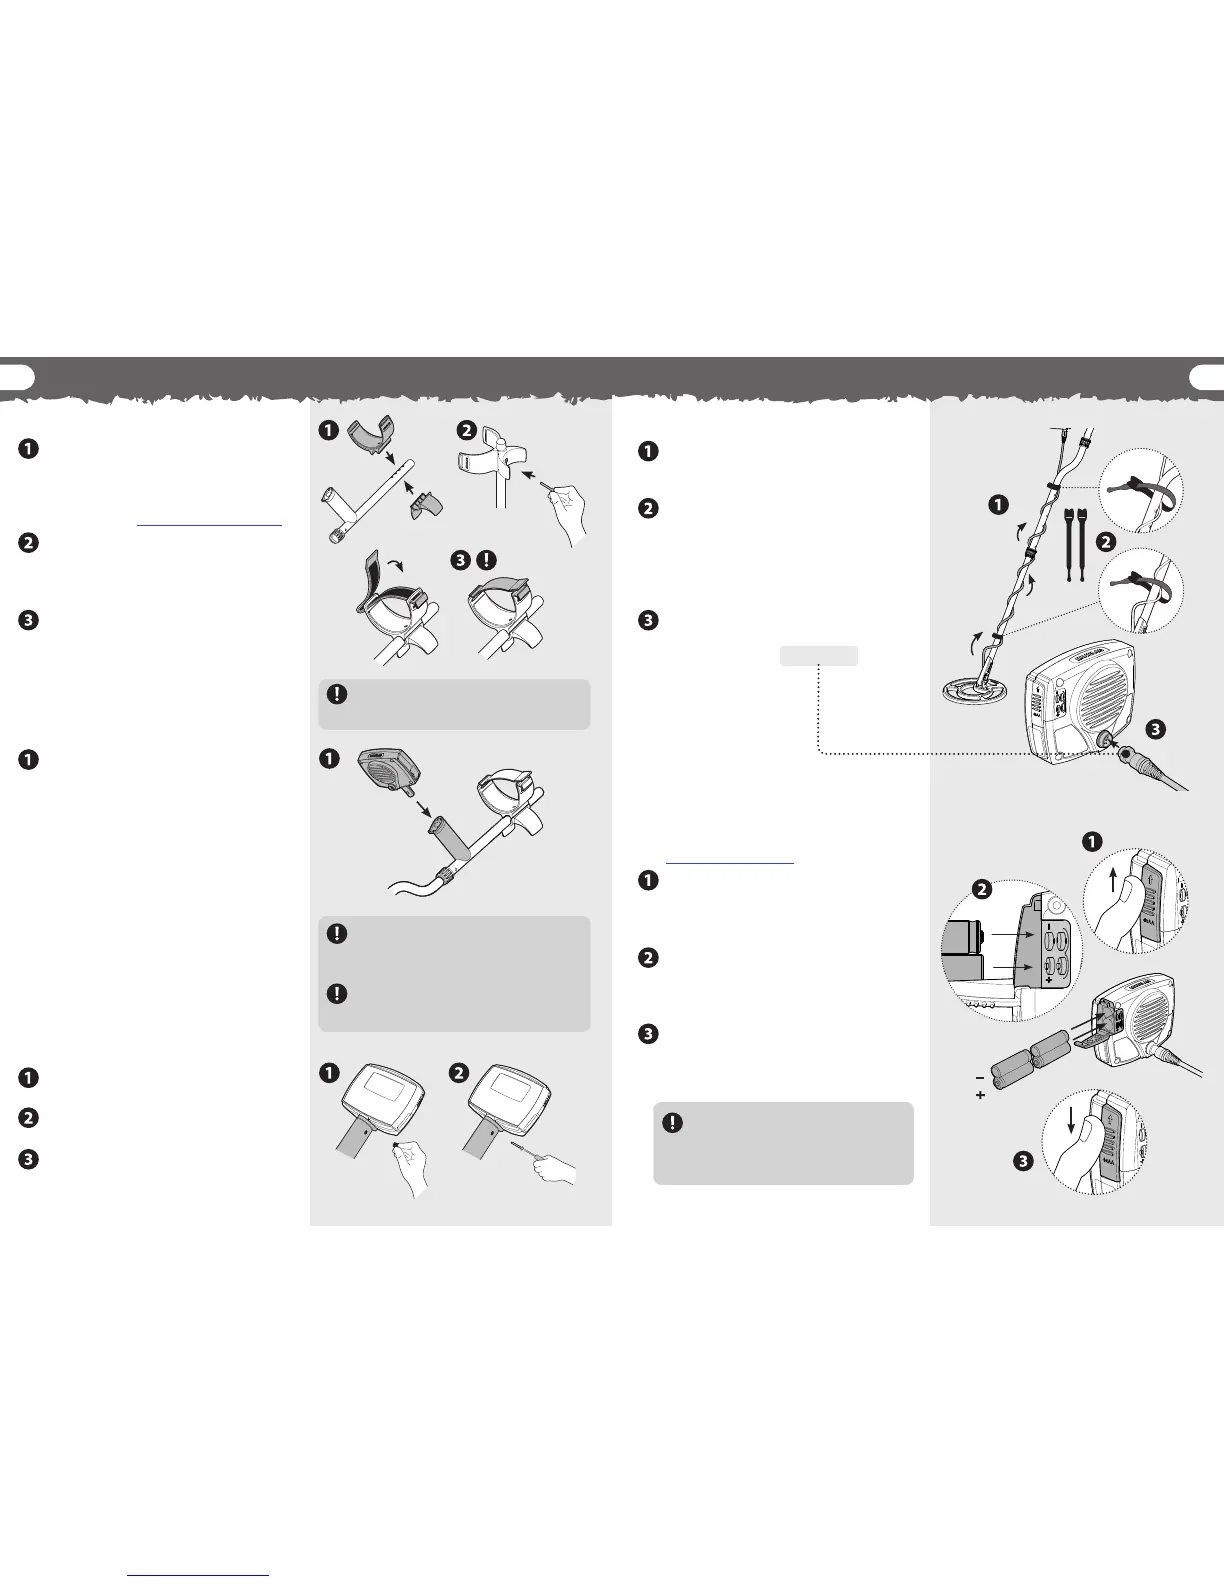
Coil Cable Assembly
Wind the coil cable around the lower
and middle shaft enough times to take
up the slack.
Use the velcro tabs to keep the coil cable in
place against the shaft. It is recommended
that one tab is used on the lower shaft close
to the coil and the other tab on the middle
shaft before the cable reaches across to the
control box.
Align the coil plug and push it into
the socket in the back of the control box,
rmly tightening the retaining ring to hold it
in place.
Armrest Assembly
Place the armrest onto the top of the
upper shaft, lining up the central hole in
the armrest with one of the holes in the
aluminium shaft. Position the armrest to suit
your arm length (Holding the Detector, p. 14).
Insert the screw up through the stand,
upper shaft and armrest. Tighten the screw,
being careful not to overtighten or damage
the thread.
With the velcro side facing upwards, thread
the armrest strap through both slots in the
armrest. Ensure that the end of the strap will
be fastened outwards from your arm.
The X-Terra 705 is designed to be used in either
the left or right hand. This diagram shows the
velcro strap threaded outwards for the left arm.
Connecting the Control Box
With the LCD facing up, push the control box
onto the end of the handle until it ts into
place.
The control box may be easily removed for
packing and transport.
Disconnecting the Control Box
Brace the detector rmly against yourself,
grasp the control box and pull it away from
the handle.
Permanently Connecting the
Control Box
While the X-Terra control box is designed
to be easily removable for packing and
transport, Minelab have made an option
available to permanently attach the control
box to the handle.
Remove the small circular rubber insert in
the top right-hand side of the handle.
Insert the screw provided into the hole and
tighten using a Phillips screwdriver.
Store the rubber insert in a safe place in case
you wish to reuse it in the future.
Inserting Batteries
The X-Terra 705 uses 4 x AA batteries which
are not included with the detector
(Battery Behaviour, p. 45).
Access the battery compartment via the
battery door located on the side of the
control box. Slide the battery compartment
door upwards with your thumb.
Place individual batteries into the
compartment as illustrated, ensuring
the positive (+) and negative (–) contacts
match the diagram on the control box.
Close the battery door by pushing and
sliding it downwards.
If the detector does not turn on
correctly, check the battery orientation.
The detector will not be damaged if the
batteries are inserted incorrectly.
76
assembling your x-terra 705
Remember to remove this screw before
attempting to disconnect the control box from
the handle. Failure to do this may result in
damage occurring.
If this option is not used, then the rubber insert
may be glued in place using a silicone sealant or
other suitable adhesive.
 Loading...