37
Checkvalve Cartridges - Cleaning/Renewal of Parts
Hot water entering the cold supply, or vice versa, indicates the checkvalve cartridge
needs immediate attention.
1. Turn off the supplies to the shower control. Open the flow control to release the
trapped water pressure and assist draining the residual water.
2. Remove the control knob and concealing plate assemblies, Refer to section:
‘Maintenance, Removing/Fitting Knob and Concealing Plate Assemblies’.
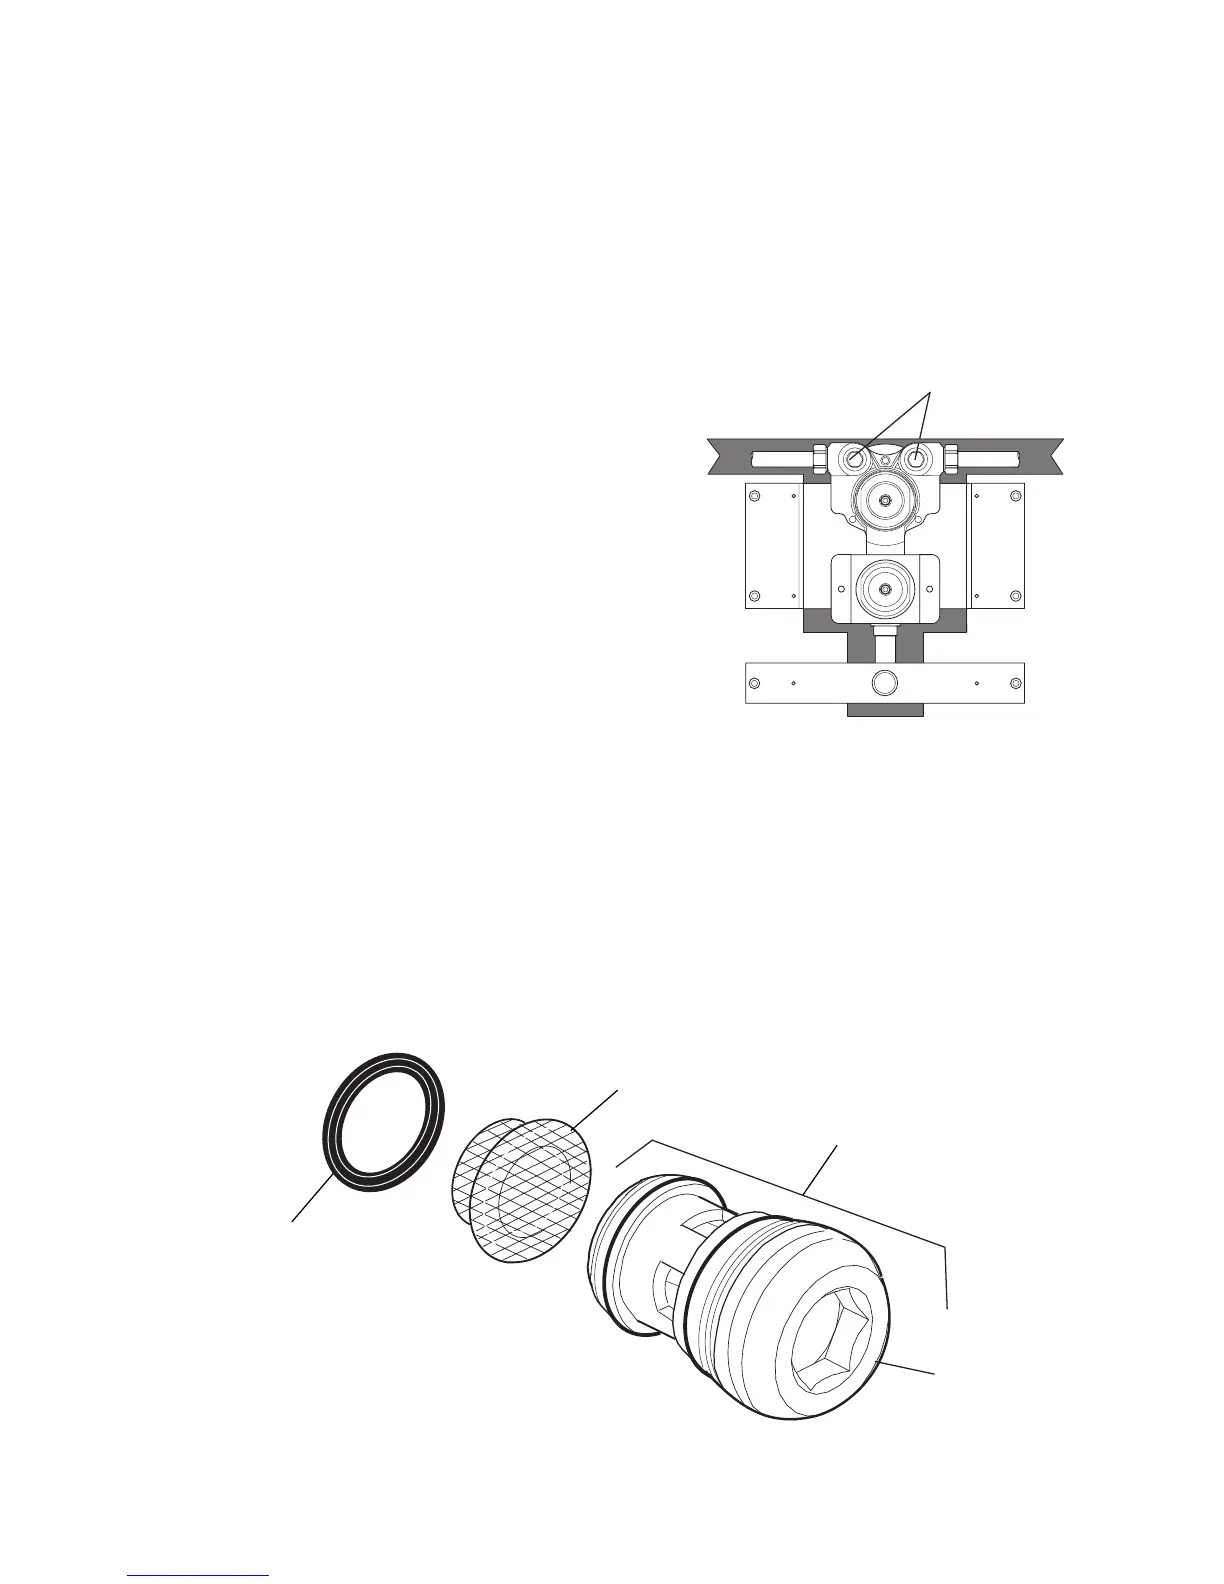
3. Undo the cartridge head using a 12 mm A/F wrench and pull the whole cartridge
free from the valve body.
Caution! Some water may be released at
this point.
4. The checkvalve cartridge assemblies may
be cleaned by removing the rubber retainers
and inlet strainers, and flushing through under
a jet of water to remove lodged particles.
Do not descale. Check if the checkvalve
cartridge operates correctly. If the cartridge
is damaged or fails to operate correctly
renew.
5. Lightly wipe external seals and threads with
a silicone-only based lubricant to aid
refitting.
6. Refit cartridges, strainers and retainers. Do not overtighten the cartridge heads
when refitting.
7. Turn the flow control fully clockwise to the off position. Restore the water supplies,
and check for leaks.
8. Follow the steps outlined in section: ‘Maintenance, Removing/Fitting Knob
and Concealing Plate Assemblies’ to reassemble the shower control.
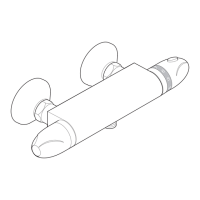
Checkvalve
Cartridges
Cartridge Location
Cartridge
Head
Rubber
Retainer
Strainer
Checkvalve
Cartridge
Checkvalve Cartridges
 Loading...