62 TX3 Telephone Access System Installation and Operation Manual
NSL Relay Cabinet Installation and Wiring
The top two mounting holes are 6 3/16 inches apart.
To mount the NSL Relay Cabinet
1. Using the back cover as a template mark the top two mounting hole
locations 6 3/16 inches apart as shown in figure 31.
2. Place the screws halfway into the wall in the position shown using a
suitable screw.
3. Hang the box onto the two screws.
4. Screw the other two screws at the bottom of the panel.
5. Tighten all four screws into place.
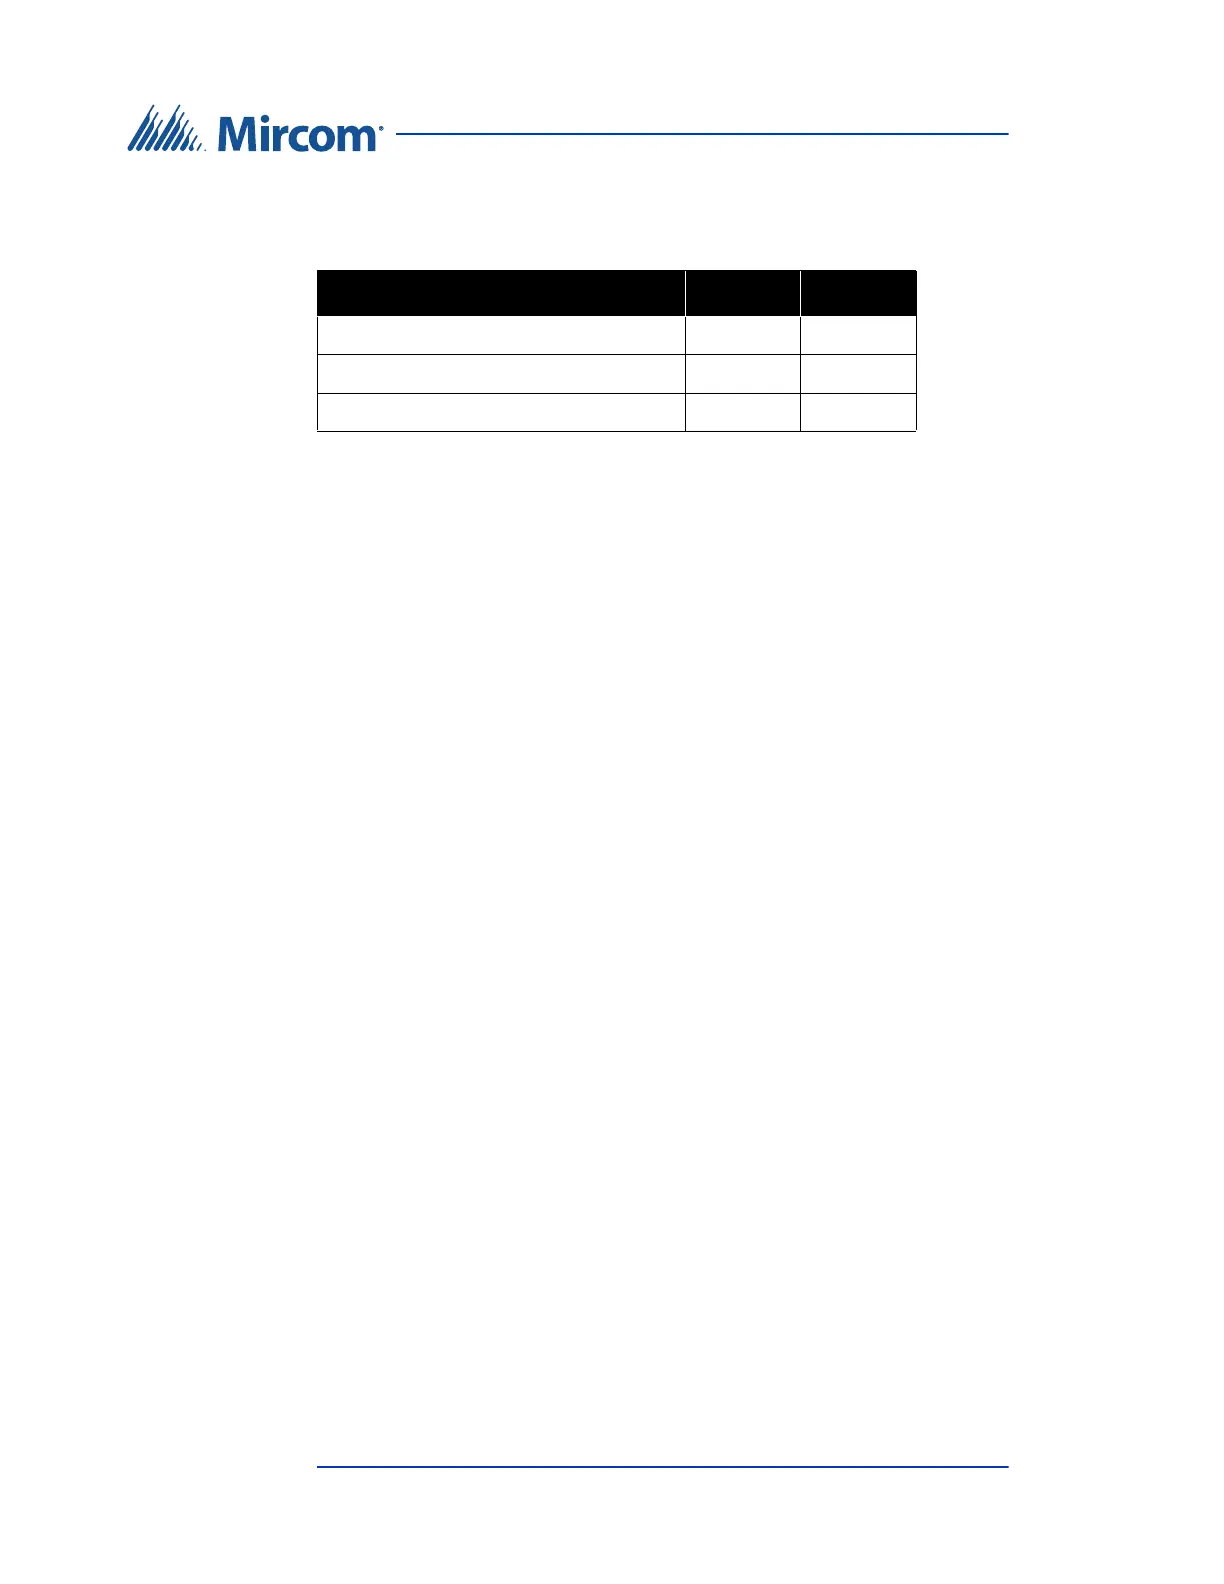
Table 4: NSL Relay Cabinet Dimensions
Model Number Dim ‘A’ Dim ‘B’
TX3-8EC 10 1/8” 13 15/16”
TX3-NSL-8M 23 3/16” 27”
TX3-16EC 23 3/16” 27”