-17-
(4) Read pre-installed bar tacking pattern data by following procedure.
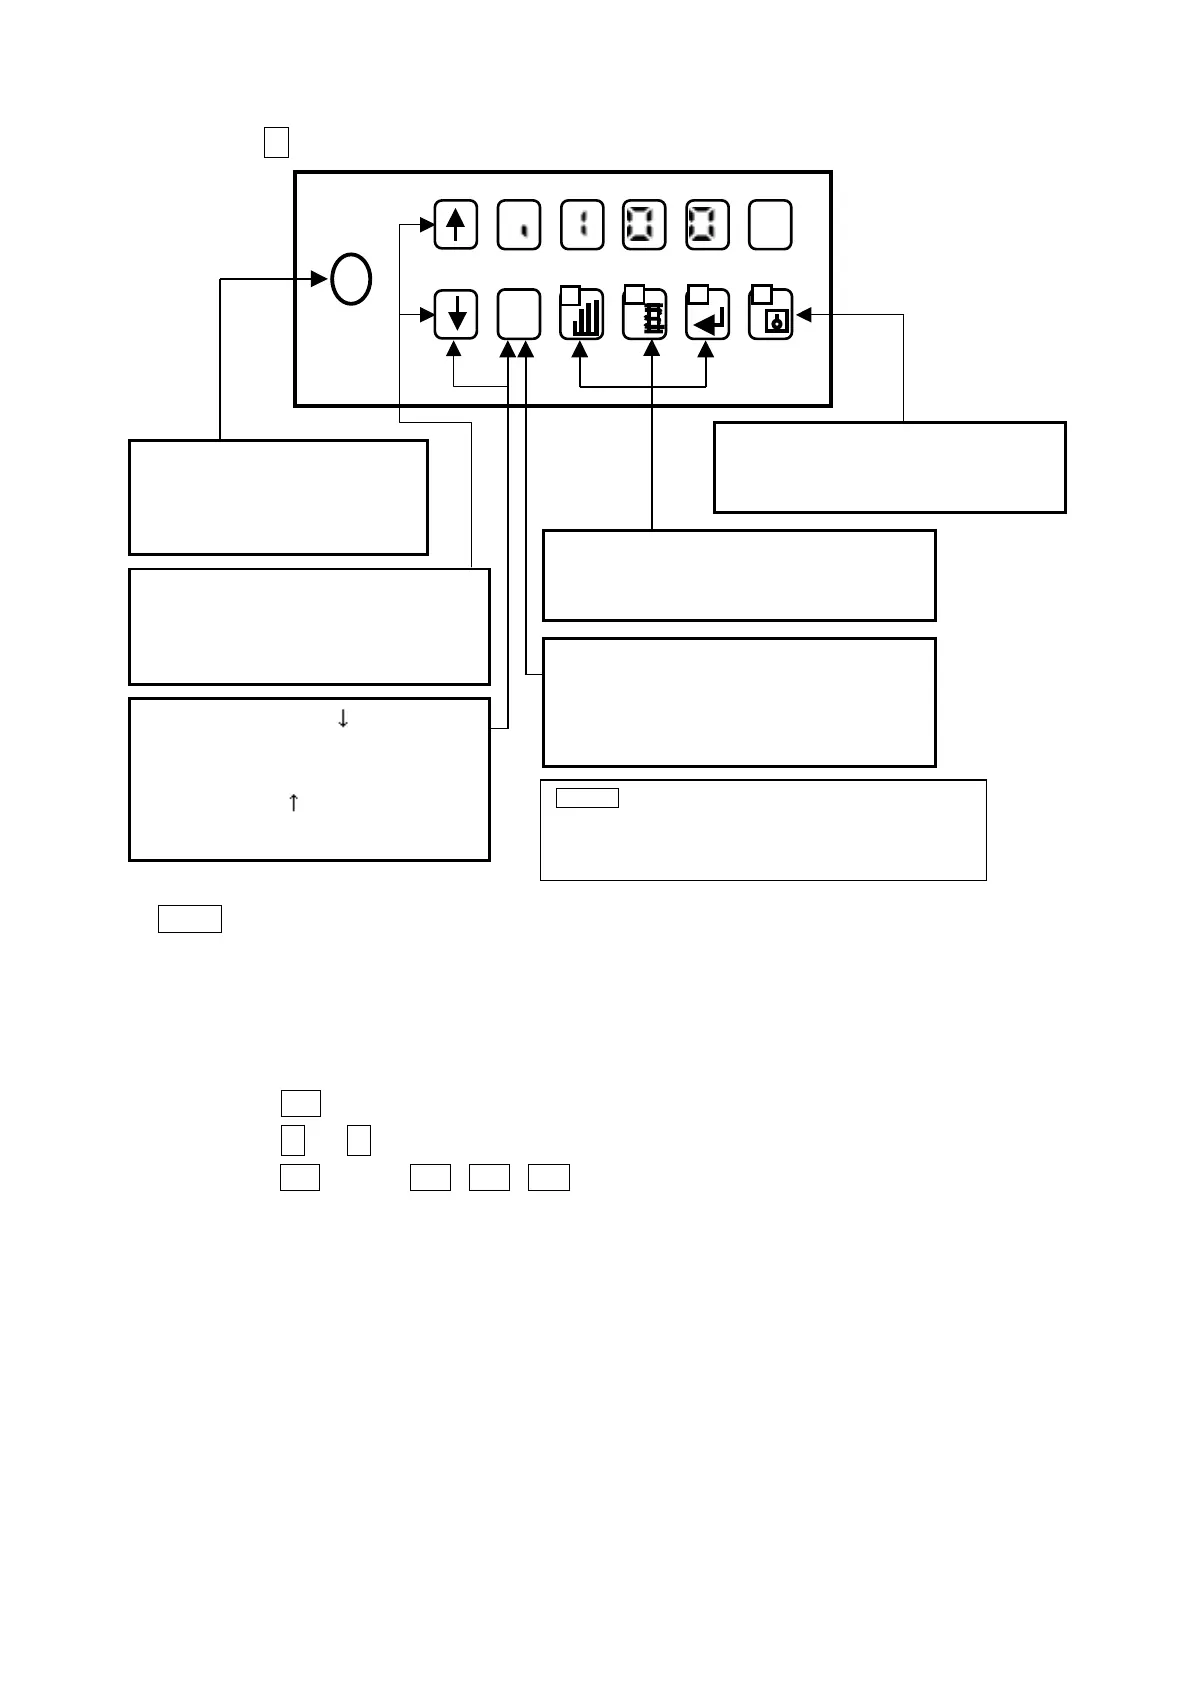
(5) Press D key, then operation mode changes to [pattern read mode] as shown below.
NOTE 16 standard patterns as following below are input to the data floppy disk.
< ex.How to selecting pattern No.100 from the floppy disk>
(1) Insert data floppy disk to the FD driver on the control box.
② Press D key on the setting panel.
③ Press ↑ or ↓ key on the setting panel until LED1 shows [F].
④ Press F key or A , B , C key, and set the program number [1,0,0] to the
LED2,3,4.
⑤ Press D key to decide the pattern number.
Changeover to normal mode
function
The normal mode will be returned to without
executing the read of the pattern No.
display in
Read destination selection function
The read destination is selected from the following
two.
[LED1]=[F]...Read from floppy disk.
[LED1]=[I]...Read from internal memory.
Setting value changeover function (increment)
With each press, the LEDs 2,3 and 4 displays (setting
values) will increment by one. (0,1 ... 8,9,0,1)
Pattern read function
The pattern No. displayed in LEDs 2,3 and 4 will be
read, and then the normal mode will be returned to.
While [F] key on and after [ ] key on pattern
No. search function (decrement)
The display in LEDs 2,3 and 4 (pattern No.) will
change to the previous display (pattern No.)
with each press the [
] key. The existing
pattern No. will display in LEDs 2,3 and 4 while
decrementing (searching) in order.
Pattern No. search function (decrement)
The display in LEDs 2,3 and 4 (pattern No.) will change to
the next display (pattern No.) with each press. The existing
pattern No. will display in LEDs 2,3 and 4 while
incrementing (searching) in order.
Memo If there is no pattern data for the No., the LED
will flicker, and if the
e is pattern data for the No., the LED
will turn ON. When the LED is ON, press the "D" key to
start reading of the pattern.
LED4 LED3
H
LED1 LED2 LED5
A
AA
A
B C D
F

 Loading...