120
4. Removing the thermistor <2-phase pipe> (TH6)
(1)Removetheservicepanel.(SeeFigure1)
(2)Removethetoppanel.(SeeFigure1)
(3)Disconnecttheconnectors,TH6andTH7(red),onthe
controllercircuitboardintheelectricalpartsbox.
(4)Loosentheclampfortheleadwireintherearofthe
electricalpartsbox.
(5)Pulloutthethermistor<2-phasepipe>(TH6)fromthe
sensorholder.
Note: In case of replacing thermistor <2-phase pipe> (TH6),
replace it together with thermistor <Ambient> (TH7),
since they are combined together.
Refer to No.5 below to remove thermistor
<Ambient>.
5. Removing the thermistor <Ambient> (TH7)
(1)Removetheservicepanel.(SeeFigure1)
(2)Removethetoppanel.(SeeFigure1)
(3)DisconnecttheconnectorTH7(red)onthecontroller
circuitboardintheelectricalpartsbox.
(4)Loosentheclampfortheleadwireintherearofthe
electricalpartsbox.(SeePhoto4)
(5)Pulloutthethermistor<Ambient>(TH7)fromthesensor
holder.
Note: In case of replacing thermistor <Ambient> (TH7),
replace it together with thermistor <2-phase pipe>
(TH6), since they are combined together.
Refer to No.4 above to remove thermistor <2-phase
pipe>.
Photo 6
6. Removing the thermistor <Liquid> (TH3)
(1)Removetheservicepanel.(SeeFigure1)
(2)DisconnecttheconnectorTH3(white)onthecontroller
circuitboardintheelectricalpartsbox.
(3)Loosentheclampfortheleadwireintherearofthe
electricalpartsbox.(SeePhoto4)
(4)Pulloutthethermistor<Liquid>(TH3)fromthesensor
holder.
Photo 5
Thermistor
<Liquid>(TH3)
Thermistor
<Suction>
(TH33)
Photo 4
Clamp
Controller
circuitboard
(C.B.)
Thermistor
<2-phasepipe>
(TH6)
Electrical
partsbox
Leadwireofthermistor
<Ambient>(TH7)
Sensorholder
7. Removing the thermistor <Comp. surface> (TH32) and
thermistor <Suction> (TH33)
(1)Removetheservicepanel.(SeeFigure1)
(2)DisconnecttheconnectorTH32(black)orTH33(yellow)
onthecontrollercircuitboardintheelectricalpartsbox.
(3)Loosentheclampfortheleadwireundertheelectrical
partsbox.(SeePhoto4)
(4)Pulloutthethermistor<Comp.surface>(TH32)andther-
mistor<Suction>(TH33)fromtheholderofthecompressor
shell.(SeePhoto6)
Photo 7
Thermistor
<Comp.surface>
(TH32)
Clamp
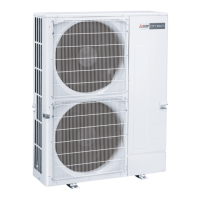
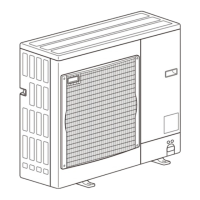
OPERATING PROCEDURE PHOTOS
 Loading...