EN-11
Installation (continued)
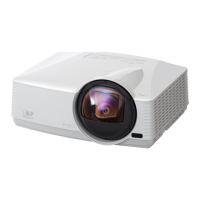
Front projection, ceiling mounting
For ceiling mounting, you need the ceiling mount
kit designed for this projector. Ask a specialist for
installation. For details, consult your dealer.
t 5IFXBSSBOUZPOUIJTQSPKFDUPSEPFTOPUDPWFSBOZ
damage caused by use of any non-recommended
ceiling mount kit or installation of the ceiling mount
kit in an improper location.
t 8IFOVTJOHUIFQSPKFDUPSNPVOUFEPOUIFDFJMJOH
set Image Reverse in the Installation menu to Mirror
Invert. See page 26.
t 8IFOUIFQSPKFDUPSJTNPVOUFEPOUIFDFJMJOH
images may appear darker than those projected in
the case of tabletop mounting. This isn’t a product
malfunction.
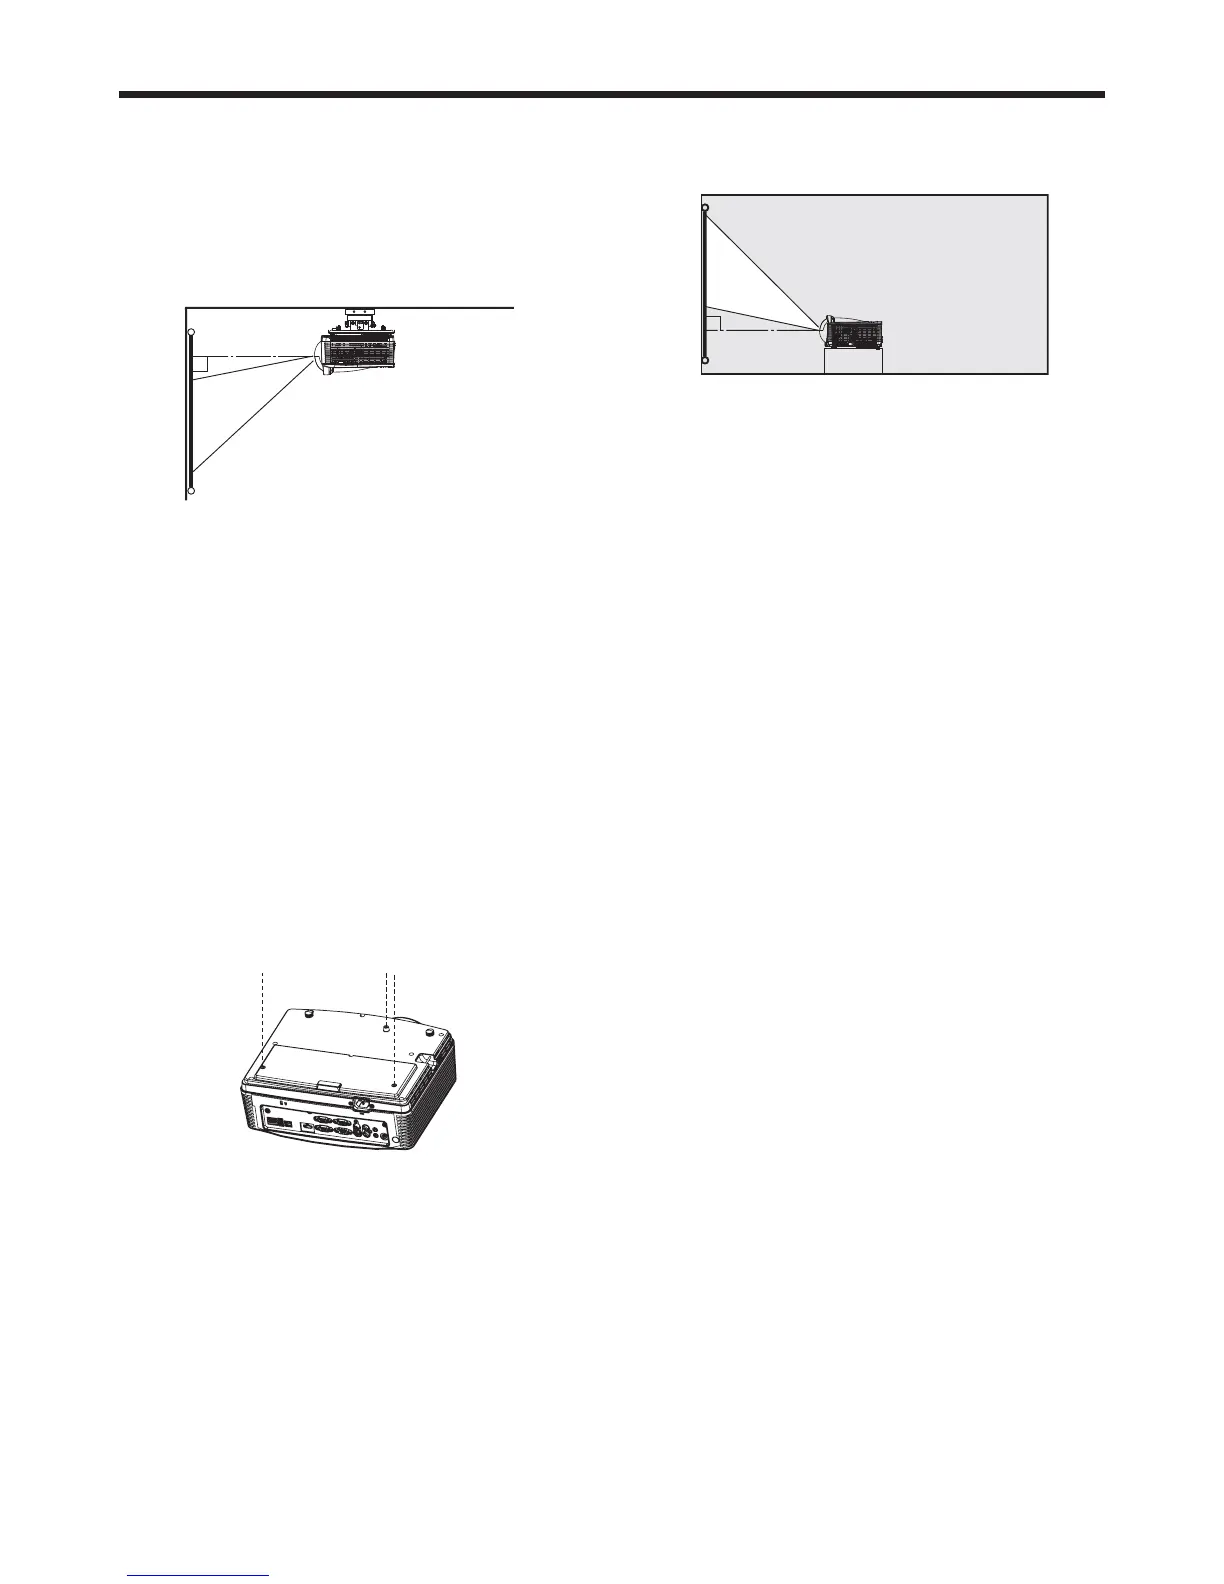
Ceiling mount installation
If you wish to install the projector using a ceiling
mount, please use the screw holes as the illustration
shows.
Important:
t 4DSFXTBSFOPUJODMVEFE1MFBTFPCUBJOUIF
appropriate screws for your type of ceiling. (M4
diameter)
t *UJTSFDPNNFOEFEUIBUZPVLFFQBSFBTPOBCMF
space between the bracket and the projector to
allow for proper heat distribution.
Rear projection
Ask a specialist for installation. For details, consult
your dealer.
t 'PSSFBSQSPKFDUJPOTFU*NBHF3FWFSTFJOUIF
Installation menu to Mirror. See page 26.
Caution:
t 1MBDJOHUIFQSPKFDUPSEJSFDUMZPOBDBSQFUJNQBJST
ventilation by the fans, causing damage or failure.
Put a hard board under the projector to facilitate
ventilation.
t 1MBDFUIFQSPKFDUPSBUMFBTUDNPSJODIBXBZ
from the wall to prevent the air inlet grille and the air
outlet grilles that emit hot air from being blocked.
t %POPUVTFUIFQSPKFDUPSJOUIFGPMMPXJOHMPDBUJPOT
and manners, which may cause fire or electric
shock.
t *OBEVTUZPSIVNJEQMBDF
t *OBTJEFXBZTPSVQTJEFEPXOQPTJUJPO
t /FBSBIFBUFS
t *OBOPJMZTNPLZPSEBNQQMBDFTVDIBTB
kitchen.
t *OEJSFDUTVOMJHIU
t 8IFSFUIFUFNQFSBUVSFSJTFTIJHITVDIBTJOB
closed car.
t 8IFSFUIFUFNQFSBUVSFJTMPXFSUIBO¡'PS
¡$PSIJHIFSUIBO¡'PS¡$
Important:
t %POPUBQQMZGPSDFUPUIFMFOTCFDBVTFUIFMFOT
may be damaged.
t #FTVSFUPVTFUIJTQSPKFDUPSBUBOBMUJUVEFPGMFTT
than 1500 meters.
 Loading...