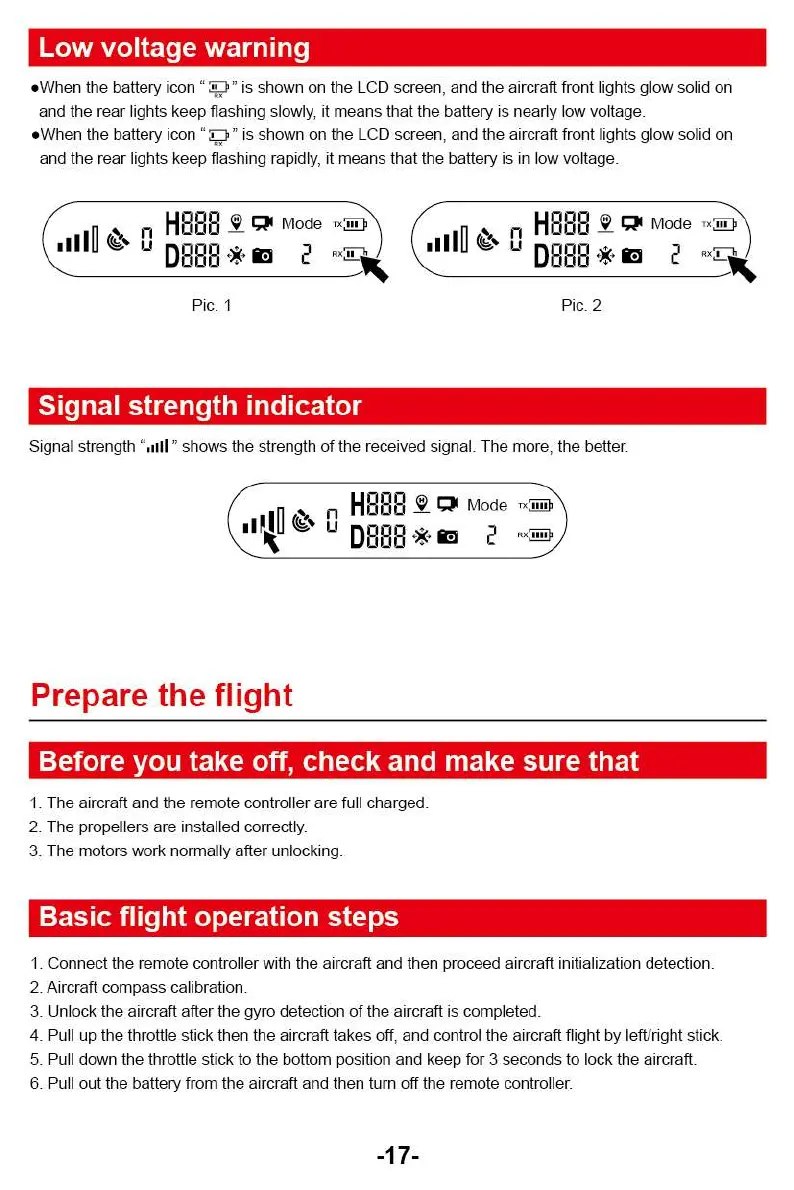
Low voltage warning
*When the battery icon "V" is shown on the LCD screen, and the aircraft front lights glow solid on
and the rear lights keep flashing slowly, it means that the battery is nearly low voltage.
*When the battery icon
" is shown on the LCD screen, and the aircraft front lights glow solid on
and the rear lights keep flashing rapidly, it means that the battery is in low voltage.
1
HoW.
1„.
Uu
kode
Hr°
Mode
TX UM
IUD
oon*I3
2
awe
.
o
ID
2 Rx9
16,
-
11
k
i
Pie. 1
Pic. 2
Signal strength indicator
Signal strength "dill " shows the strength of the received signal. The more, the better.
HOOR
pi
Mode
—6
IIIlO
DBOO*10 2
Prepare the flight
Before you take off, check and make sure that
1.
The aircraft and the remote controller are full charged.
2.
The propellers are installed correctly.
3.
The motors work normally after unlocking.
Basic flight operation steps
1.
Connect the remote controller with the aircraft and then proceed aircraft initialization detection.
2.
Aircraft compass calibration.
3.
Unlock the aircraft after the gyro detection of the aircraft is completed.
4.
Pull up the throttle stick then the aircraft takes off, and control the aircraft flight by left/right stick.
5.
Pull down the throttle stick to the bottom position and keep for 3 seconds to lock the aircraft.
6.
Pull out the battery from the aircraft and then turn off the remote controller.
-17-