Pic 1
Pic. 2
[ =3
EVA
soft
Pic. 3
[1]
[2]
[3]
[4]
[5]
[6]
[7]
[8]
[9]
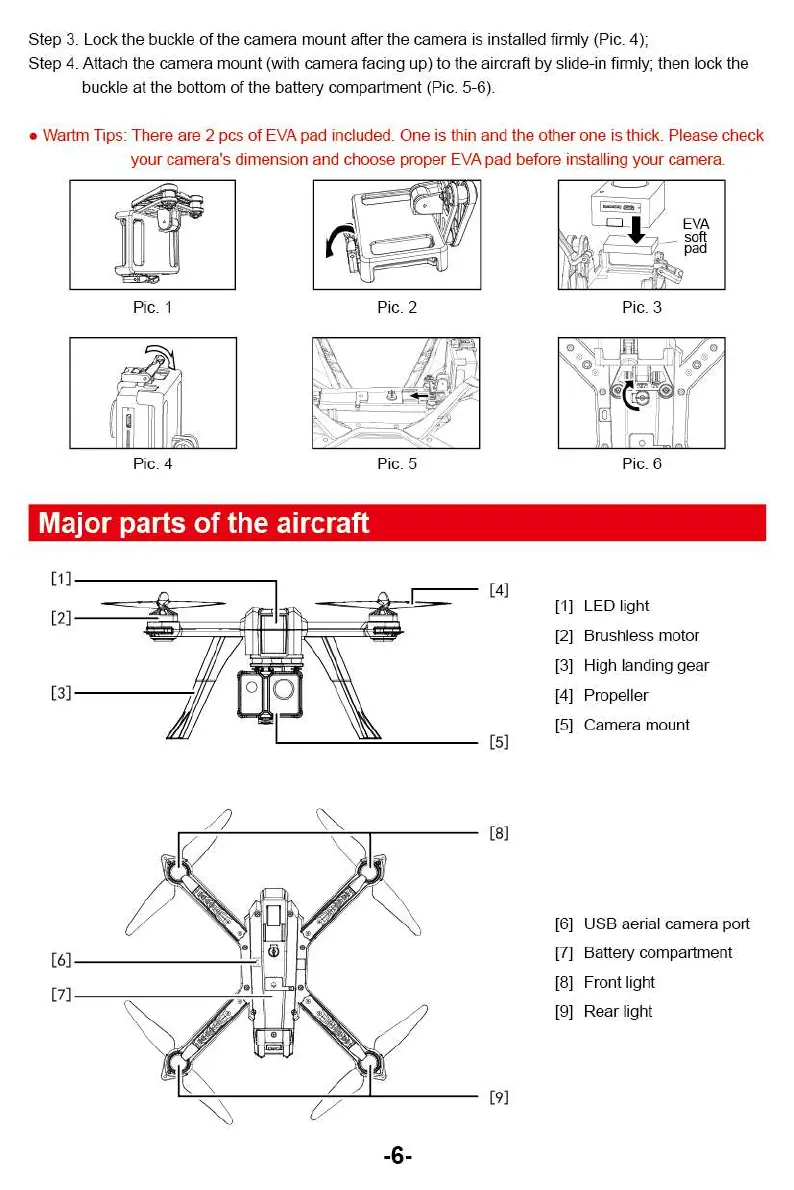
Step 3. Lock the buckle of the camera mount after the camera is installed firmly (Pic. 4);
Step 4. Attach the camera mount (with camera facing up) to the aircraft by slide-in firmly; then lock the
buckle at the bottom of the battery compartment (Pic. 5-6).
•
Wartrn Tips: There are 2 pcs of EVA pad included. One is thin and the other one is thick. Please check
your camera's dimension and choose proper EVA pad before installing your camera.
Pic. 4
Pic. 5
Pic. 6
Major parts of the aircraft
[1]
LED light
[2]
Brushless motor
[3]
High landing gear
[4]
Propeller
[5]
Camera mount
[6]
USB aerial camera port
[7]
Battery compartment
[8]
Front light
[9]
Rear light
-6-
Pic 1
Pic. 2
[ =3
EVA
soft
Pic. 3
[1]
[2]
[3]
[4]
[5]
[6]
[7]
[8]
[9]
Step 3. Lock the buckle of the camera mount after the camera is installed firmly (Pic. 4);
Step 4. Attach the camera mount (with camera facing up) to the aircraft by slide-in firmly; then lock the
buckle at the bottom of the battery compartment (Pic. 5-6).
•
Wartrn Tips: There are 2 pcs of EVA pad included. One is thin and the other one is thick. Please check
your camera's dimension and choose proper EVA pad before installing your camera.
Pic. 4
Pic. 5
Pic. 6
Major parts of the aircraft
[1]
LED light
[2]
Brushless motor
[3]
High landing gear
[4]
Propeller
[5]
Camera mount
[6]
USB aerial camera port
[7]
Battery compartment
[8]
Front light
[9]
Rear light
-6-