Product assemble
How to attach and detach the propellers
•
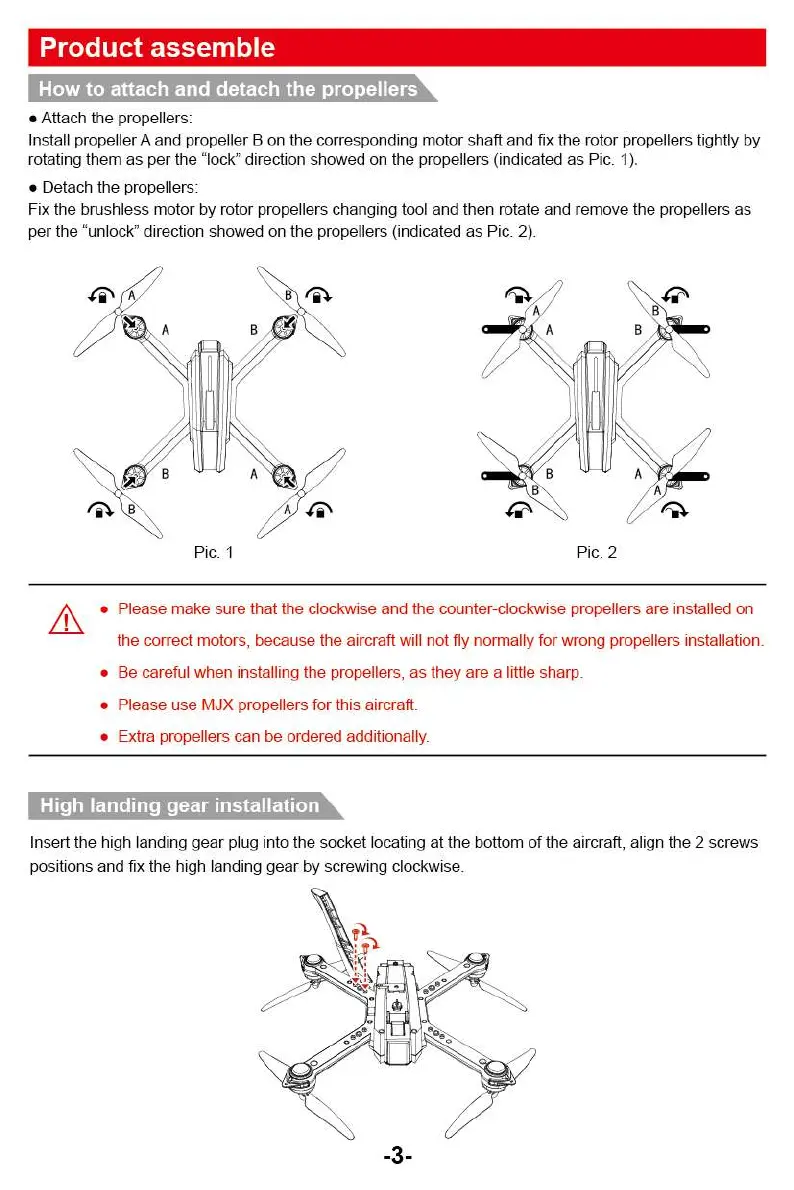
Attach the propellers:
Install propeller A and propeller B on the corresponding motor shaft and fix the rotor propellers tightly by
rotating them as per the "lock" direction showed on the propellers (indicated as Pic. 1).
•
Detach the propellers:
Fix the brushless motor by rotor propellers changing tool and then rotate and remove the propellers as
per the 'unlock" direction showed on the propellers (indicated as Pic. 2).
Pic. 1
Pic. 2
•
Please make sure that the clockwise and the counter-clockwise propellers are installed on
the correct motors, because the aircraft will not fly normally for wrong propellers installation.
■
Be careful when installing the propellers, as they are a little sharp.
•
Please use MJX propellers for this aircraft.
•
Extra propellers can be ordered additionally.
High landing gear installation
Insert the high landing gear plug into the socket locating at the bottom of the aircraft, align the 2 screws
positions and fix the high landing gear by screwing clockwise.
-3-
Product assemble
How to attach and detach the propellers
•
Attach the propellers:
Install propeller A and propeller B on the corresponding motor shaft and fix the rotor propellers tightly by
rotating them as per the "lock" direction showed on the propellers (indicated as Pic. 1).
•
Detach the propellers:
Fix the brushless motor by rotor propellers changing tool and then rotate and remove the propellers as
per the 'unlock" direction showed on the propellers (indicated as Pic. 2).
Pic. 1
Pic. 2
•
Please make sure that the clockwise and the counter-clockwise propellers are installed on
the correct motors, because the aircraft will not fly normally for wrong propellers installation.
■
Be careful when installing the propellers, as they are a little sharp.
•
Please use MJX propellers for this aircraft.
•
Extra propellers can be ordered additionally.
High landing gear installation
Insert the high landing gear plug into the socket locating at the bottom of the aircraft, align the 2 screws
positions and fix the high landing gear by screwing clockwise.
-3-