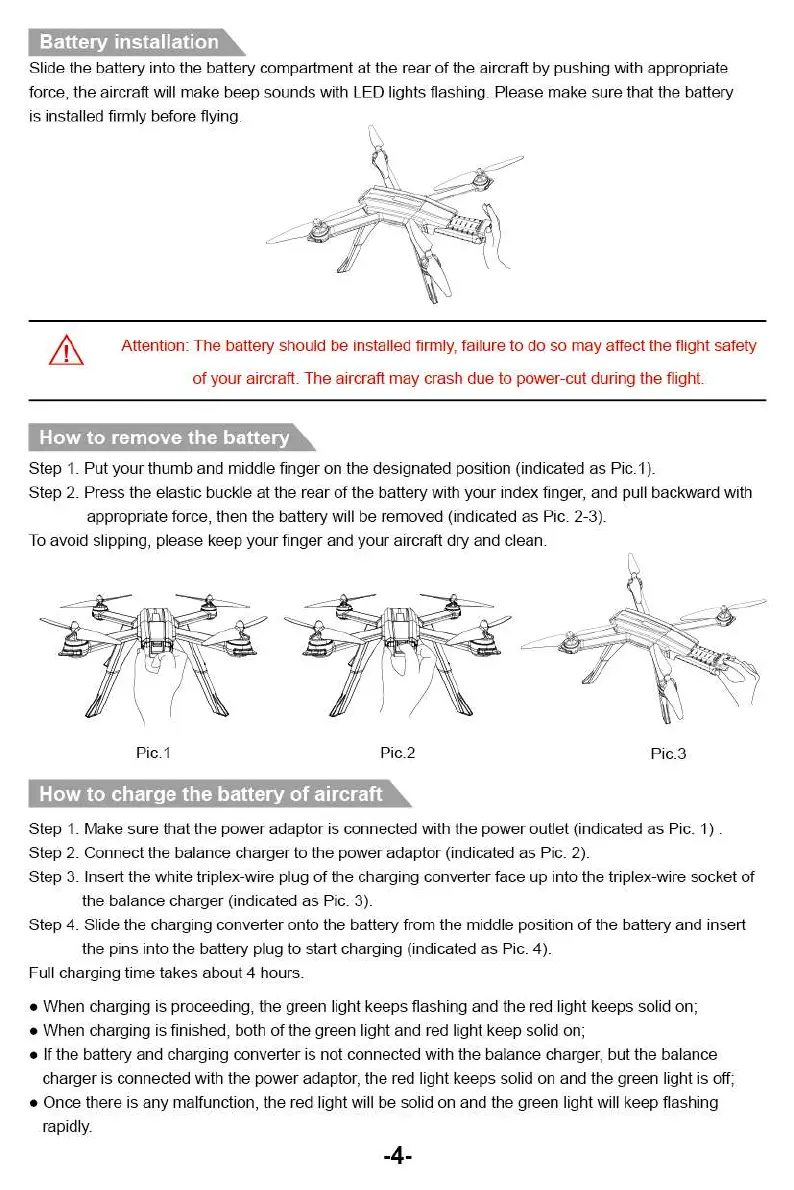
Battery installation
Slide the battery into the battery compartment at the rear of the aircraft by pushing with appropriate
force, the aircraft will make beep sounds with LED lights flashing. Please make sure that the battery
is installed firmly before flying.
Attention: The battery should be installed firmly, failure to do so may affect the flight safety
of your aircraft. The aircraft may crash due to power-cut during the flight.
How to remove the battery
Step t Put your thumb and middle finder on the designated position (indicated as Pic.1).
Step 2. Press the elastic buckle at the rear of tl
-
e battery ith your index finger, and pull backward with
appropriate force, then the battery will !)e removed (indicated as Pic. 2-3).
To avoid slipping, please keep your finger aft:: your aircraft dry and clean.
Pic_l
Pic_2
Pic.3
How to char •e
of aircraft
Step 1. Make sure that the power adaptor is connected with the power outlet (indicated as Pic. 1) .
Step 2. Connect the balance charger to the pov,:er adaptor (indicated as Pic. 2).
Step 3. Insert the white triplex-',.vire plug of the charging converter face up into the triplex-wire socket of
the balance charger (incicated as Pic. 3).
Step 4. Slide the charging converter onto the battery from the middle position of the battery and insert
the pins into the battery plug to start charging (indicated as Pic. 4).
Full charging time takes about 4 hours.
•
When charging is proceeding, the green light keeps flashing and the red light keeps solid on;
•
When charging is finished, both of the green light and red light keep solid on;
•
If the battery and charging converter is not connected with the balance charger, but the balance
charger is connected with the power adaptor, the red light keeps solid on and the green light is off;
•
Once there is any malfunction, the red light will be solid on and the green light will keep flashing
rapidly.
-4-