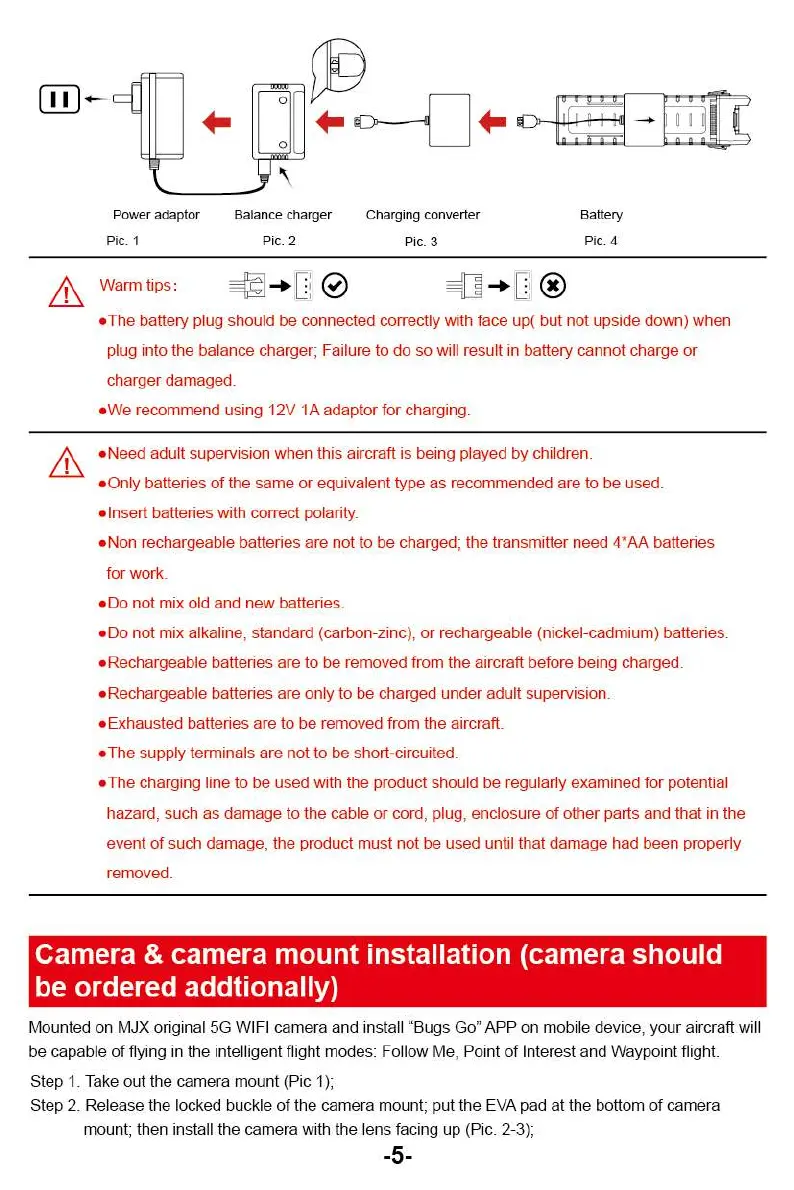
Battery
Pic. 4
Power adaptor
Pic. 1
Warm tips:
Balance charger
Pic. 2
Charging converter
Pic. 3
A
•
The battery plug should be connected correctly with face up( but not upside down) when
plug into the balance charger; Failure to do so will result in battery cannot charge or
charger damaged.
•
We recommend using 12V 1A adaptor for charging.
•
Need adult supervision when this aircraft is being played by children.
*
Only batteries of the same or equivalent type as recommended are to be used
*
Insert batteries with correct polarity.
•
Non rechargeable batteries are not to be charged; the transmitter need 4'AA batteries
for work
•
Do not mix old and new batteries.
•
Do not mix alkaline, standard (carbon-zinc), or rechargeable (nickel-cadmium) batteries.
•
Rechargeable batteries are to be removed from the aircraft before being charged.
•
Rechargeable batteries are only to be charged under adult supervision.
'
Exhausted batteries are to be removed from the aircraft.
•
The supply terminals are not to be short-circuited.
•
The charging line to be used with the product should be regularly examined for potential
hazard, such as damage to the cable or cord, plug, enclosure of other parts and that in the
event of such damage, the product must not be used until that damage had been properly
removed.
Camera & camera mount installation (camera should
be ordered addtionally)
Mounted on MJX original 5G WIFI camera and install "Bugs
Go.
APP on mobile device, your aircraft will
be capable of flying in the intelligent flight modes: Follow Me, Point of Interest and Waypoint flight.
Step 1. Take out the camera mount (Pic 11:
Step 2. Release the locked buckle the camera mount; put the EVA pad at the bottom of camera
mount; then install the czmem v,:ith the ler.s -acing up (Pic. 2-3);
-5-