12
Meaning of the LEDs :
After plugging the charger in the socket, all the LEDs light up for approx 1 sec. (BAT146 only).
Then, the charge status display (1-4) on the charger initially changes to the yellow LED (« self-
check ») and then indicates the operating condition of the charger :
Steady yellow LED : Charger is ready for operation
Flashing green LED : Battery pack is charging
Steady green LED : The battery pack is more than 80% charged and ready for use. In
the background, the battery pack will continue to be charged up to 100%.
Flashing red LED : General fault indicator, e.g. not in full contact, short circuit, faulty
battery pack, etc.
Steady red LED : Battery temperature is outside the permitted limit values. As soon as
the permitted temperature is reached, the charger automatically switches to charging.
On the BAT146 only, the maximum remaining charging time is indicated on the LEDS
(1-3)
Batteries
*Autonomy is measured with a load equal to 50% of the max torque
Instructions for use :
The battery pack is delivered partially charged. To guarantee
that the battery pack provides full power, charge it completely
in the charger before using it for the first time. It can be charged
at any time without reducing the battery life. Interrupting the
charging process does not damage it. The battery pack is fitted
with a temperature sensor, which only permits charging at
temperatures of between 0 °C to 55 °C. This ensures a longer
battery life.
The battery pack should ideally be stored in a cool (5°C to
25°C) and dry location (air humidity < 80 %). Significantly
shorter operating times after each charge indicate that the battery pack is worn and should be
replaced with a new one. Observe instructions regarding disposal.
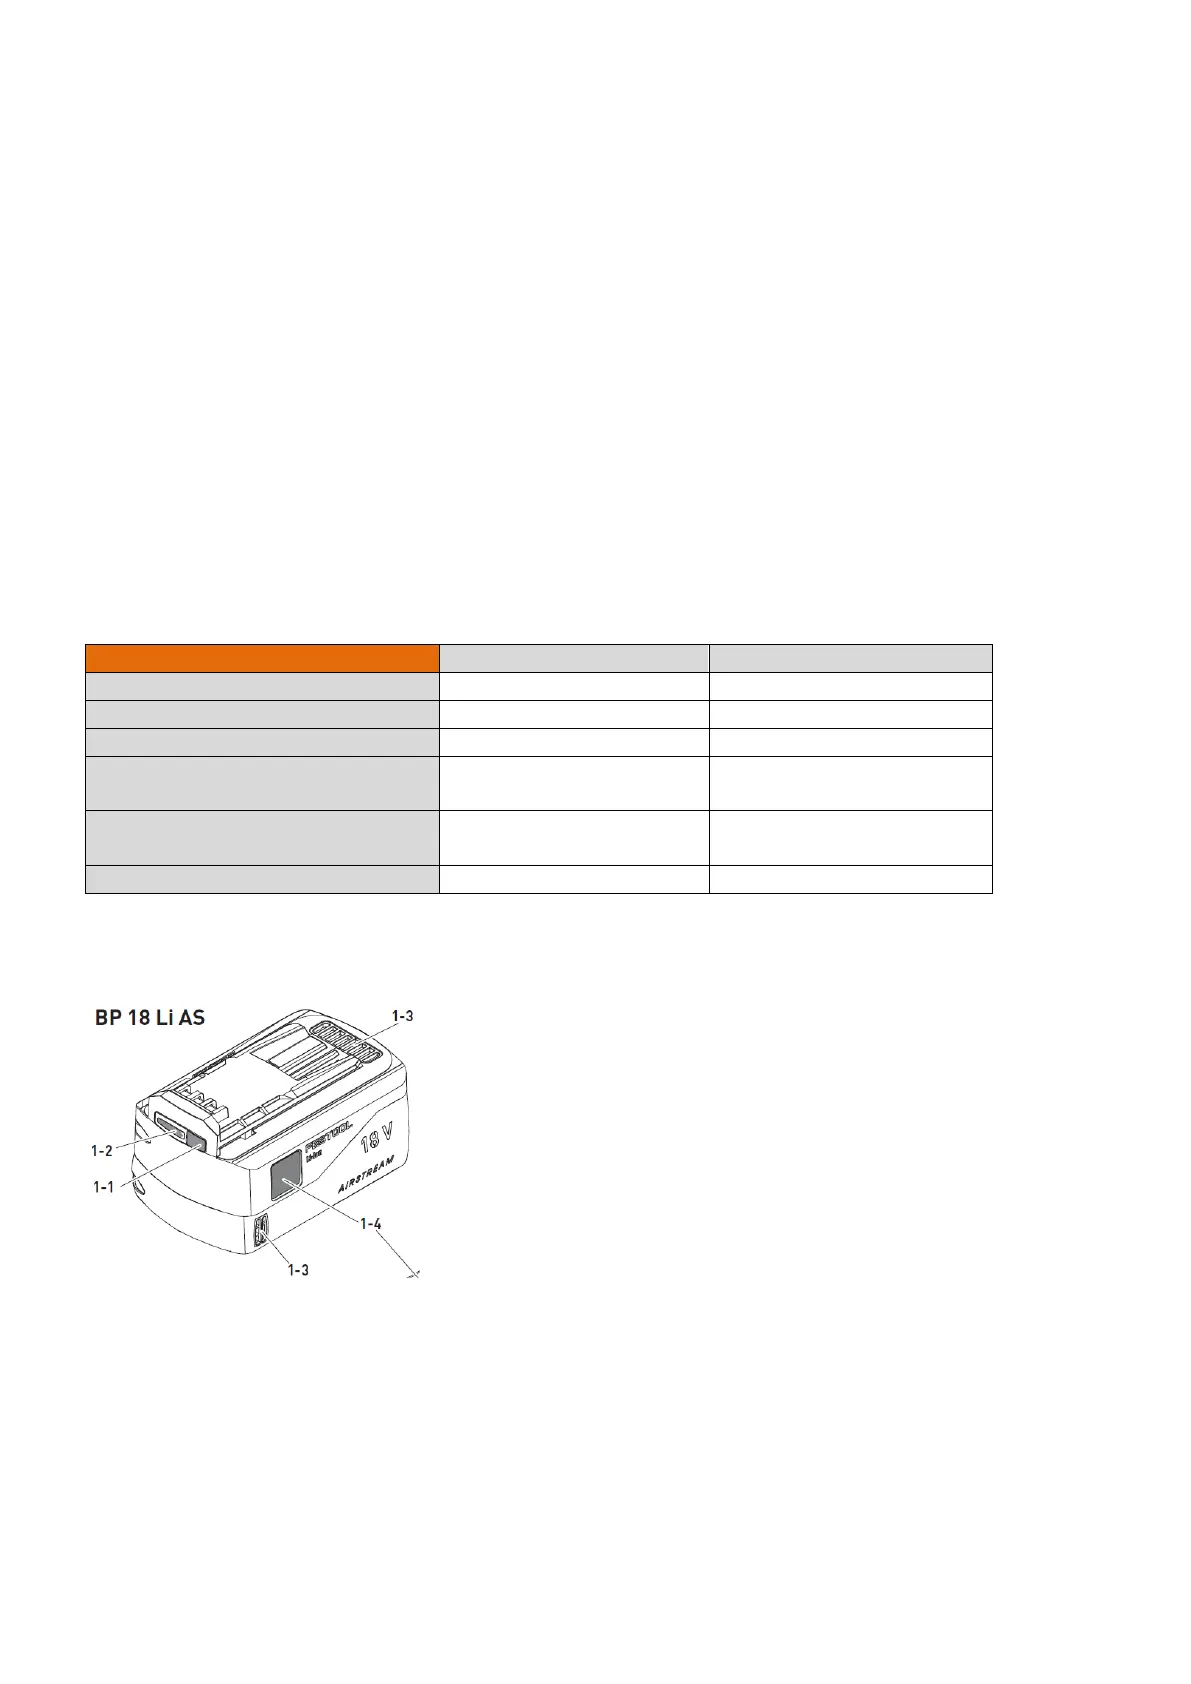
Capacity display:
When pressing the button,[1-1] the charge indicator [1-2] shows the charge of the battery
pack during approx. 2 s :
3 LED : Battery pack is charged > 70%
2 LED : Battery pack is charged between 40% and 70%
1 LED : Battery pack is charged between 15% and 40%