32
12. Installing the Servos
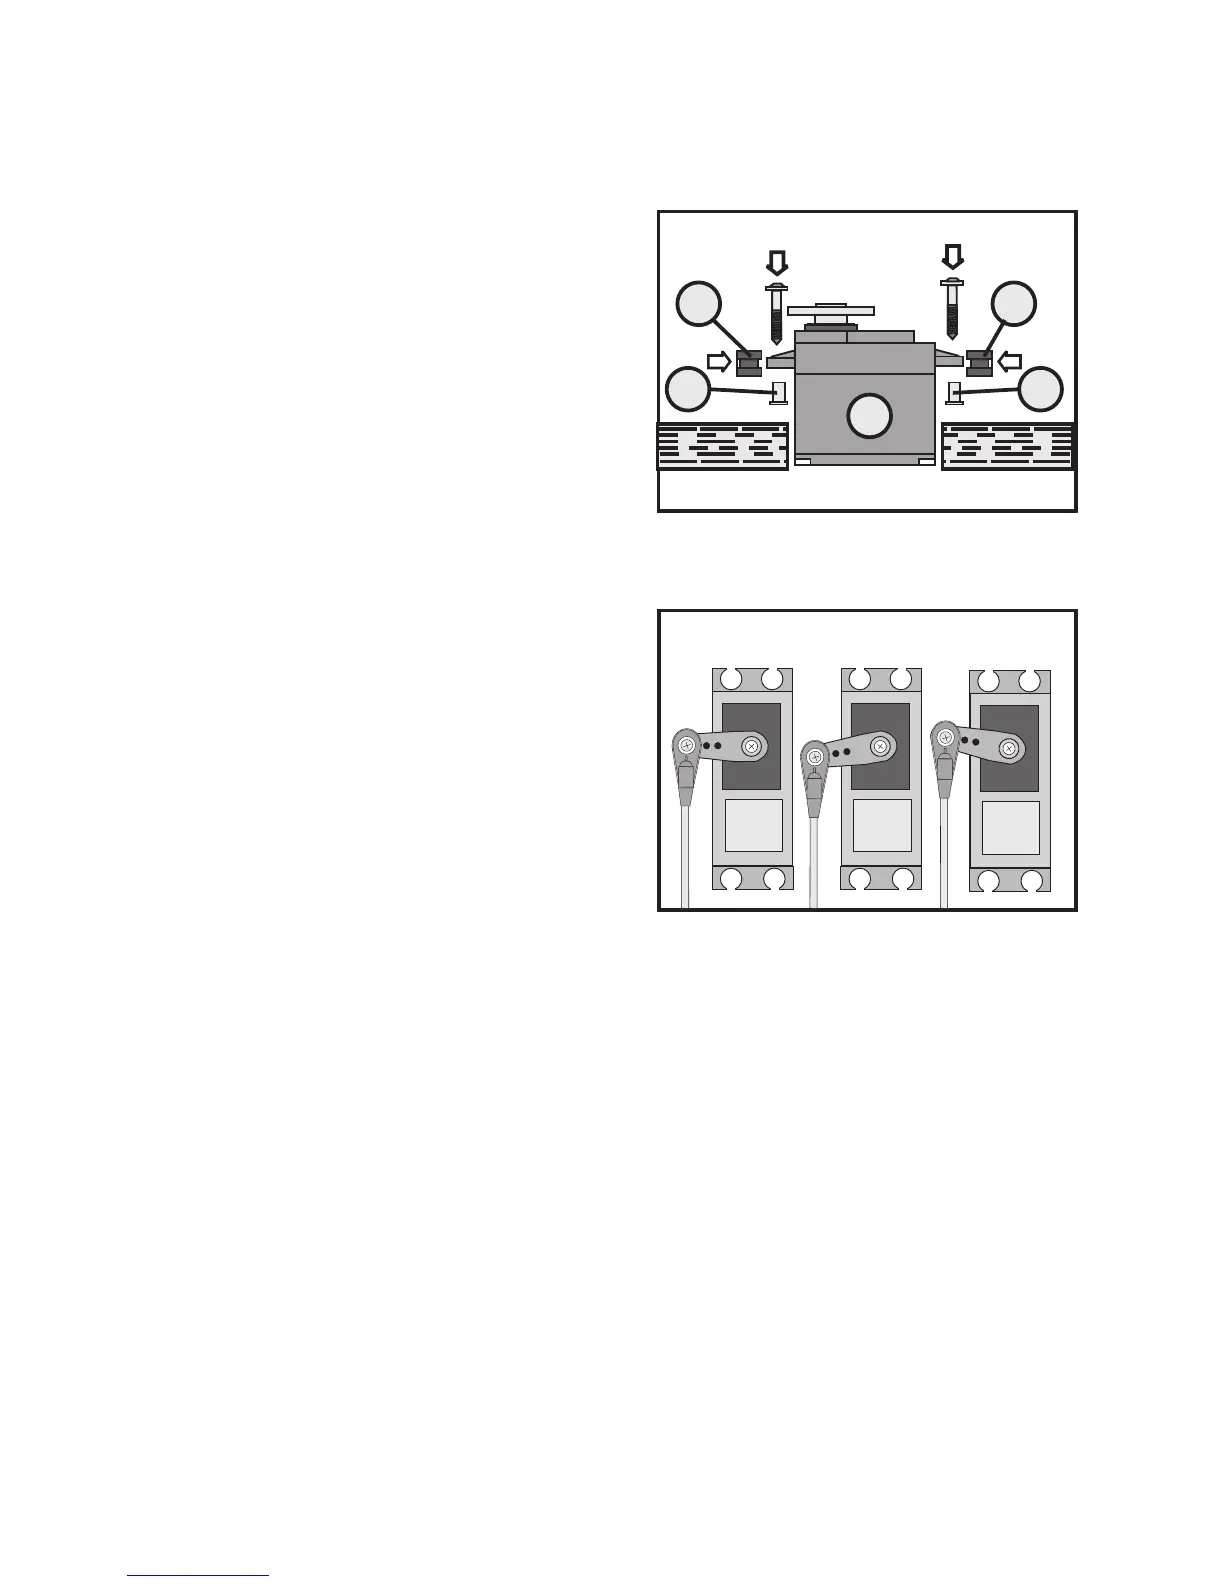
The installation of a servo (1) always depends on the
particular model used. For specific information, refer to the
design documents of the model.
However, generally you should try to fasten the servos with
screws in such a way that vibrations are minimised.
This is why rubber bushings (2) with metal sleeves (3) are
usually included with the servos.
When servo arms or linkages are obstructed, the servos
cannot assume the required positions. This causes higher
power consumption and the model cannot be controlled
properly.
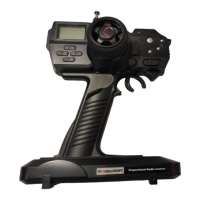
Always mount the servo lever at a 90° angle to the linkage
rods (see sketch A).
The rudder or steering travel will not be equal on both sides
if the servo lever is mounted at an angle to the linkage rod
(sketches B and C).
3
2
2
1
3
Figure 10
SERVO SERVO
SERVO
A
B
C
Figure 11