EasyManua.ls Logo

modway Billie MOD-6212-GRY User Manual

modway Billie MOD-6212-GRY
6 pages
To Next Page IconTo Next Page
Page #1 background imageLoading...
Page #1 background image
A
B
C
D
E
F
G
J
H
MOD-6212
Thank you for purchasing the MODWAY BED!
Before you start, here are some helpful advice:
1. We suggest you spend a short time reading through this leaflet and then follow the simple step instructions.
Customer Service 609-256-9000 | www.modway.com
01 of 06
2. Owing to the size and weight of the bed, we recommend that it is assembled by two adults, on a carpeted or
padded area, in the room that it is intended for. Approx assembly time: 40 minutes.
3. Please do not use any tools other than those provided or recommended in these instructions.
4. Please do not throw away any of the packaging or the instruction until you have checked all the components and
hardware and the furniture is fully assembled. Please ensure that the packaging is disposed of in a safe
environmentally friendly way.
5. Assemble all components loosely until advised to tighten. Depending on use, it may be necessary to tighten the
components from time to time, so please save tools that have been provided.
6. Please keep all fitting out of reach of children.
Components:
A HEADBOARD PANEL
1 PC
B FOOTBOARD PANEL
1 PC
C SIDE RAIL
2 PCS
D CENTER RAIL
1 PC
E
CENTER RAIL LEG
3 PCS
F
BED LEG (L)
2 PCS
G
BED LEG (R)
2 PCS
H LEG SUPPORT RAIL
2 PCS
I LEG MOUNTING PLATE
4 PCS
J
BED SLATS
1 SET
I
Question and Answer IconNeed help?

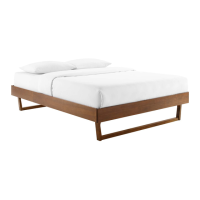
Do you have a question about the modway Billie MOD-6212-GRY and is the answer not in the manual?

modway Billie MOD-6212-GRY Specifications

General IconGeneral
Brandmodway
ModelBillie MOD-6212-GRY
CategoryIndoor Furnishing
LanguageEnglish

Summary

Product Components and Hardware

Components List

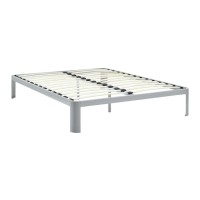
Lists all parts included in the package, such as headboard, footboard, rails, legs, and hardware.

Hardware Bed Frame

Details the specific bolts, screws, washers, nuts, and brackets required for assembly.

Assembly Steps

Step 1: Assemble Legs and Support Rails

Attaches bed legs (F, G) and support rails (H) using specific bolts and washers.

Step 2: Attach Leg Mounting Plates

Secures leg mounting plates (I) to the bed frame using bolts and Allen keys.

Step 3: Connect Headboard and Footboard

Attaches side rails (C) to the headboard (A) and footboard (B) using L brackets and bolts.

Step 4: Attach Side Rails to Frame

Connects side rails (C) to the headboard (A) and footboard (B) using bolts and washers.

Step 5: Secure Side Rails

Reinforces side rail connections using bolts, washers, and Allen keys.

Step 6: Install Center Rail Brackets

Attaches brackets to the headboard and footboard for the center rail.

Step 7: Attach Center Rail

Secures the center rail (D) to the frame using bolts and Allen keys.

Step 8: Attach Center Rail Legs

Installs adjustable feet (14) onto the center rail legs (E).

Step 9: Install Bed Slats

Attaches bed slats (J) to the frame using bolts and barrel nuts.

Step 10: Final Slat Installation

Continues attaching bed slats (J) to the frame, ensuring proper spacing.

Step 11: Secure All Slats

Fastens all bed slats (J) to the side rails (C) and center rail (D) with screws.

Step 12: Assembly Completion

Indicates the successful completion of the bed assembly process.

Related product manuals