-27-
Revision 2/F3506
Bottom Element
Two Screws
Top Element
One Screw
Centre Nut
6.3.15 FAN
6.3.14 ELEMENTS
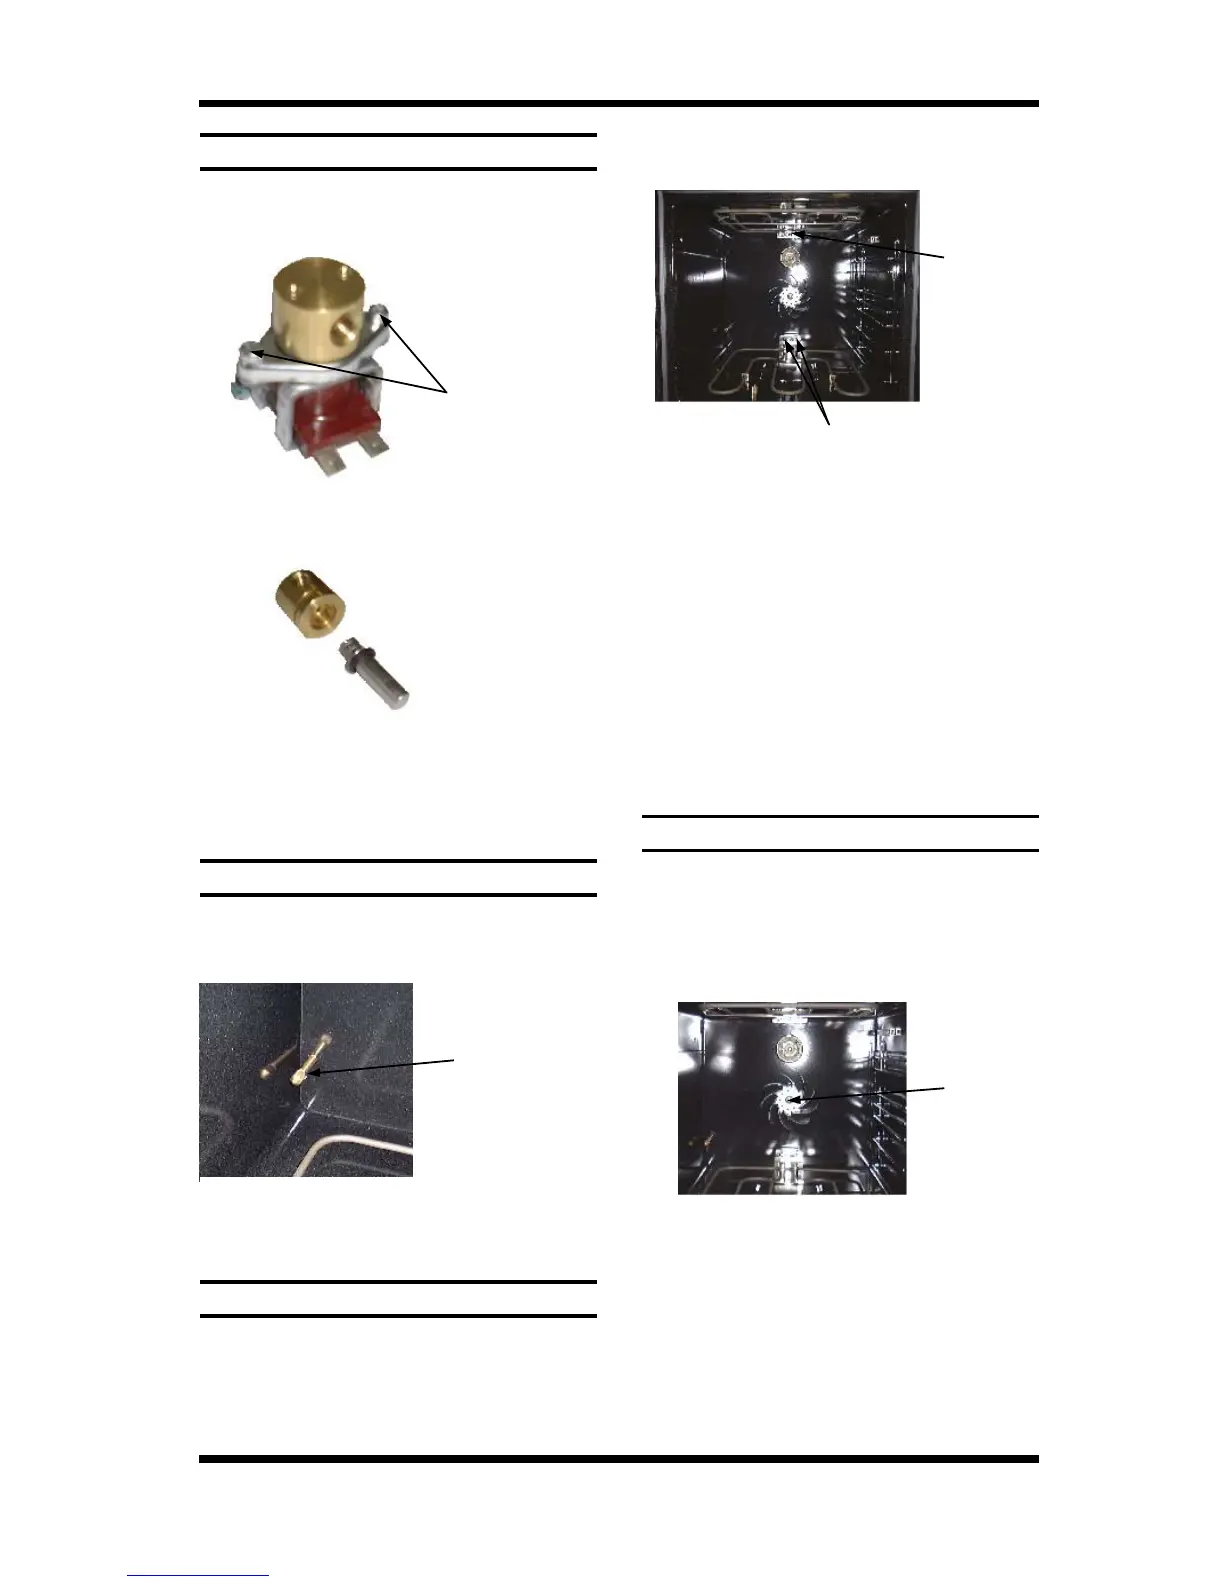
6.3.13 SPRAY NOZZLE
1) Inside the oven remove the LH side rack
and baffle (refer 6.2.3), then unscrew the
water injection nozzle.
1) With service panel and baffle removed
(refer 6.2.2 and 6.2.3) remove the wires
from the element(s).
1) With service panel and baffle removed
(refer 6.2.2 and 6.2.3) undo the centre
nut.
NOTE: LH thread - Turn clockwise to
loosen.
Figure 6.3.20
Water Injection
Nozzle
2) Clean or replace as required, ensuring
debris free on re-assembly.
2) Unscrew the element from inside the
oven.
2) Replace and re-assemble in reverse
order.
Figure 6.3.22
Figure 6.3.21
6.3.12 WATER SOLENOID CLEANING
1) Remove water solenoid (refer 6.3.10).
2) Remove the two screws securing the
bracket to the solenoid.
Two Screws
3) Remove the valve assembly.
Figure 6.3.18
4) Clean the valve assembly, removing all
dirt and grime from the valve seat.
5) Reassemble the valve assembly and
solenoid.
Figure 6.3.19
Valve Assembly
208 V Top Inner Element 24.5 ohms
Top Outer Element 55.3 ohms
Bottom Element 22.5 ohms
220—240V Top Inner Element 29.5 ohms
Top Outer Element 66.5 ohms
Bottom Element 27.3 ohms
Element Ratings ±5%
3) Pull element carefully to remove.
4) Replace and re-assemble in reverse
order.