Revision 3/F3563
© Moffat Ltd, August 2006 E27 Convection Oven
-39-
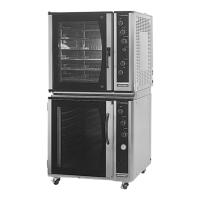
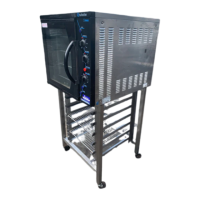
APPENDIX A. DOUBLE STACKING KIT (24419)
Kit Includes: Part No
1 x Vent Duct 24306
1 x Vent Pipe 24307
1 x Saddle Clamp 10023
1 x Double Stack Front 04921
2 x Double Stack Side 24509
1 x Double Stack Rear 24510
25 x
3
/
8
" x 8A Pozi Pan Hd Screw 41045
2 x ½” x 8 Phillips Head Black Screw 41046
2 x Black Fibre Washer 45605
Assembly Instructions: (THE ELECTRICAL SUPPLY MUST BE DISCONNECTED)
A. Bottom Unit
(Refer figure 1)
1. Position vent duct on bottom unit over oven vent. Temporarily locate double stack rear in
correct position on top of bottom unit. Centrally locate the vent duct in the cut-out. Check that
the oven vent is covered and mark the
five hole positions (two down each side
of the flue duct and one at front) on the
oven wrapper.
2. Drill five ø3.5mm holes in the oven
wrapper where marked.
3. Secure the vent duct to the wrapper
with five 3/8" x 8A Pozi screws into
these holes.
4. Undo the three screws securing the top
lintel to the bottom oven, and remove
the lintel. Remove the four screws
from the top rear of the oven wrapper.
B. Top Unit
1. Remove all trays and racks from oven.
Tip oven upside down and remove the feet screwed into the base.
2. Remove the six screws (three each side) securing the oven wrapper to the sides of the oven.
Position the double stack sides flush with the sides and front of the oven, and secure each
with three screws.
3. Remove the three screws along the front bottom edge of the oven. Position the double stack
front over these three screw holes. Flush the ends of the double stack front with the sides of
the unit and secure to the double stack sides using the two black screws (with
fibre washers). Secure to bottom of oven with three screws.
4. Secure the double stack rear to the double stack sides with two screws.
Figure A.1
Double Stack Rear
Remove Lintel