– 22 –
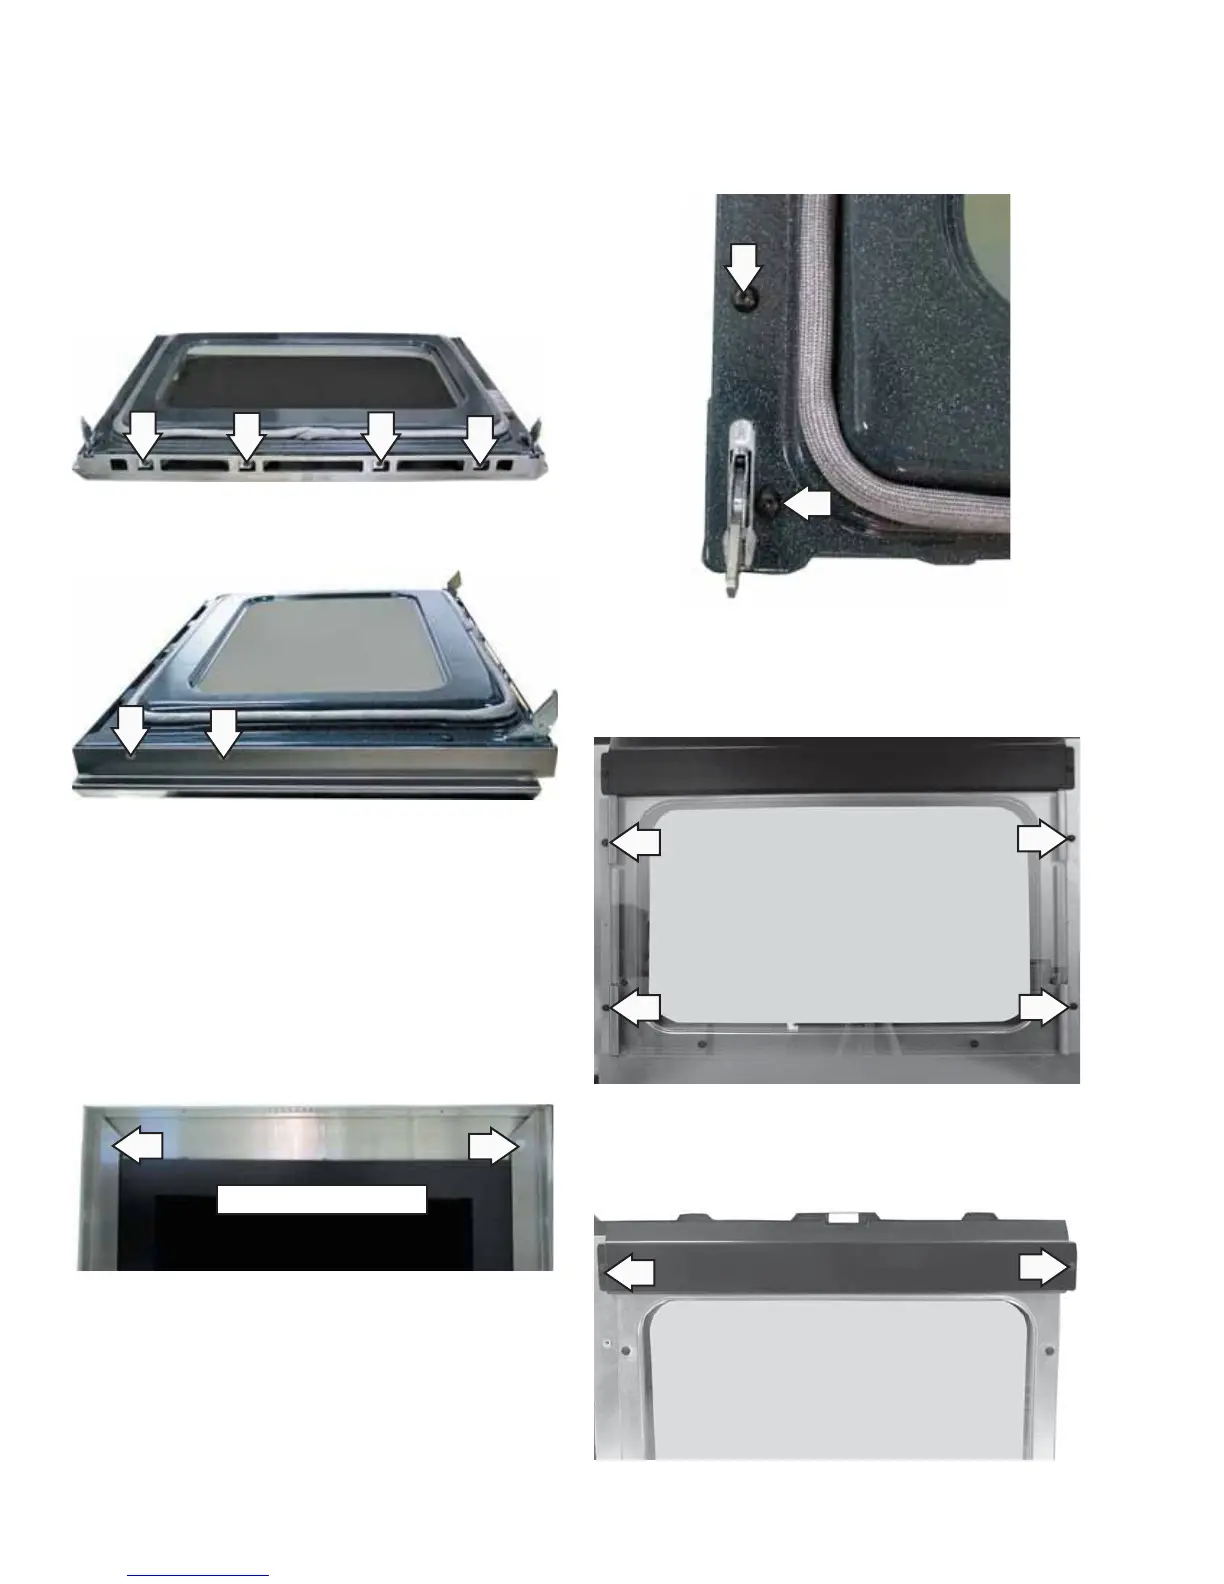
2. Remove the 4 T-15 Torx screws (2 on each side)
that attach each door hinge to the inner door.
Carefully turn the door over and remove both
door hinges.
Remove the four ¼-in. hex-head screws that
attach the glass and side brackets (glass closet
to the outer door glass) to the inner door.
3.
Remove the two ¼-in. hex-head screws that
hold the heat defl ector to the heat barrier.
4.
Remove the 4 T15 Torx screws (2 on each side)
from the outer door assembly.
4.
Caution: Care must be taken if reinstalling the door
handle. Overtightening screws can damage handle.
Hand-tighten screws and make sure handle fi ts
snugly to door panel. (Do not use electric driver.)
To replace the inner door assembly:
Remove the outer door assembly. (See Door
Assembly.)
1.
Outer Door Assembly
(Continued next page)
To remove the outer door assembly:
Remove the door.
Place the inner door assembly, gasket side up,
on a protective surface.
Remove the three ¼-in. hex-head screws and
the single T15 Torx screw from the bottom of the
outer door assembly.
1.
2.
3.
Note: The inner door assembly is heavier than the
outer door assembly.
Separate the inner door assembly from the
outer door assembly.
Remove the two ¼-in. hex-head screws
that hold the door handle to the outer door
assembly.
5.
6.
Door Shown with Inner Door Assembly Removed