– 39 –
Disconnect
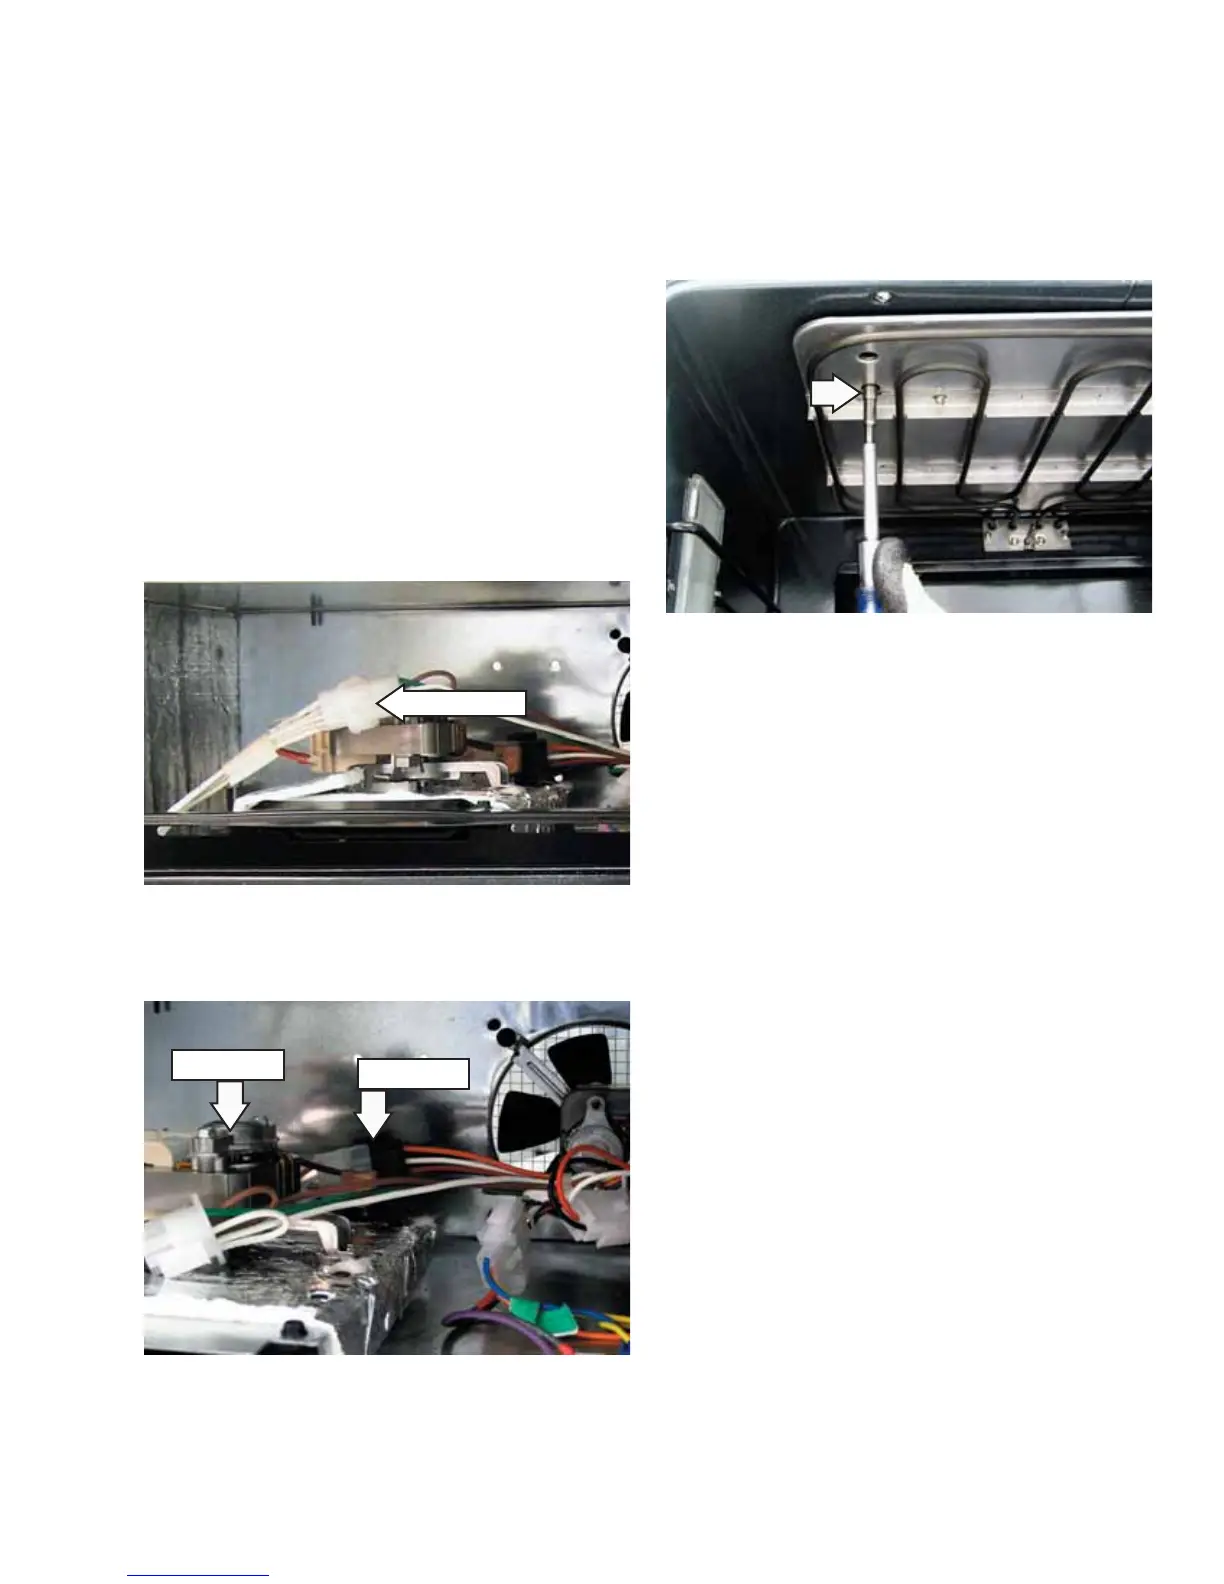
5. Disconnect the power vent wire harness.
Disconnect
Power Vent
Note: Two holes are provided in the broiler shield to
gain access to the 2 screws that attach the power
vent assembly to the oven frame.
6. Remove the two ¼-in. hex-head screws that
attach the power vent assembly to the oven
frame.
7. Lift and remove the power vent assembly.
To remove the lower oven power vent assembly
and FAD:
Remove the ovens from the installation and
separate the ovens. (See Oven Removal.)
Remove the three ¼-in. hex-head screws from
the bottom of the middle trim.
Remove the three ¼-in. hex-head screws that
attach the vent trim to the oven. Remove the
vent trim.
Disconnect the power vent wire harness.
Note: Two holes are provided in the broiler shield to
gain access to the 2 screws that attach the power
vent assembly to the oven frame.
Remove the two ¼-in. hex-head screws that
attach the power vent assembly to the oven
frame.
Lift and remove the power vent assembly.
1.
2.
3.
4.
5.
6.
To remove the FAD:
The FAD is held in place by two ¼-in. hex-head
screws. To access the FAD on a single or upper
oven, see
Control Compartment Access. On the lower
oven, see Lower Oven Control Compartment Access.
To remove the single or upper oven power vent
assembly and FAD:
Remove the racks. (See Oven Racks.)
Access the control compartment. (See Control
Compartment Access.)
Remove the three ¼-in. hex-head screws that
attach the vent trim to the oven. Remove the
vent trim.
Disconnect the left side light wire harness.
1.
2.
3.
4.