7
PRINTER SETUP
Warning! Take care not to remove or damage the black PEI build mat on the build platform.
This mat is essential to ensure the 3D model properly adheres to the build platform during
printing. If this mat becomes damaged or wears out, replace it with painter's tape, Kapton®
tape, or ordinary masking tape.
Perform the following steps to prepare the printer for use.
1. Remove the printer from its packaging and place it on a flat, stable surface with
plenty of ventilation and a nearby AC power outlet.
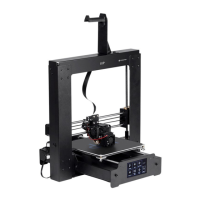
2. Open the Accessories box and remove the Filament Holder. Slide
the tab at the flat end into the Filament Holder Slots (7) on the
rear of the printer frame.
3. Insert the included microSD
™
card into the MicroSD™ Card Slot (6)
on the side of the printer.
4. Plug the DC barrel connector on the included AC power adapter into the power
connector on the side of the printer. Next, plug the C13 end of the included AC
Power Cable into the C14 panel connector on the AC Power Adapter, then plug the
other end into a nearby AC power outlet.
5. Press the bottom button once to highlight the Temperature entry, then press the
center button to select it.
6. Press the center button to select the temperature value, then use the top and
bottom buttons to set the target temperature. Set it to 230°C for ABS filament or
set it to 195°C for PLA filament. Press the center button to save the target
temperature and begin heating the extruder.