Do you have a question about the Monoprice MP10 and is the answer not in the manual?
Use 4mm hex wrench and M4x6 screws to attach vertical part to horizontal part.
Use 2.5mm hex wrench and M5x20 screws to secure vertical frame to horizontal frame.
Loosen screw marked with red circle, remove screw rod, then re-tighten.
Use 3mm hex wrench to loosen the screw on the top side.
Insert screw rod into top hole, then tighten the screw from previous step.
Use 2.5mm hex wrench and M4x6 screws to attach LCD module and plug in.
Use 2.5mm hex wrench and M4x6 screws to attach filament holder to the frame.
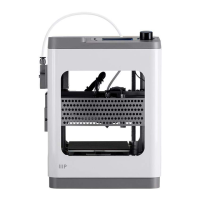
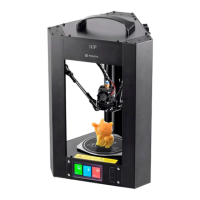
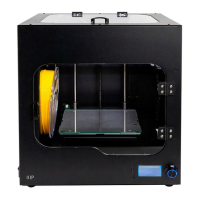
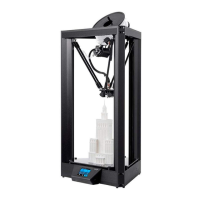
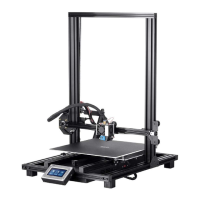
Place printer on a flat, stable surface with ventilation and power outlet.
Ensure power switch is OFF, plug in AC power cord, then switch ON.
Insert the included memory card into the slot on the right side of the LCD module.
Touch Preheat, set nozzle and bed temperatures, then touch Start Preheat.
Set the nozzle temperature to your target value based on filament type.
Set the bed temperature to the target temperature for your filament type.
Printer begins preheating nozzle and bed to target values.
Snip filament end diagonally and place reel on the filament rack.
Return to Main Menu, enter Move Menu, raise extruder above build platform.
Squeeze lever, insert filament, push until resistance, release lever.
Use E column in Move Menu to feed filament until several centimeters are extruded.
Use plastic scraper to clean extruded filament from nozzle and build platform.
Touch the back button in the Move Menu to return to the Main Menu.
Touch Print button, select gcode file from memory card to start printing.
After the first layer, touch Pause or Cancel to stop printing.
Compare first layer to images to determine if bed leveling is needed.
From Main Menu, touch Move, then Tune to enter Set Offset Menu.
Touch Auto Leveling button; printer measures distance to bed at multiple points.
Touch CLOSE or FAR buttons to adjust global offset (must be less than 0).
Once the gap is satisfactory, touch the checkmark button to save and exit.
Download MP 3D Printer WiFi Connect app from Google Play Store.
Disconnect USB cable; USB and Wi-Fi connections cannot be used simultaneously.
Turn the printer's power switch to the ON position.
Start the MP 3D Printer WiFi Connect application on your mobile device.
Select the appropriate Wi-Fi network from the displayed list.
Enter your wireless network password.
Press and hold Move button for 3 seconds until 'Smart config started' appears.
Press Connect to WiFi on mobile; connection message and IP address will display.
Use card reader, locate and double-click Cura_3.3.1.exe to start setup.
Click Next on Welcome screen, then click I Agree on License Agreement.
Use file browser to select install directory or accept the default.
Ensure all boxes are checked, then click Install.
Click Finish to complete installation and launch Cura program.
Click Printer > Printer > Add Printer...
Click Other, choose Monoprice MP10 entry, then click Add Printer.
Machine Settings screen displayed; click Close to finish Cura installation.
Set connection, travel feed rate, extrusion speed, and temperatures.
Set number of extruders, fans, max temperatures, and diameter.
Device complies with FCC Part 15; rules for interference and operation.
Product compliance with EU directives like EMC, Low Voltage, RoHS, WEEE.
Information for consumer products covered by EU WEEE Directive on disposal.
Warnings about water use, electrical storms, power outlet access, and ventilation.
| Nozzle width | 0.4 mm |
|---|---|
| Print technology | Fused Filament Fabrication (FFF) |
| Printing material | ABS, Nylon, Polyethylene Terephthalate Glycol (PETG), Polylactic acid (PLA), Wood fiber |
| Maximum travel speed | 100 mm/sec |
| Layer thickness (max) | 0.3 mm |
| Layer thickness (min) | 0.05 mm |
| Maximum build size (WxDxH) | 300 x 300 x 400 mm |
| Filament thickness supported | 1.75 mm |
| Wi-Fi | Yes |
| Ethernet LAN | No |
| Compatible memory cards | MicroSD (TransFlash) |
| Product color | Black |
| Maximum extruder tip temperature | 280 °C |
| Maximum print platform temperature | 110 °C |
| AC input voltage | 100 - 240 V |
| AC input frequency | 50 - 60 Hz |
| Engraver module | - |
| Depth | 622 mm |
|---|---|
| Width | 501 mm |
| Weight | 12500 g |