28
SECTION 7 - ROUTINE SERVICING INSTRUCTIONS
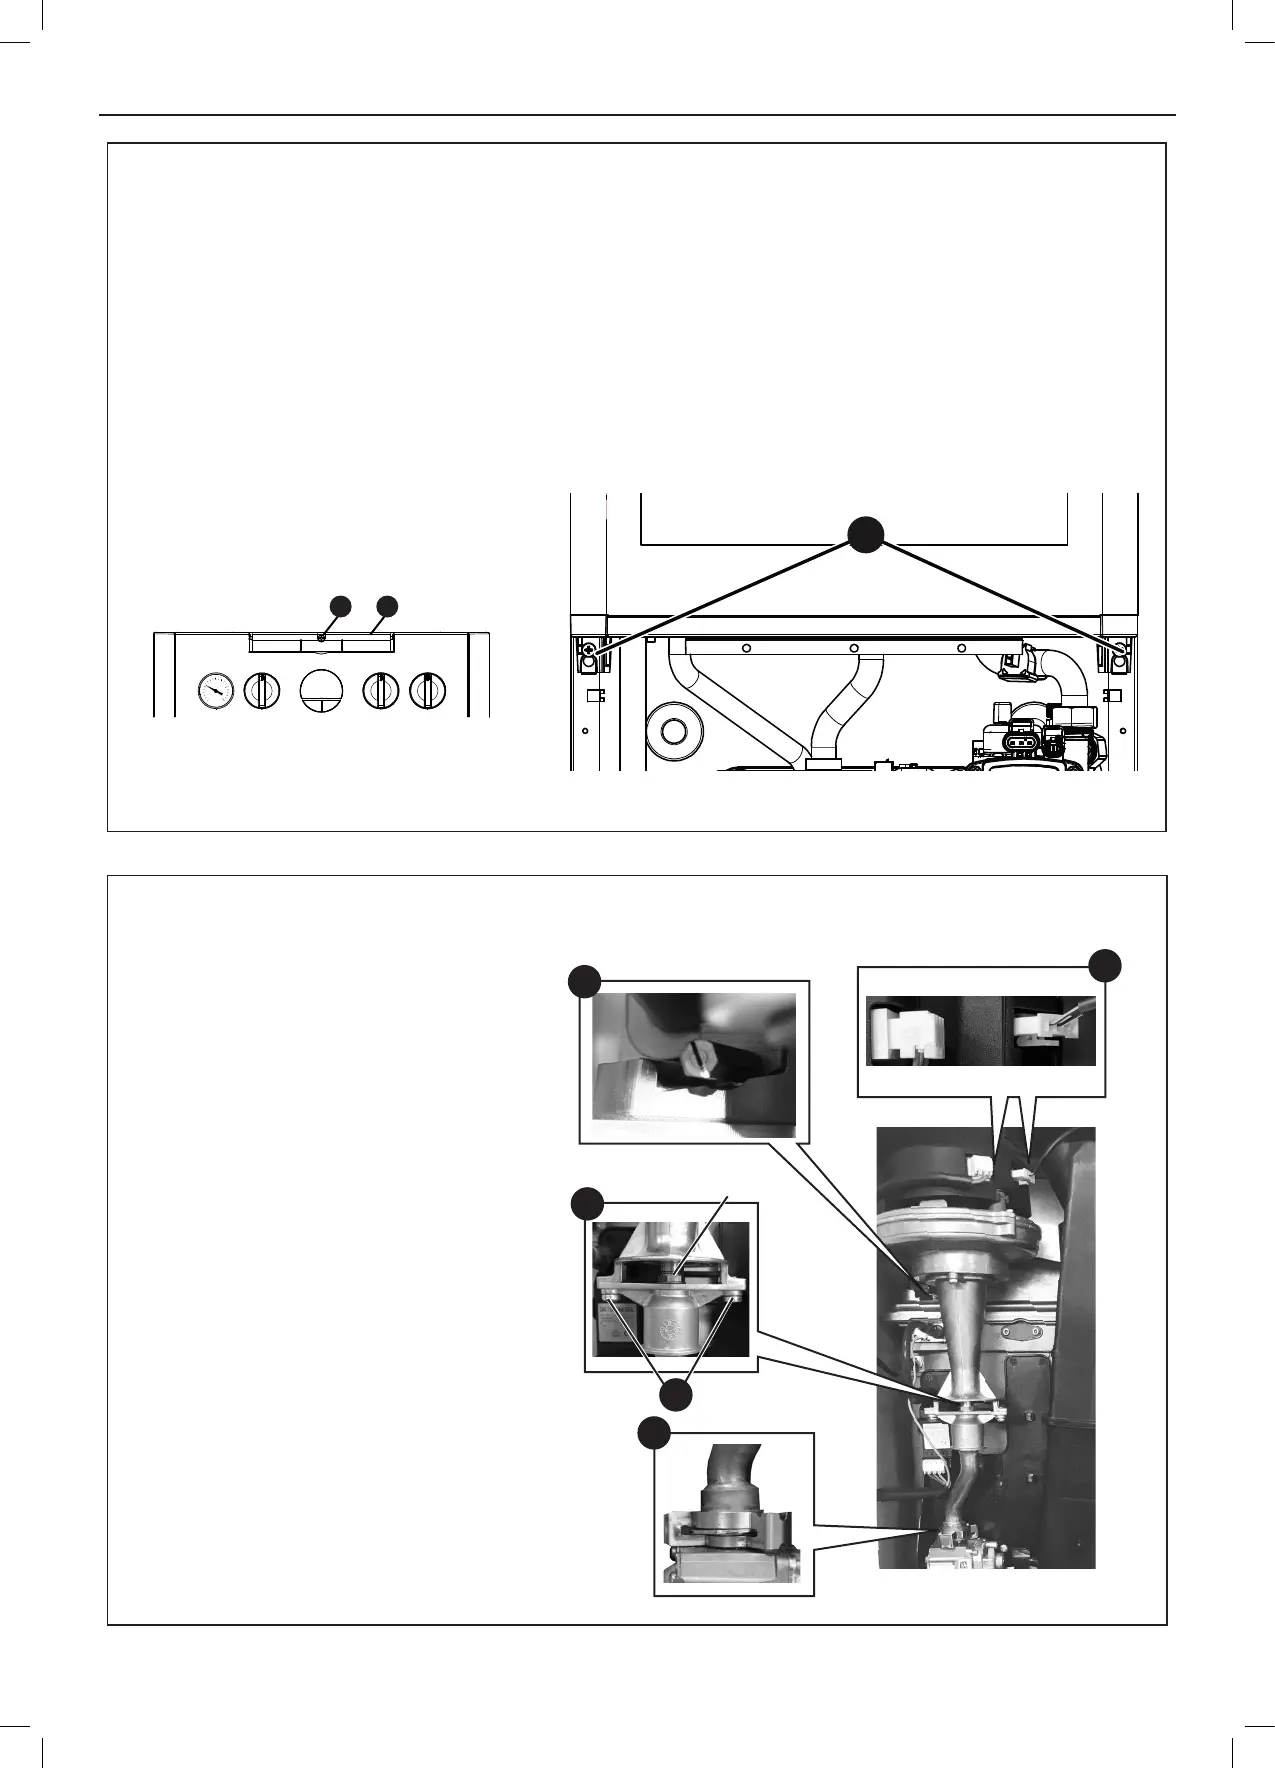
7.5 BOILER UPPER & LOWER FRONT PANEL REMOVAL / REPLACEMENT
7.6 FAN AND VENTURI ASSEMBLY REMOVAL AND CLEANING
REMOVAL
1. Lift the lower front panel access ap.
2. Unscrew the xing screw, close the access ap to retain
the screw and hinge the lower front panel down into the
service position.
3. Remove the two upper front panel xing screws, lift the
panel and remove.
4. Check combustion seals on front panel.
REPLACEMENT
5. Hook the upper panel onto the top retaining clips.
6. Retain the upper panel with the two xing screws
previously removed ensuring a good seal is made.
7. Swing the lower front panel up and retain with the xing
screw.
8. Close the lower front panel access ap.
1. Disconnect the electrical leads from the fan.
2. Remove the clip from the gas control valve
outlet and ease the pipe upwards rotate and
then ease down to remove.
3. Remove the extended nut on the fan
mounting bracket.
4. Lift off fan and venturi assembly.
5. Remove locating screw and twist off venturi
from fan.
6. Inspect venturi sealing o-ring, replace if
cracked or damaged.
7. Remove the two screws retaining the
injector housing to the venturi.
8. Clean and inspect injector assembly.
9. Re-assemble in reverse order.
1
3
8
2
3&63&6
1&82&7
Injector
7
 Loading...