Do you have a question about the Morphy Richards Bread Maker and is the answer not in the manual?
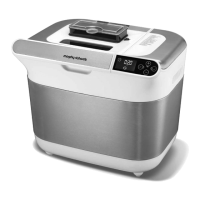
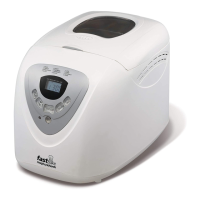
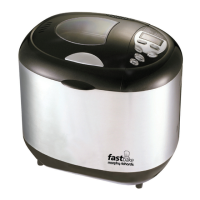
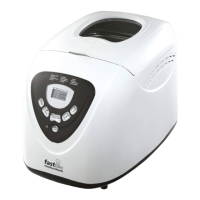
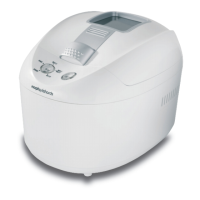
Diagram illustrating the main parts of the breadmaker, including the lid, body, control panel, and baking pan.
Description of control buttons: Start, Stop, Colour, Loaf size, and Select for operating the breadmaker.
Explanation of information shown on the breadmaker's display window, including program numbers and time.
Details for Basic bread program, suitable for white and brown bread, including time.
Details for Quick bread program for faster baking of white bread, resulting in a dense texture.
Details for Speciality program for light weight bread like French bread, with crisp crust.
Details for Sweet program for baking sweet breads with a crisper crust due to sugar.
Details for Wholemeal program for breads with significant wholewheat, requiring longer preheat.
Details for Cake program which mixes and bakes cakes, requiring separate ingredient mixing.
Details for Dough program to prepare dough only, not for baking bread.
Details for Extrabake program for increasing baking time, useful for jams and marmalades.
Details for Jam program for making jam and marmalade from fresh fruits.
Details for Sandwich program for light texture bread with a softer crust.
Instructions for safely removing the baking pan from the breadmaker before adding ingredients.
Guidance on attaching the kneading blades to the shafts before use.
Instructions on measuring ingredients accurately and adding them in the correct order, noting yeast placement.
Procedure for correctly inserting the baking pan back into the breadmaker and closing the lid.
Action to plug in the breadmaker and confirmation of basic menu and normal time setting.
How to choose the desired crust colour using the Colour button.
Instructions for selecting the loaf size, choosing between small or large.
Guidance on selecting the desired program using the Select button.
How to set the delay timer for the bread to be ready at a later time.
How to press the Start button to begin the breadmaking process.
Information on the automatic progression through programmed stages.
What happens when the program is completed, including the buzzer and display.
Explanation of the keep warm function circulating hot air for 60 minutes after baking.
Instructions for stopping the machine and safely removing the hot baking pan.
How to turn out the bread, cool it, and handle the kneading blade.
Reminder to always unplug the appliance after use for safety.
Instructions for cleaning the exterior and interior surfaces of the breadmaker with a damp cloth.
Guidance on cleaning the baking pan, avoiding dishwashers and abrasive materials.
List of cleaning agents and materials to avoid, such as paint thinner, steel wool, and polishing powder.
Advice on protecting the non-stick coating, including avoiding metal utensils and cleaning the kneading blade.
Explains that breadmaking is a science and highlights the importance of ingredient roles and accurate measurement.
Details different flour types like all-purpose, bread, wholemeal, and self-raising, and their effects on bread.
Information on ingredients like oatmeal, yeast types, sugar's role, and salt's function in breadmaking.
Describes different glazes like egg, butter, milk, and sweet icing for enhancing finished bread.
Provides tips on ingredient placement, dough proofing, humidity/altitude adjustments, and dough handling.
Recipes for various yeast breads including Basic White, Brown, Italian Herb, Raisin, Sun-dried Tomato, and Malt Loaf.
Recipe for basic white bread using the quick setting for faster baking.
Recipe for French bread using the Speciality setting for a crisp crust and light texture.
Recipe for raisin bread using the Sweet setting, which may produce a crispier crust.
Recipe for 100% wholemeal bread using the Wholemeal setting.
Recipe for 50% wholemeal bread using the Wholemeal setting.
Method for standard cake mix using two ingredient groups for mixing and baking in the machine.
Recipe for Granary bread, which is a wholemeal type bread.
Ingredients and method for a banana nut loaf cake.
Recipe and method for preparing white rolls dough using the Dough setting.
Recipe and method for preparing wholemeal rolls dough.
Recipe for making marmalade from Seville oranges using the Jam setting.
Recipe for making raspberry and apple jam using the Jam setting.
Details on pre-heating duration and when heating cycles are active.
Timings for stirring and kneading cycles, including anti-clockwise and alternating movements.
Duration of rising phases and dough smoothing, with notes on heating cycles.
Timings for the baking phase and the rest phase before warming begins.
Duration of the warming function and when heating cycles are active.
Causes and solutions for bread sinking, related to liquid, salt, yeast, humidity, and altitude.
Reasons for insufficient bread rise, including yeast, sugar, salt, water temperature, and mixing.
Causes for excessive bread rise, relating to humidity, yeast, liquid, and temperature.
Solutions for dry and dense bread, often due to liquid balance or flour condition.
Reasons for a soggy center, including excess liquid from fruit or rich ingredients.
Causes for over-browning, related to sugar content or crust color setting.
Causes for large holes, including water temperature, liquid amount, yeast quantity, and humidity.
Reasons for sticky bread surface, related to condensation or ingredient balance.
Troubleshooting for the H:HH display message indicating the breadmaker is too hot.
| Brand | Morphy Richards |
|---|---|
| Model | Bread Maker |
| Category | Bread Maker |
| Language | English |