Fig. 21
Fig. 22
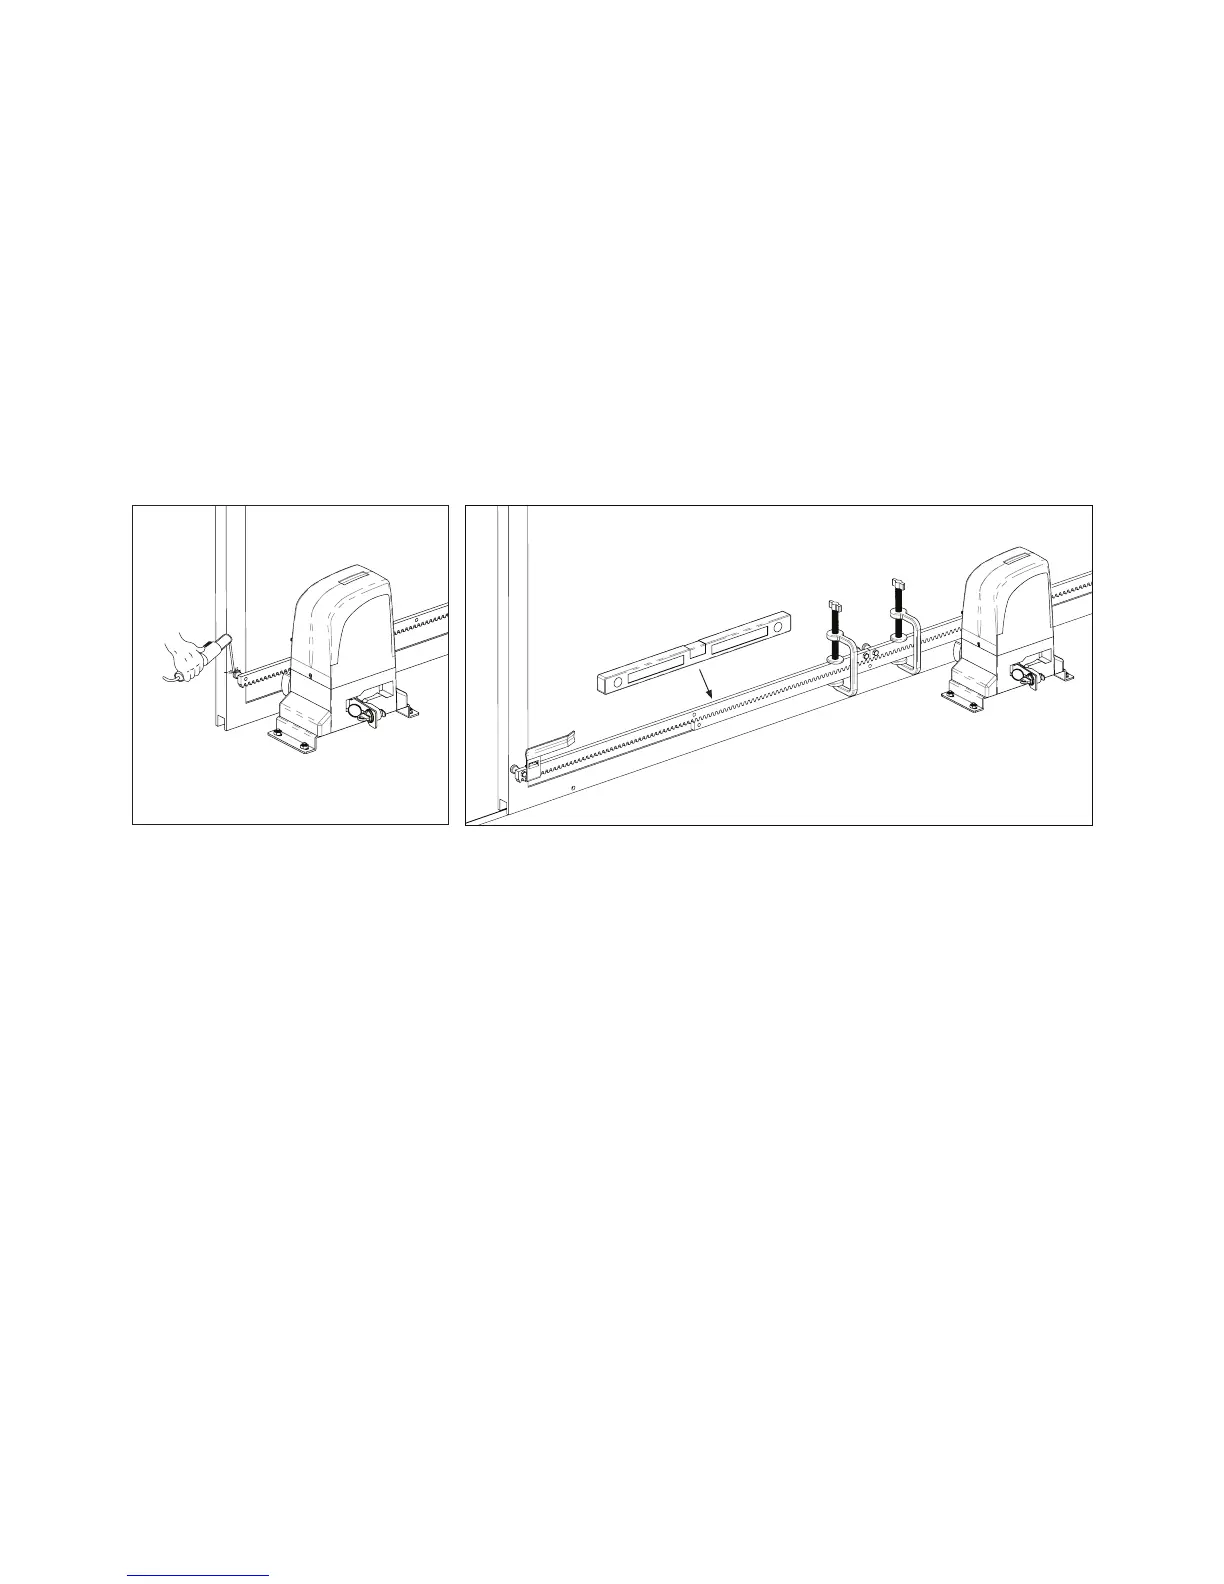
c) Move the gate to manually back and forth, to ensure that the gear rack is properly seated on the
pinion and movement occurs smoothly.
d) Set the rack in the gate. (Fig. 21) .To ensure a correct xation, can go slowly moving the gate and
setting the gate spacers always near the pinion.
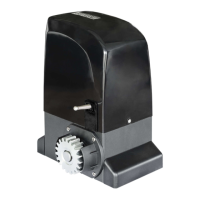
e) Pull another element of the rack above, using a piece of additional rack teeth to synchronize the two
elements (Fig. 22).
f ) Use a level again to make sure that rack is perfectly level.
g) Manually move the gate and carry out the operations of attachment such as with the rst element,
proceeding up to the end of the gate.
NOTE: This motor can work with all types of racks.
When installing nylon rack, make the application following the same steps described in the previous
paragraphs.
Start by placing the gate in the closed position, support the rst meter of rack pinion on the engine and
keeping it level horizontally, screw the rst screw.
Go opening the gate and tightening the remaining bolts.
Continue adding more rack parts and repeating the same steps to complete the installation.
NOTES:
- Make sure that, during the gate travel, all the rack elements mesh correctly with the pinion.
- Do not, on any occasion, weld the rack elements either to the spacers. For xing these, use screws and
washers like in the Fig.20.
- Do not use grease or other lubricants between rack and pinion.
Pág. 09