Do you have a question about the Motorola APX 7500 05 and is the answer not in the manual?
Information regarding product safety and compliance with RF energy exposure standards.
Details on changes and updates described in Publication Manual Revisions (PMRs).
Information on how to obtain replacement parts, including part numbers.
Details the terms and conditions of the limited warranty for Motorola products.
Outlines Motorola's responsibilities, remedies, and limitations under the warranty.
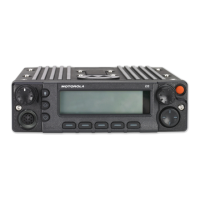
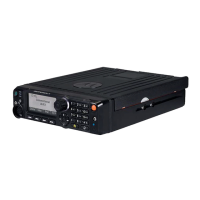
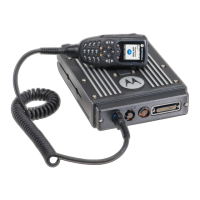
Provides a description of the mobile radio and its basic dimensions.
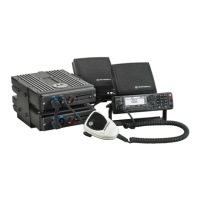
Describes the different standard installation configurations available for the radio.
Notes that motorcycle configurations are not applicable for 100W radios and O9 control heads.
Lists the tools necessary for performing APX 7500 radio installations.
Guidance on planning the radio installation, including vehicle inspection and cable routing.
Details wiring for radio functionality based on ignition switch state and programming.
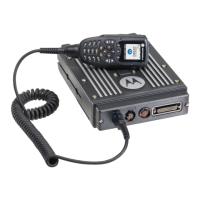
Instructions on mounting the radio transceiver and control heads in vehicles.
Information on routing and connecting power cables for the radio transceiver and control head.
Guidelines for installing antennas on metal-body vehicles for optimal performance and safety.
Final steps for connecting cables and completing the radio system installation.
Procedures for mounting the Universal Relay Controller (URC) in a vehicle.
Detailed instructions for assembling power, ground, and wire connections for the URC.
Instructions for installing accessories in dash-mounted configurations.
Procedures for installing accessories in remote-mount configurations.
Details on the Vehicle Interface Port (VIP) for control head operations and inputs.
Information on the accessory connector assembly, including disassembly and assembly.
Describes the components and unique items provided with motorcycle radio models.
Overview of the motorcycle radio installation process and key steps.
Key considerations and tips for a successful motorcycle radio installation.
Instructions for mounting the universal mounting plate on the motorcycle.
Procedures for mounting the speaker and control head in various configurations.
Steps for installing the antenna base and routing antenna cables.
Guidance on routing various cables for the motorcycle radio system components.
Instructions for installing the transceiver and connecting cables within the enclosure.
Steps for connecting cables to O9, O5, and O3 control heads.
Instructions for installing dust covers to protect unused connectors.
Ensures proper wiring of ignition sense for radio operation.
Verifies correct grounding and accessory wiring for the radio.
Techniques to enhance the quality of power and ignition lines for reliable operation.
Information on how to order replacement parts and equipment.
Accessing the online catalog for parts and information.
Addresses for submitting written orders for replacement parts.
| GPS | Yes |
|---|---|
| Bluetooth | Yes |
| Frequency Range | 136-174 MHz (VHF), 380-470 MHz (UHF Range 1), 450-520 MHz (UHF Range 2), 764-870 MHz (700/800 MHz) |
| Digital Protocol | P25 Phase 1 & 2 |
| Operating Temperature | -30°C to +60°C |