8-14
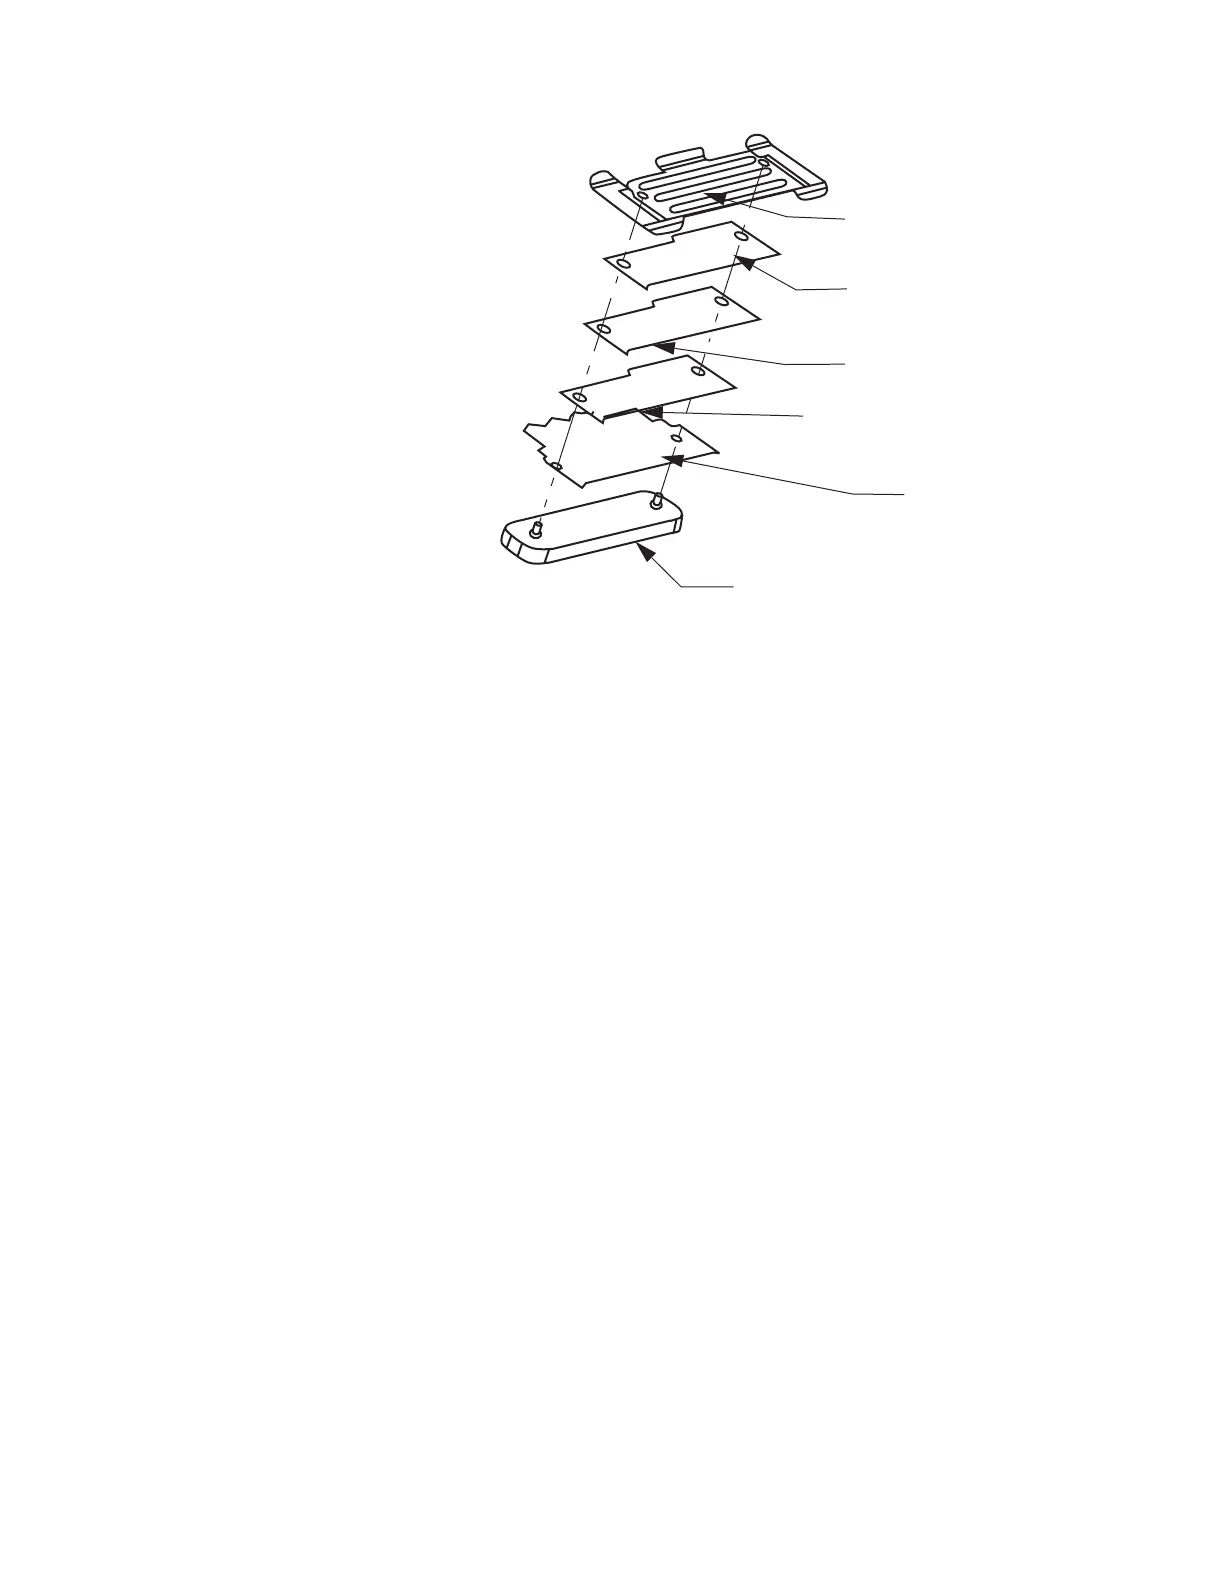
Figure 8-18 Replacing the Universal Controls Flex Bracket
6. With the controls flex universal contacts facing down, align holes
in the controls flex to match the pegs on the alignment tool.
7. Peel the bottom liner from the double-sided adhesive and apply
to the controls flex using the alignment pegs shown above. The
adhesive should align to the outer edges of the flex. Two pieces of
adhesive are supplied in case of assembly error.
8. Apply hand pressure to the adhesive.
9. Peel the top liner from the adhesive and apply the new bracket
using the alignment pegs. The bracket should be assembled to the
adhesive on the non-coated side. The top edge of the bracket
should closely align with the edge of the controls flex.
10. Apply pressure to the controls flex and the bracket.
11. Continue with the remaining steps for reassembling the controls
seal into the NEW housing assembly, as described earlier in this
chapter.
12. Once the assembly is fully completed, the dust cover may be
removed.
Universal Connector
Bracket
Top Liner
(Remove)
Adhesive
Bottom Liner
(Remove)
Flex
(Contacts Facing Down)
Universal Bracket
Bracket

 Loading...


