Do you have a question about the Motorola NNTN9212 and is the answer not in the manual?
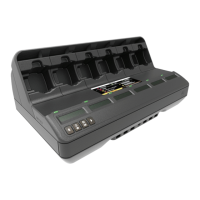
Provides detailed instructions for replacing APX-series Pocket Inserts on an IMPRES 2 Multi-Unit Charger.
Lists the specific tools needed for the pocket insert replacement procedure.
Details requirements for a clean environment and adherence to Electrostatic Discharge (ESD) safety protocols.
Unplug the MUC and remove the four Phillips screws from the rear shroud.
Remove TorxT10 screws from the pocket insert and disengage it from the unit.
Disconnect the old pocket insert cable and connect the new one, ensuring proper orientation.
Align and slide the new pocket insert into place, then secure it with the TorxT10 screw.
Reinstall the rear shroud, secure with Phillips screws, and verify the MUC's LED operation.
| Brand | Motorola |
|---|---|
| Model | NNTN9212 |
| Category | Battery Charger |
| Language | English |