9
9
English
Figure 11: Reinstall the T10 screw and tighten to 6 in-lbs.
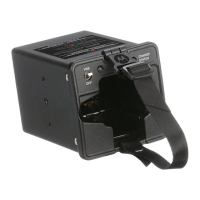
9. Slide the rear shroud onto the unit. Slide both sides forward,
and lock the tabs into place to reinstall the hood.
Figure 12: Hood reinstallation.
MN005697A01.book Page 9 Friday, July 19, 2019 10:40 AM

 Loading...