- 9 -
Wall Mounting (optional)
For some applications, you will find it convenient to mount IESH-MB on
the wall, as illustrated below.
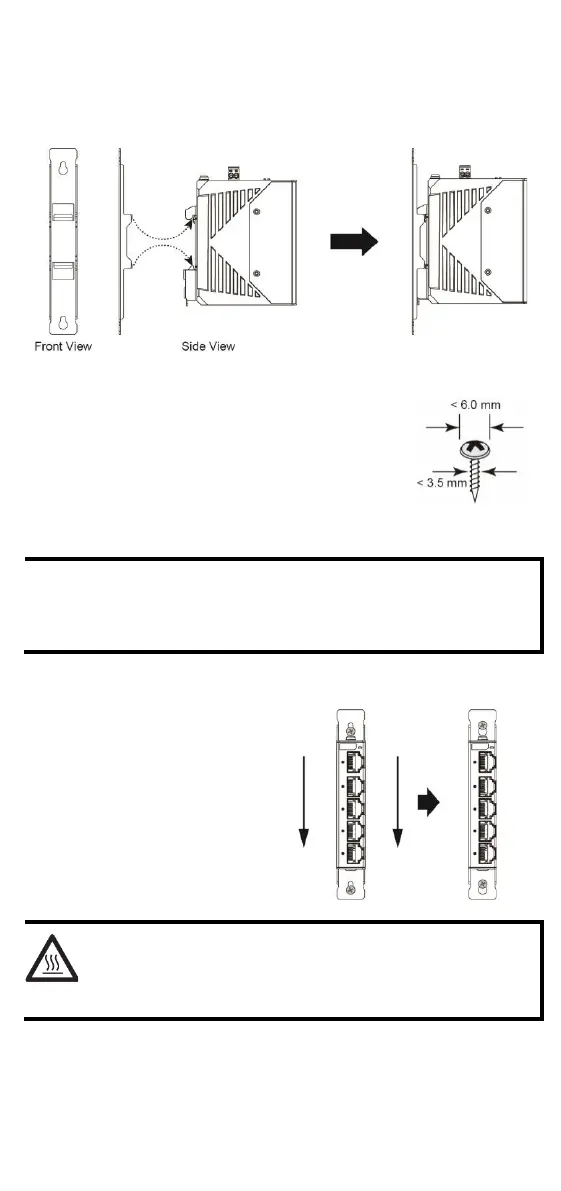
There are two options for installation: The first option
is to hook the IESH-MB DIN-rail latch on the opening
of the wall mount kit (see picture above) and then
mount the wall-mount kit on the wall with screws.
(The other option is to perform these two steps in
the other order.) The heads of the screws should be
less than 6.0 mm in diameter, and the shafts should
be less than 3.5 mm in diameter, as shown in the
figure at the right.
Before tightening screws into the wall, make sure the screw
head and shank size are suitable by inserting the screw into
one of the keyhole-shaped apertures of the Wall Mounting
Plates.
Do not screw the screws in all the way—leave about 2 mm to allow
room for sliding the wall mount panel between the wall and the screws.
Once the screws are fixed in the
wall, insert the two screw heads
through the large parts of the
keyhole-shaped apertures, and
then slide IESH-MB downwards,
as indicated. Tighten the two
screws for added stability.
WARNING
External parts are hot. Take necessary precautions if it is
necessary to touch.
 Loading...