9
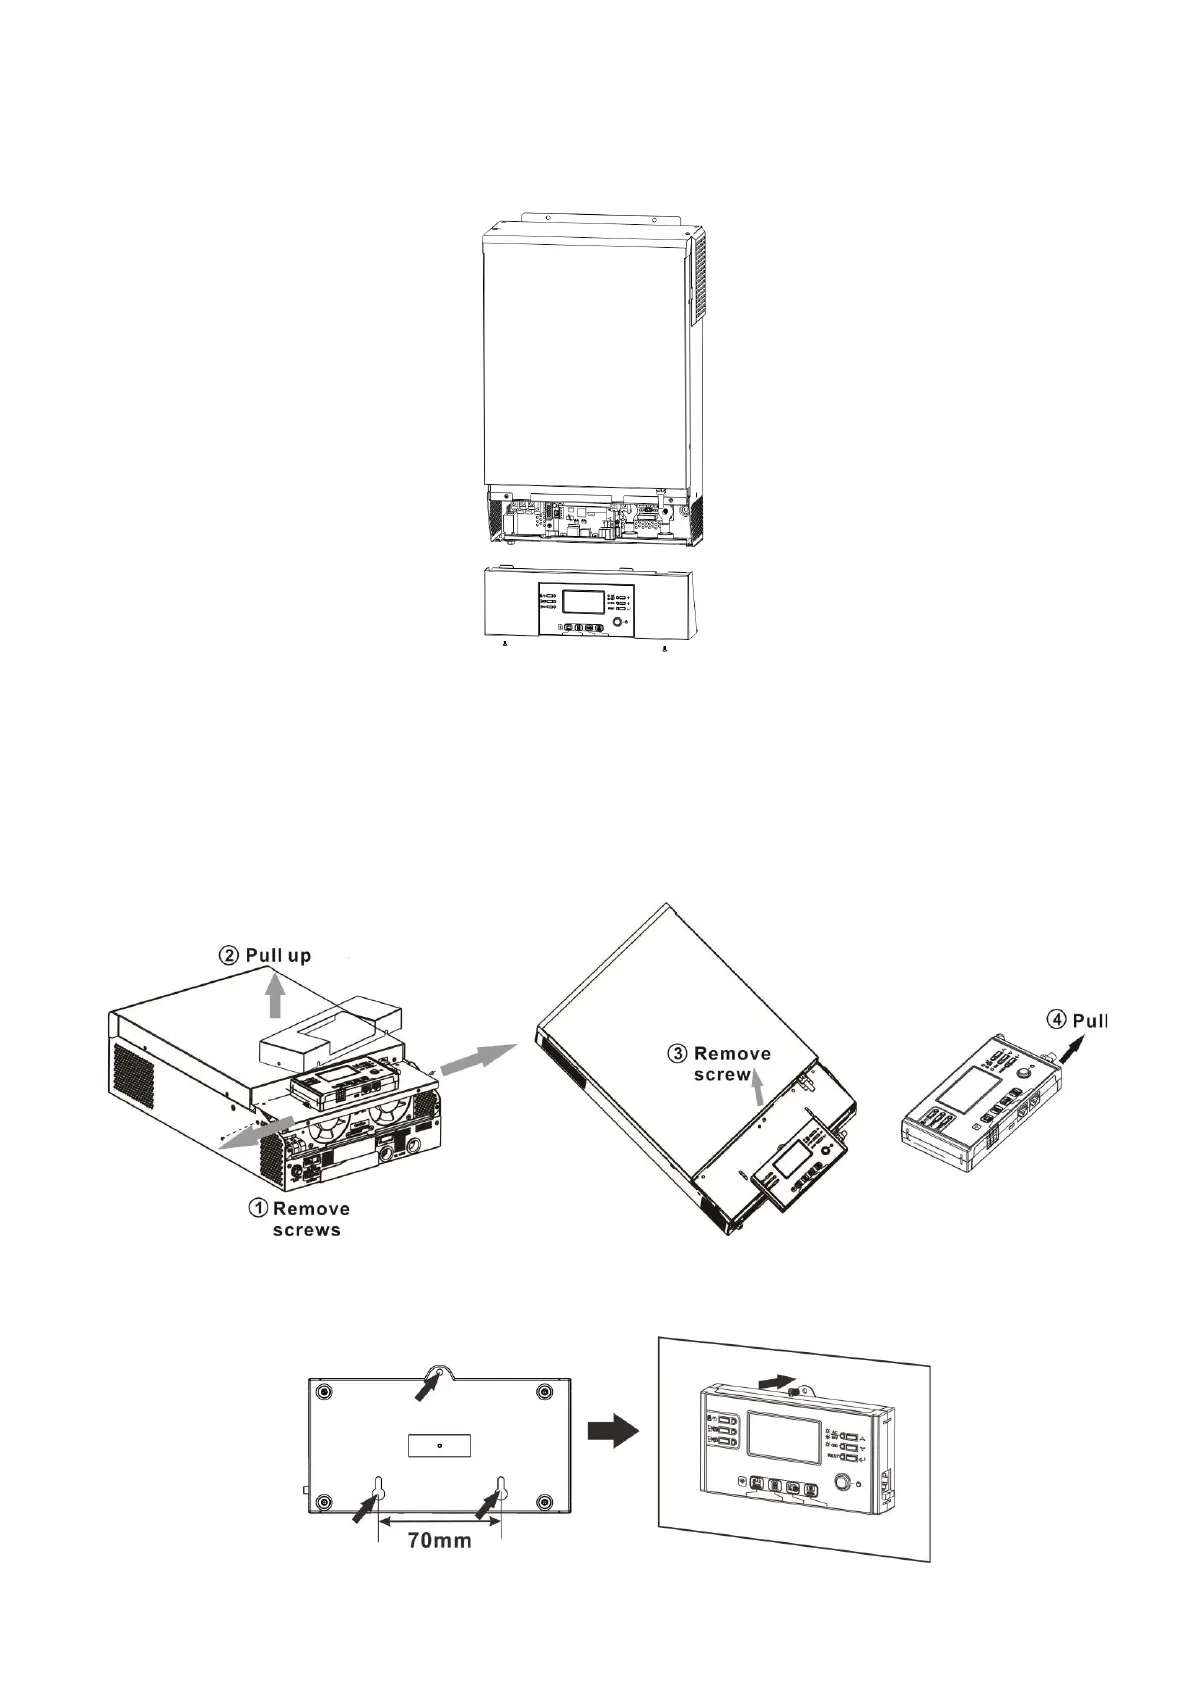
Final Assembly
After connecting all wirings, please put bottom cover back by screwing two screws as shown on the below
chart.
Remote Display Panel Installation
The LCD panel can be removable and installed in a remote site with an optional communication cable. Please
follow below steps to implement this remote panel installation.
Step 1. Loosen the screw on the two sides of bottom case and push up the case cover. Then, remove screw
on the top of the display panel. Now, the display can be removed from the bottom case. Then, pull out the
cable from the remote communication port.
Step 2. Drill two holes in the marked locations with two screws as shown below chart. Place the panel on the
surface and align the mounting holes with the two screws. Then, use one more screw on the top to fix the
panel to the wall and check if the remote panel is firmly secured.
 Loading...