4
3. INSTALLATION
3.1 Unpacking and Inspection
Before installation, please inspect the unit. Be sure that nothing inside the package is
damaged. You should have received the following items inside of package:
Solar charge controller x 1
User manual x 1
Communication cable x 1
Battery Voltage Sense x 1
Software CD x 1
3.2 Preparation
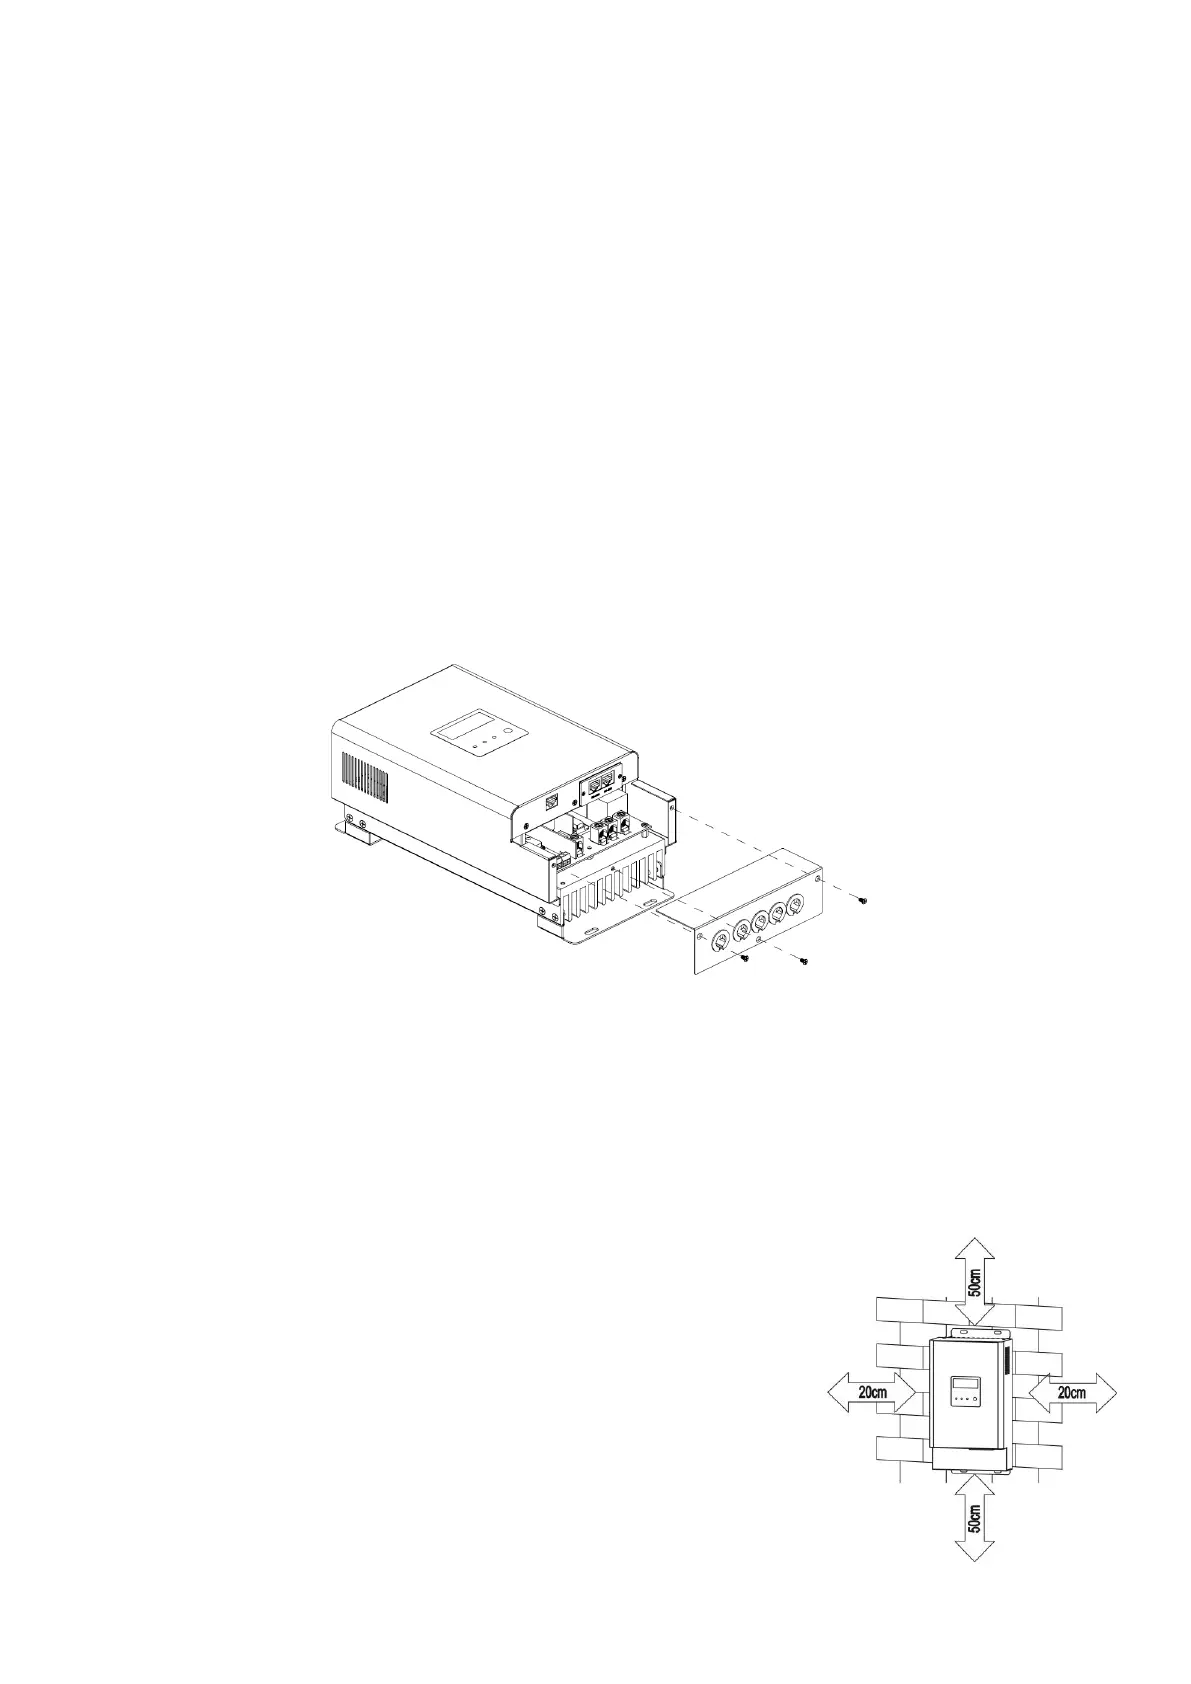
Before connecting all wirings, please take off wiring box cover by removing screws as
shown below.
3.3 Mounting the Unit
Consider the following points before selecting where to install:
This solar charge controller is designed in IP31 for indoor applications only.
Do not mount the unit on flammable construction materials.
Mount on a solid surface
Install this charger at eye level in order to allow the LCD display to be read at all
times.
For proper air circulation to dissipate heat, allow a
clearance of approx. 20 cm to the side and approx. 50 cm
above and below the unit.
The ambient temperature should be between 0°C and 55°C
to ensure optimal operation.
The recommended installation position is to be adhered to
the wall vertically.
 Loading...