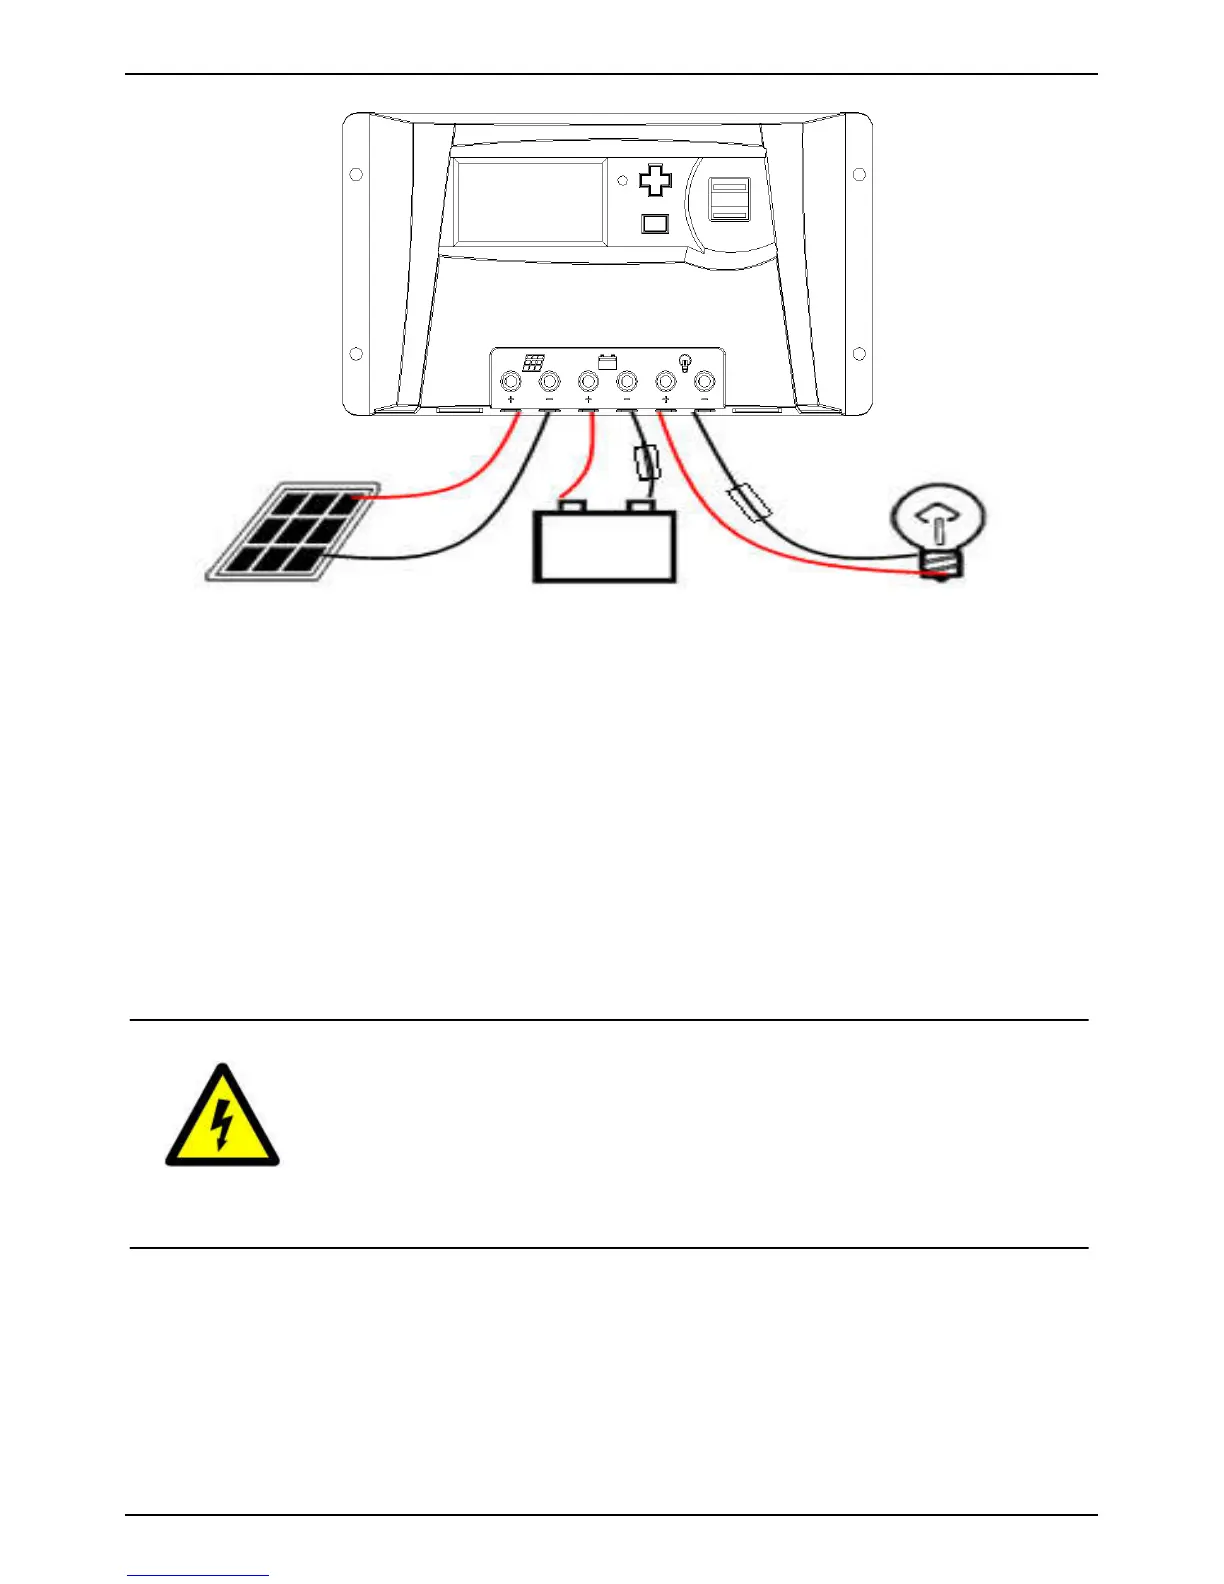
Figure 4-2: Connecting Diagram
4.3 Wiring
A、 Choose the appropriate cables(fix the controller on the wall or other
vertical plane).
B、 Prepare cutting pliers, cross screwdriver and multi-meter, etc.
4.4 Installation Process
A. Mount the controller on the wall and fasten the screws.
B. Check whether the battery voltage and solar panels array voltage is within
the requested range.
C. Switch off the over-current breaker or fuse of the battery, solar panels
array and load.
D. Wiring.
Fuse
① ② ③
Note: Please switch off the breakers of battery, solar
panels array before installing the controller. Do not touch
the positive and negative pole of solar panels or battery
at the same time when installing, otherwise you have the
risk of electrical shock.