Page 30
mrcool.com
Indoor Unit Installation
Indoor Unit
Space behind unit
Refrigerant piping
Drain hoseSignal wire
Insulation tape
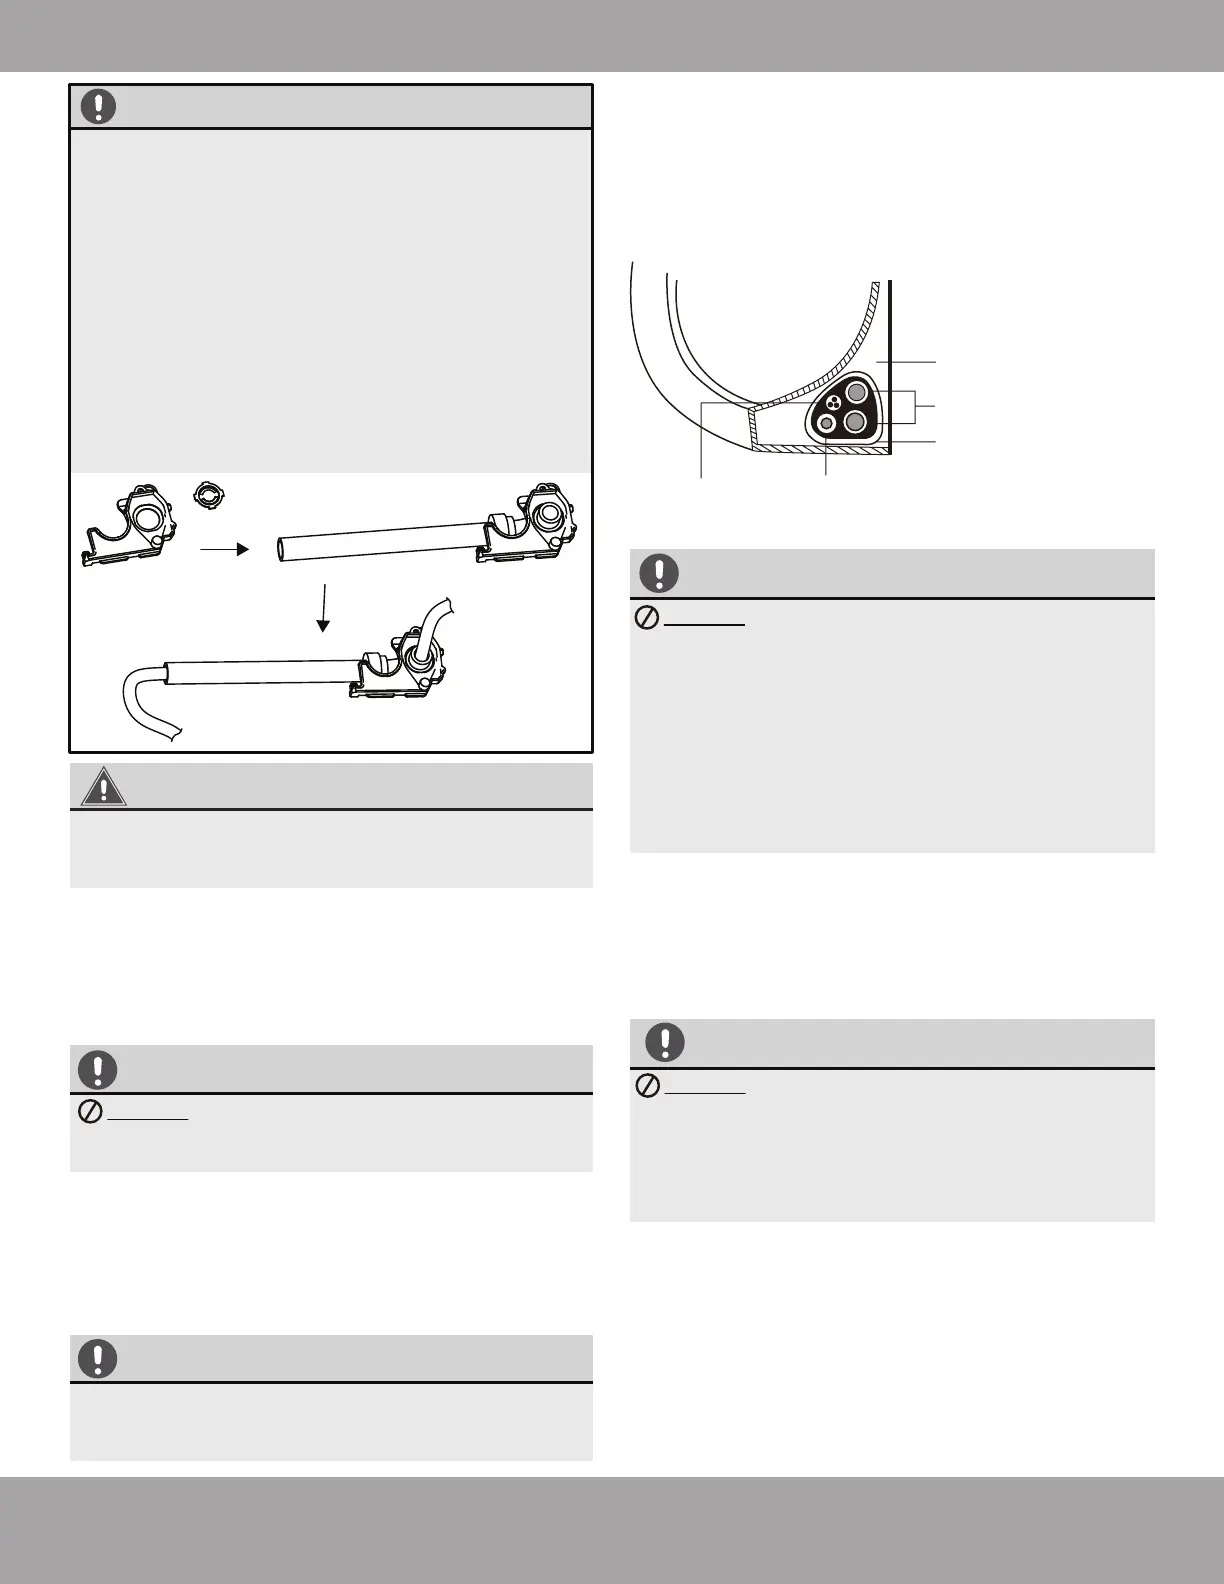
Fig. 5.15
CAUTION
DO NOT intertwine the signal cable with any
other wiring when bundling these items
together, as this could cause the system to
malfunction.
Ensure the drain hose is at the bottom of
the bundle as shown above. If the drain
hose is put at the top of the bundle it could
cause the drain pan to overflow, which
could result in system failure, water damage
and/or fire.
•
Step 9: Wrap Piping and Cables
Before passing the piping, drain hose, and signal
cable through the wall hole, you must bundle them
together to protect and insulate them.
1. Bundle the refrigerant pipes, drain hose, and signal
cable in the orientation as shown in Fig. 5.15.
2. Using adhesive vinyl tape, secure the drain hose to
the underside of the refrigerant piping.
3. Using insulation tape, wrap the signal wire,
refrigerant piping, and drain hose tightly together.
Then, double-check that everything has been
bundled.
CAUTION
DO NOT wrap the ends of the piping. You will
need access to them in order to test the
system for leaks when the installation
process has been completed (refer to the
Electrical Checks and Leak Checks section of
this manual for more information).
IMPORTANT
If the electrical code or the region the unit is
being installed in requires the use of conduit
tubing for the indoor unit wiring to run
through, please follow the steps below before
attempting to wire the unit (Refer to Fig. 5.14):
1. Remove the knock-out panel from the rat
baffle of the indoor unit, as shown below.
This is required in order to make the hole
large enough to allow the conduit tubing
to fit into it.
2. Once the conduit tubing has been
installed, run the wiring through the
conduit tube and into the unit to be
connected.
All wiring must be installed strictly in
accordance with the wiring diagram located
on the back of the indoor unit front panel.
WARNING
6. Facing the front of the unit, connect the wiring by
securely fastening the u-lug of each wire to the
corresponding terminal on the terminal block
using a screwdriver. The wiring connections must
be made according to the wiring diagram on the
indoor unit.
7. Double-check the wiring connections to ensure
they are secure. Then, use the cable clamp to
secure the cable to the unit. Be sure to screw the
clamp tightly to the unit.
8. Close the wire cover and reinstall the plastic
panel on the back of the unit.
CAUTION
DO NOT mix up live and null wires, as it
could create a potentially dangerous
situation and cause unit to malfunction.
NOTE ABOUT WIRING
The wiring connection process may differ
slightly depending upon the unit or the region
it is being installed in.
Fig. 5.14