Page 10
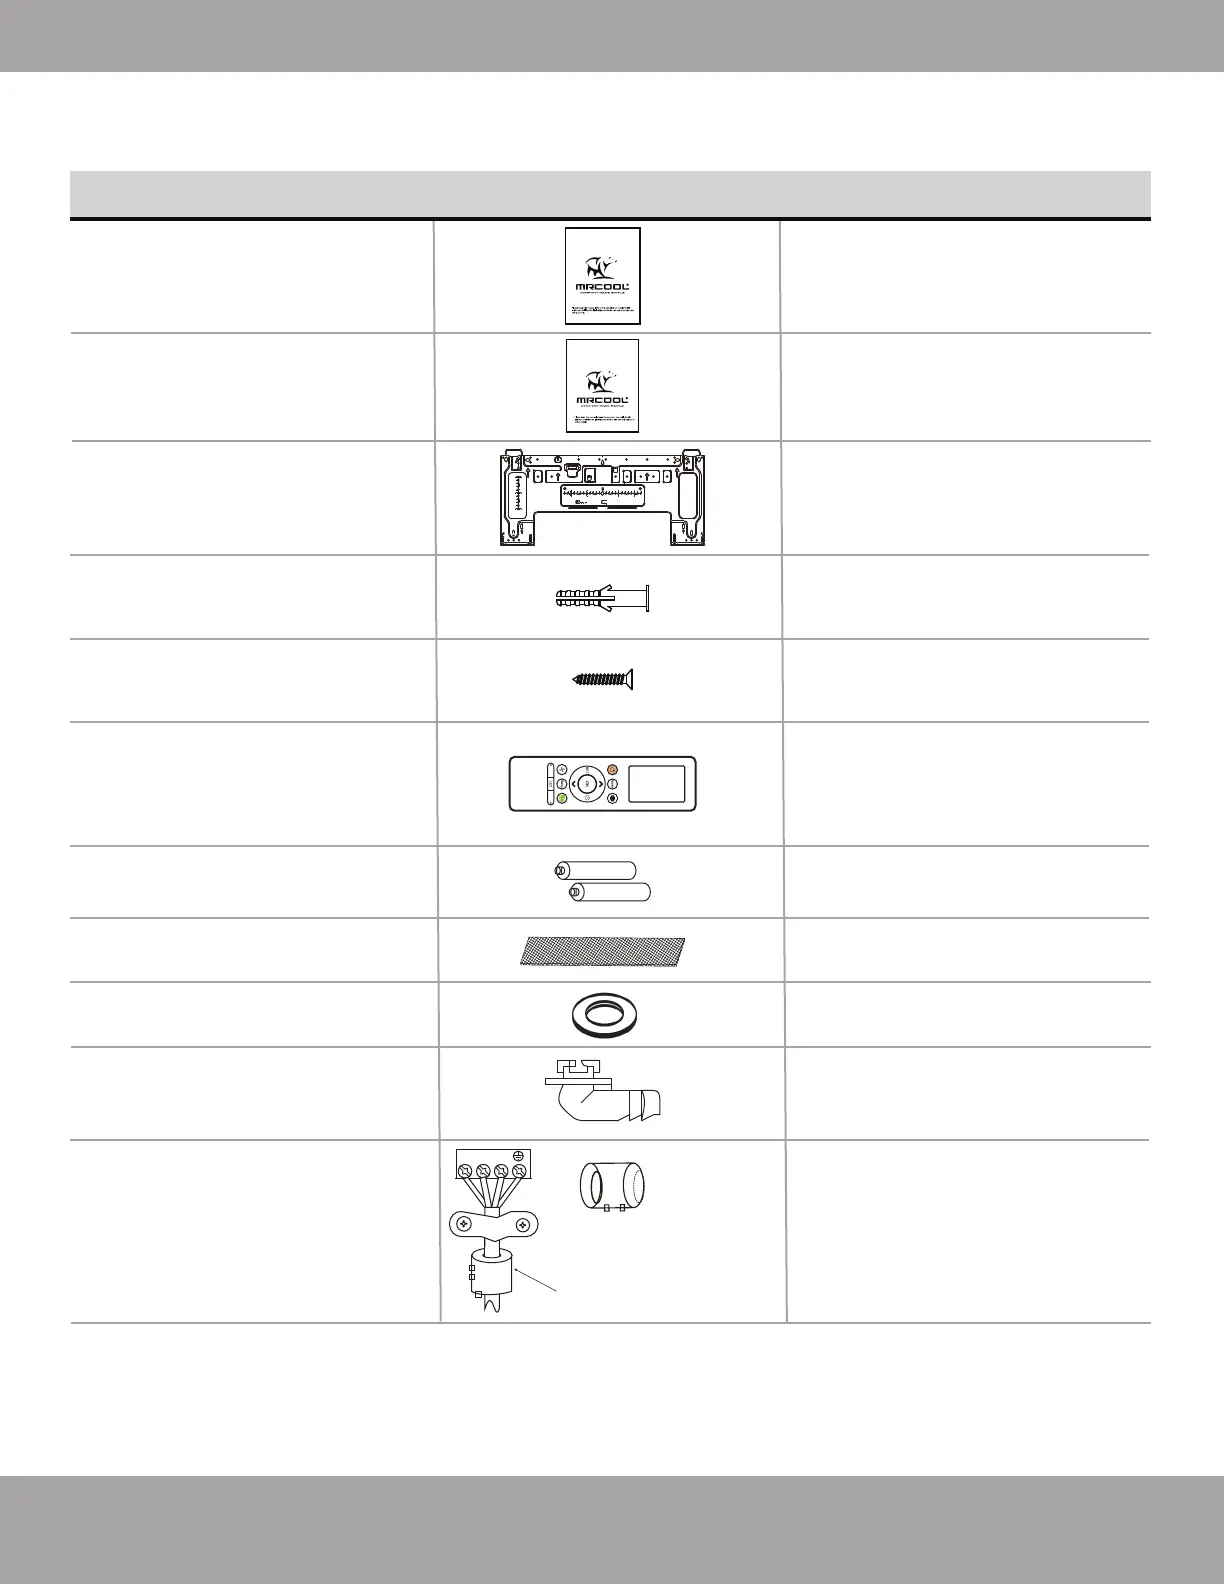
Accessories
mrcool.com
Note: Illustrations are for explanatory purposes only - The actual shape and size may vary.
*If supplied with unit, please refer to the wiring diagram for further details of how to install it on the
connective cable.
The listing below shows the accessories and parts (these may vary depending on purchase &
options). Use all of the installation parts and accessories to install the system. Improper
installation may result in water leakage, electrical shock, fire, and/or equipment failure.
Batteries
2
Small Filter
1
Seal
(for cooling & heating models)
1
Mounting Plate
(some models
depending on options)
Anchors
Mounting Plate Screws
Remote Control
(some models)
1
5~8
(depending on models)
5~8
(depending on models)
1
PART LOOKS LIKE... QUANTITY
1
Drain Joint
(for heating & cooling models)
Installation & Owner’s
Manual
Remote Control
Manual
(some models)
1
1
Please read this manual carefully before installation and keep it for future reference.
Owner’s Manual
E-Star™ DIY
Series
For more details visit www.MrCool.com
For more details visit www.MrCool.com
Please read this manual carefully before installation and keep it for future reference.
Remote Control
User Manual
Magnetic Ring & Belt
(some models)*
Varies by model
Humidity
Boo st
FROM EDGE TO HOLE CENTER:50mm
FROM EDGE TO HOLE CENTER:100mm
150
100
100
100
50
50
50
2
2
2
4
4
4
6
RECOMMAND
LIQUID
GAS
BUBBLE
LEVEL
mm
inch
mm
inch
1 2 3
Pass the belt through
the hole of the
Magnetic ring to fix it
on the cable