Page 26mrcool.com
Indoor Unit Installation
PIPING DIRECTION & EXITING THE UNIT:
• In some regions a conduit tube must be used
for the cabling exiting the unit. In order to
ensure there is enough space for the piping
and conduit when the unit is mounted to the
wall, it is recommended to attach the drain
hose to the right-hand side of the unit (when
you’re facing the back of the unit).
• When selecting if the piping will exit the unit
on the left-hand or right-hand side, please
ensure that the pipes exit horizontally. This
will ensure that the removal or installation
of the unit’s lower panel will not be affected
by the piping.
4.
Grip the refrigerant piping of the indoor unit at
the base of the bend. Then, slowly and with even
pressure, bend the piping to the orientation
selected for it to exit the unit (Refer back to
Fig. 5.6).
CAUTION
Be extremely careful not to dent or damage
the piping while bending away from the unit,
as this could affect the unit’s performance.
5.
Seal the ends of the piping of the indoor unit to
ensure no moisture or foreign debris enters it.
Keep the piping sealed until they are ready to be
connected.
Step 5: Hook Indoor Unit to Mounting Plate
In this step you will partially install the indoor unit to
the wall mounting plate in order to make necessary
piping and electrical connections.
1.
Carefully lift the air handler and carry it to the
mounting plate. Slightly lean the top of the air
handler toward the wall and hook the top of the
indoor unit on the upper hooks of the wall
mounting plate.
2.
The hooks on the mounting plate are smaller
than the holes on the back of the unit. This allows
the unit to be adjusted on either side. If you find
there is not ample room to connect the piping to
the unit, the unit can be adjusted left or right by
approximately 1.18 - 1.95 in (30 - 50 mm)
depending on model (Refer to Fig. 5.7).
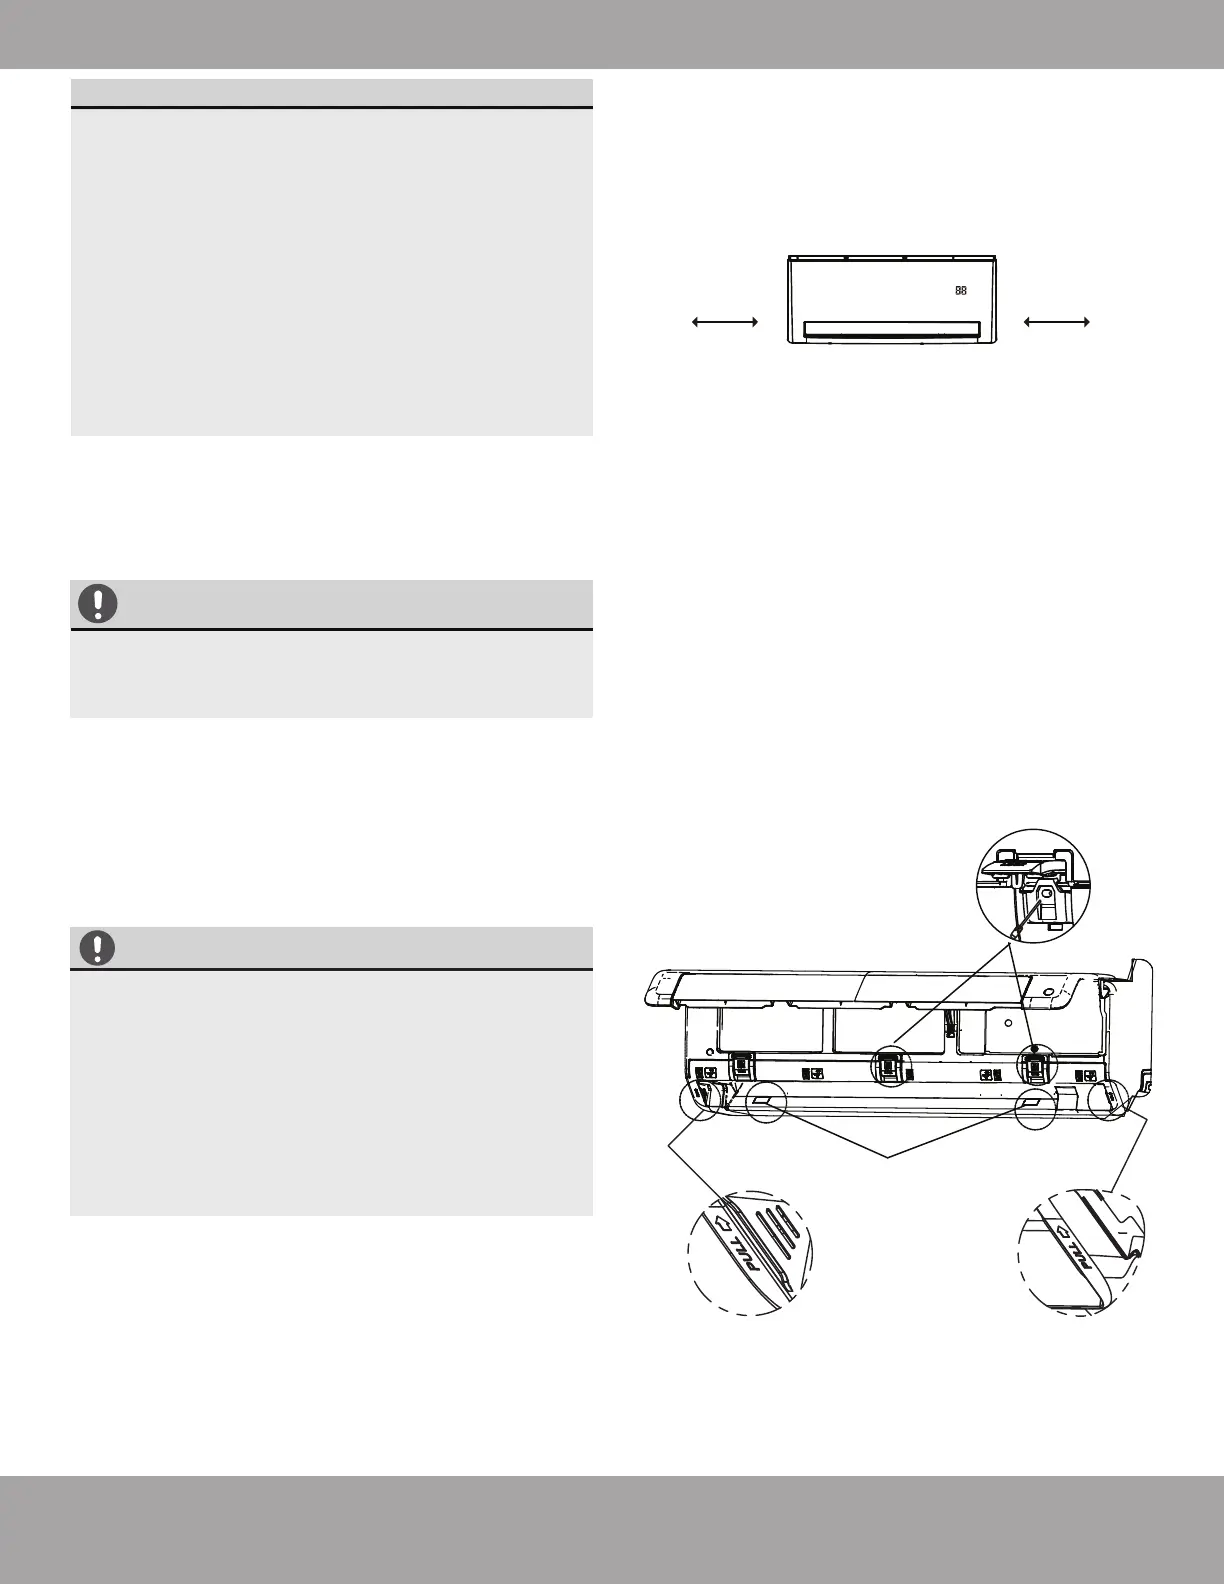
Adjust Unit to the left or right
1.18-1.95 in
(30-50 mm)
1.18-1.95 in
(30-50 mm)
Step 6: Remove Indoor Unit Lower Panel
In this step you will remove the lower panel of the
indoor unit. This will allow access to make necessary
refrigerant piping connections, connect the drainage
pipe and connect the signal cable (Refer to Fig. 5.8).
IMPORTANT
Depending on the type of installation being
performed (connecting indoor unit to existing,
embedded piping or not), selection of where
the piping will exit the unit, and room
necessary to make connections, it may be
necessary to connect the refrigerant piping,
drain hose and signal cable before attempting
to hook and mount the indoor unit to the
mounting plate. If this is the case, please skip
to the next step.
Lift the front panel of the air handler and lock it
into the open position as shown below.
1.
Open the screw covers shown below and remove
the screws using a screwdriver.
2.
Then, unscrew the screws shown below on the
lower panel of the air handler.
3.
Hold both sides of the lower panel on the places
that are both labeled “PULL.” Then, carefully pull
the lower panel upwards to release the buckles
so the panel can be removed from the unit.
4.
Open the screw covers
and unscrew the
screws.
Unscrew the screws
from the lower panel
of the indoor unit.
Pull the panel upwards
to release the buckles and
remove it from the air handler.
Fig. 5.7
Fig. 5.8