EasyManuals Logo

MrCool Universal Series Service Manual

MrCool Universal Series
74 pages
To Next Page IconTo Next Page
To Previous Page IconTo Previous Page
Page #18 background imageLoading...
Page #18 background image
mrcool.com17
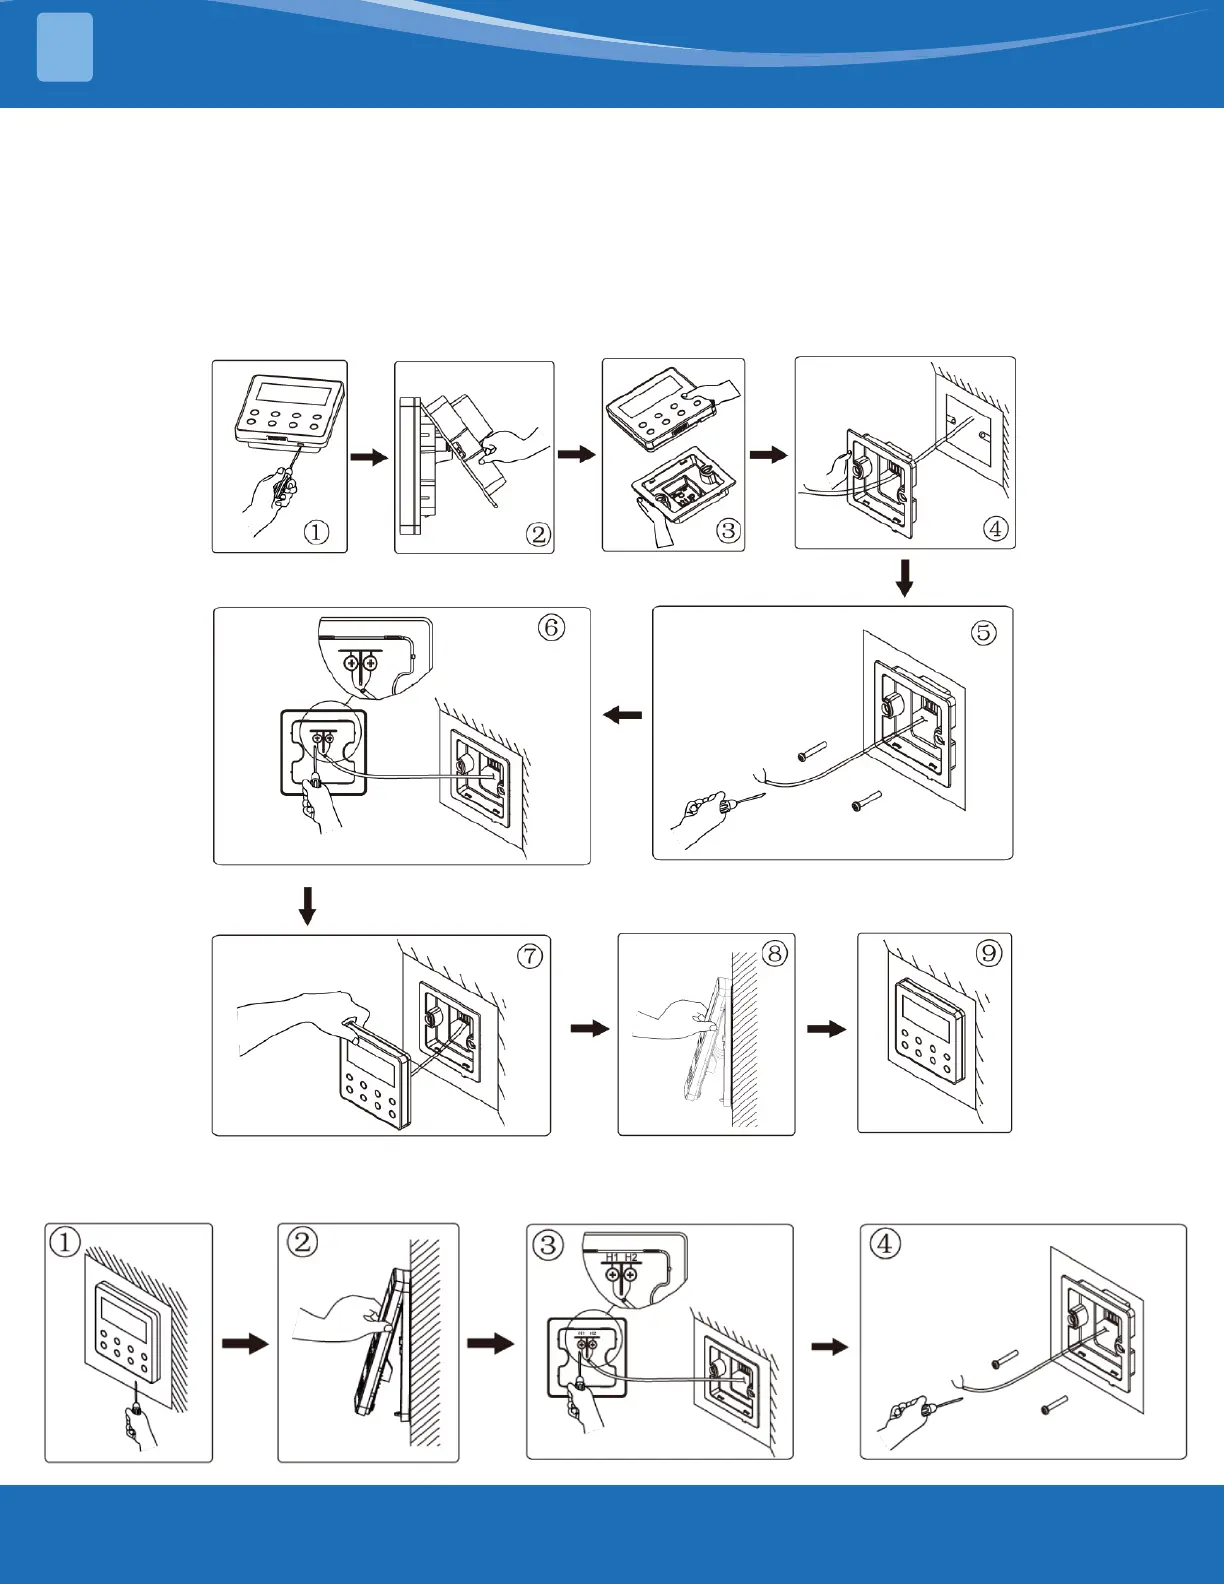
3. Hold the sole plate of the controller to the wall and use M4x25 to attach the sole plate onto the installing
hole of the wall.
4. Connect the 2-core STP with the two wiring terminals on the back of the wired controller and tighten the
screw. There is no polarity for these two wiring terminals, but it should not be connected to a strong current.
5. Buckle the panel of the wired controller with the sole plate, and installation is complete.
Removal of Wired Controller
WIRED CONTROLLER
2

Other manuals for MrCool Universal Series

Questions and Answers:

Question and Answer IconNeed help?

Do you have a question about the MrCool Universal Series and is the answer not in the manual?

MrCool Universal Series Specifications

General IconGeneral
TypeInverter
BrandMrCool
SeriesUniversal Series
RefrigerantR410A
Phase1
Heating CapacityVaries by model
Cooling CapacityVaries by model
CompatibilityUniversal
HSPF Rating10
Voltage208/230V
Operating Temperature (Cooling)Varies by model
Operating Temperature (Heating)Varies by model
Indoor Noise Level (dB)Varies by model
Outdoor Noise Level (dB)Varies by model
Indoor Unit Dimensions (H x W x D)Varies by model
Outdoor Unit Dimensions (H x W x D)Varies by model
Indoor Unit WeightVaries by model
Warranty5 years

Related product manuals