mrcool.com 16
16
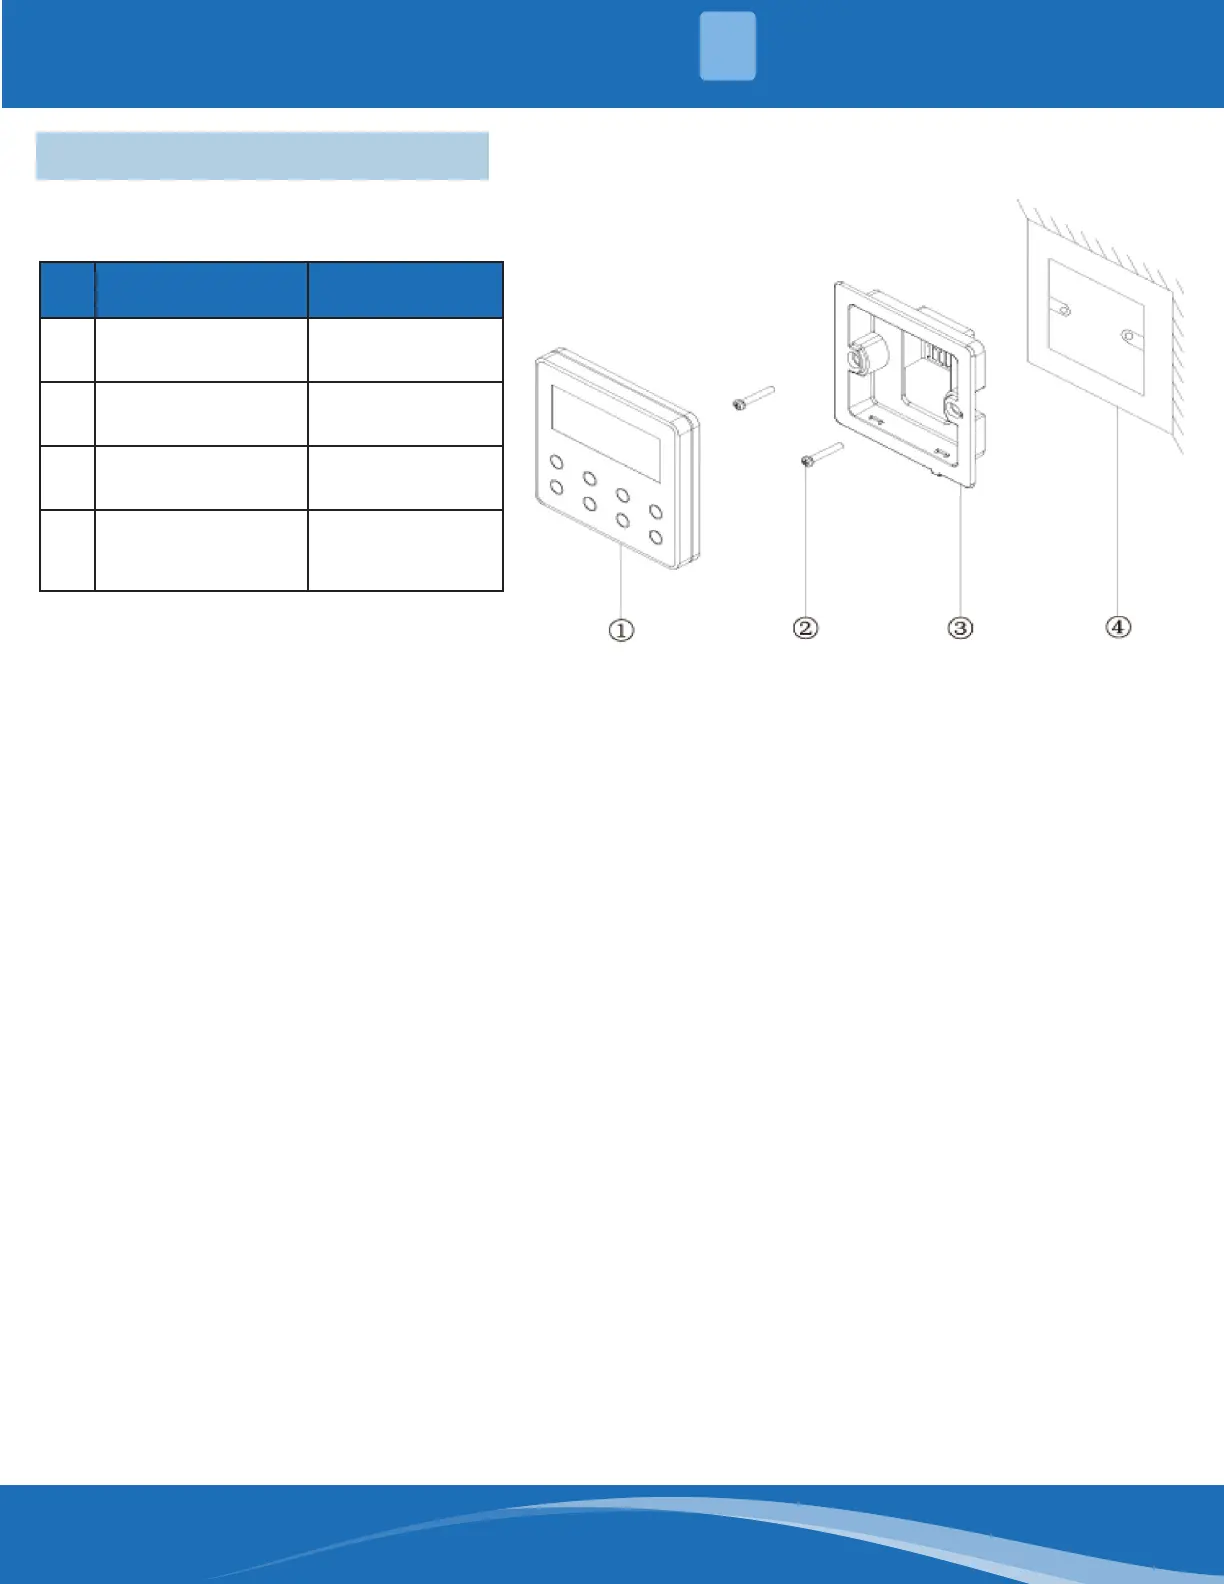
2.4 Installation of Wired Controller
Accessories List
No. Name Quantity
1 Wired Controller 1
2 M4x25 Screw 2
3 Installation Box 1
4
Inside-Wall
Junction Box
1
(To be prepared
by installer)
Installation Location Requirements
1. Do not install the wired controller in a location that is wet or likely to become wet.
2. Do not install the wired controller near high-temperature objects or under direct sunlight.
3. Do not install the wired controller in a position facing a window, in order to avoid interference with other
controllers of the same model nearby.
4. Before installation, cut o the power supply of wiring inside the wall.
5. In order to avoid malfunction due to electromagnetic interference and other causes, ensure the following:
1. Ensure the interface of the communication wire is correct, otherwise communication cannot occur.
2. The signal wire of the controller should be separated from the power cord and the indoor and outdoor
connecting wires. The shortest distance should be at least 7.87in (20cm), otherwise communication
cannot occur.
3. If the unit is installed in a location that is likely to be impacted by electromagnetic interface, the signal
wire of the controller should be made of STP (shielded twisted pair).
6. The wired controller should only be installed indoors; its working temperature range is 32°F~122°F
(0°C~50°C)
Installation Steps
First, select the correct signal wire for the wired controller: 2-core signal wire (Diameter ≥ .03in (.75mm); Length
< 98.4ft (30m); Recommended length 26.2ft (8m).
1. Before installation, cut of the power supply of the indoor unit.
2. Pull the 2-core STP from inside the wall through the installing hole, and thread the wire through the
connecting hole in the back of the controller's sole plate.
WIRED CONTROLLER
2