EasyManuals Logo

MrCool Universal Series Service Manual

MrCool Universal Series
74 pages
To Next Page IconTo Next Page
To Previous Page IconTo Previous Page
Page #50 background imageLoading...
Page #50 background image
mrcool.com49
MAINTENANCE
4
4.4 Assembly & Disassembly
Assembly & Disassembly of Compressor
Note: Ensure there isn't any refrigerant in piping system and the power supply is cut o before
removing the compressor.
Step Illustration Handling Instruction
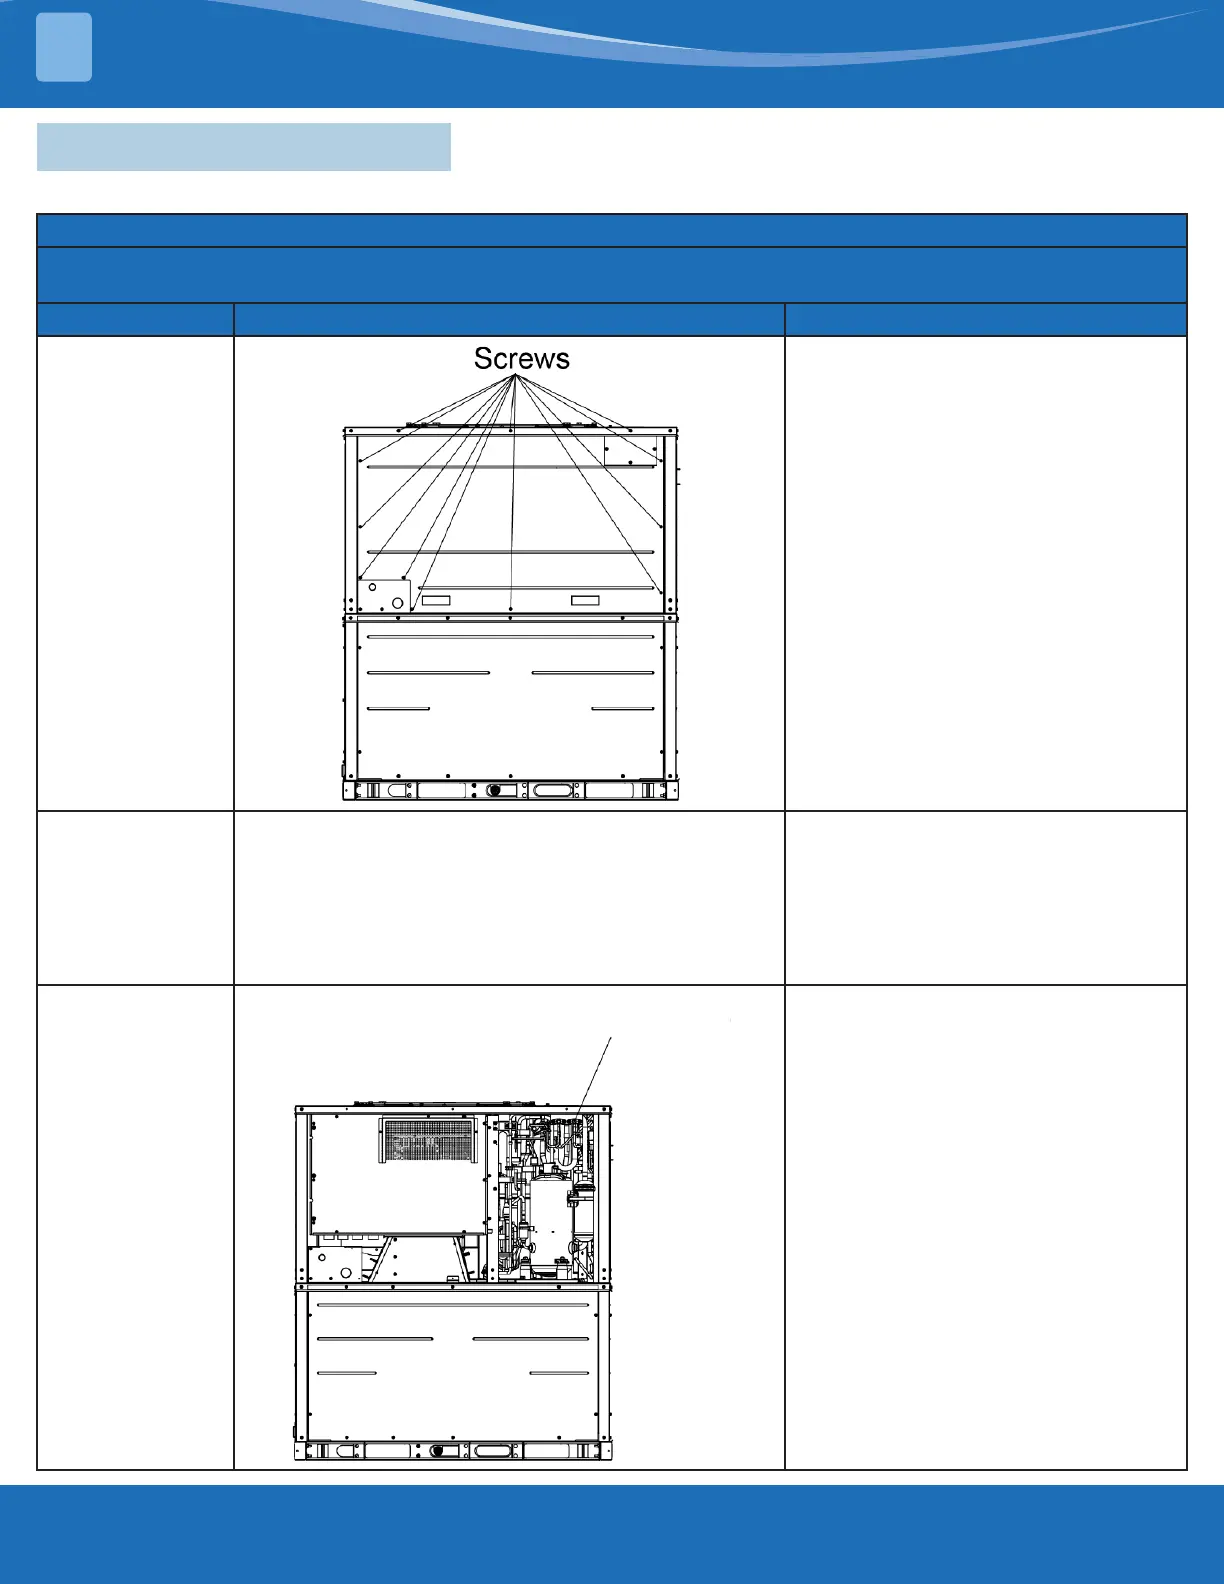
1. Open the front
panel
Unscrew the bolts (indicated by
arrows).
2. Disconnect the
power cord and
condenser fan
motor wires.
Disconnect the power cord and
condenser fan motor wires after
removing the side plate.
Note: Earmark the color of wire
corresponding to the terminal when
removing wire to avoid mistakes
when renewing wire connection.
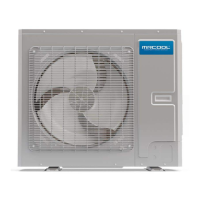
3. Recover
refrigerant in the
system
Connect vacuum recovery tank
with nozzle for adding freon for
recovery of refrigerant.
Note: Recovery work must be
complete as refrigerant is harmful to
the environment and animals.
Nozzles
MDPH180244 / MDPH180364

Other manuals for MrCool Universal Series

Questions and Answers:

Question and Answer IconNeed help?

Do you have a question about the MrCool Universal Series and is the answer not in the manual?

MrCool Universal Series Specifications

General IconGeneral
TypeInverter
BrandMrCool
SeriesUniversal Series
RefrigerantR410A
Phase1
Heating CapacityVaries by model
Cooling CapacityVaries by model
CompatibilityUniversal
HSPF Rating10
Voltage208/230V
Operating Temperature (Cooling)Varies by model
Operating Temperature (Heating)Varies by model
Indoor Noise Level (dB)Varies by model
Outdoor Noise Level (dB)Varies by model
Indoor Unit Dimensions (H x W x D)Varies by model
Outdoor Unit Dimensions (H x W x D)Varies by model
Indoor Unit WeightVaries by model
Warranty5 years

Related product manuals