42
Locations
Chains: Shown as solid lines in Figure-6.
Chain tensioners: There are (2) different styles, notated by A and B in Figure-6.
A1A1
A2A2
B1B1
B2B2
B3B3
B4B4
Figure-6
Chains Cont.
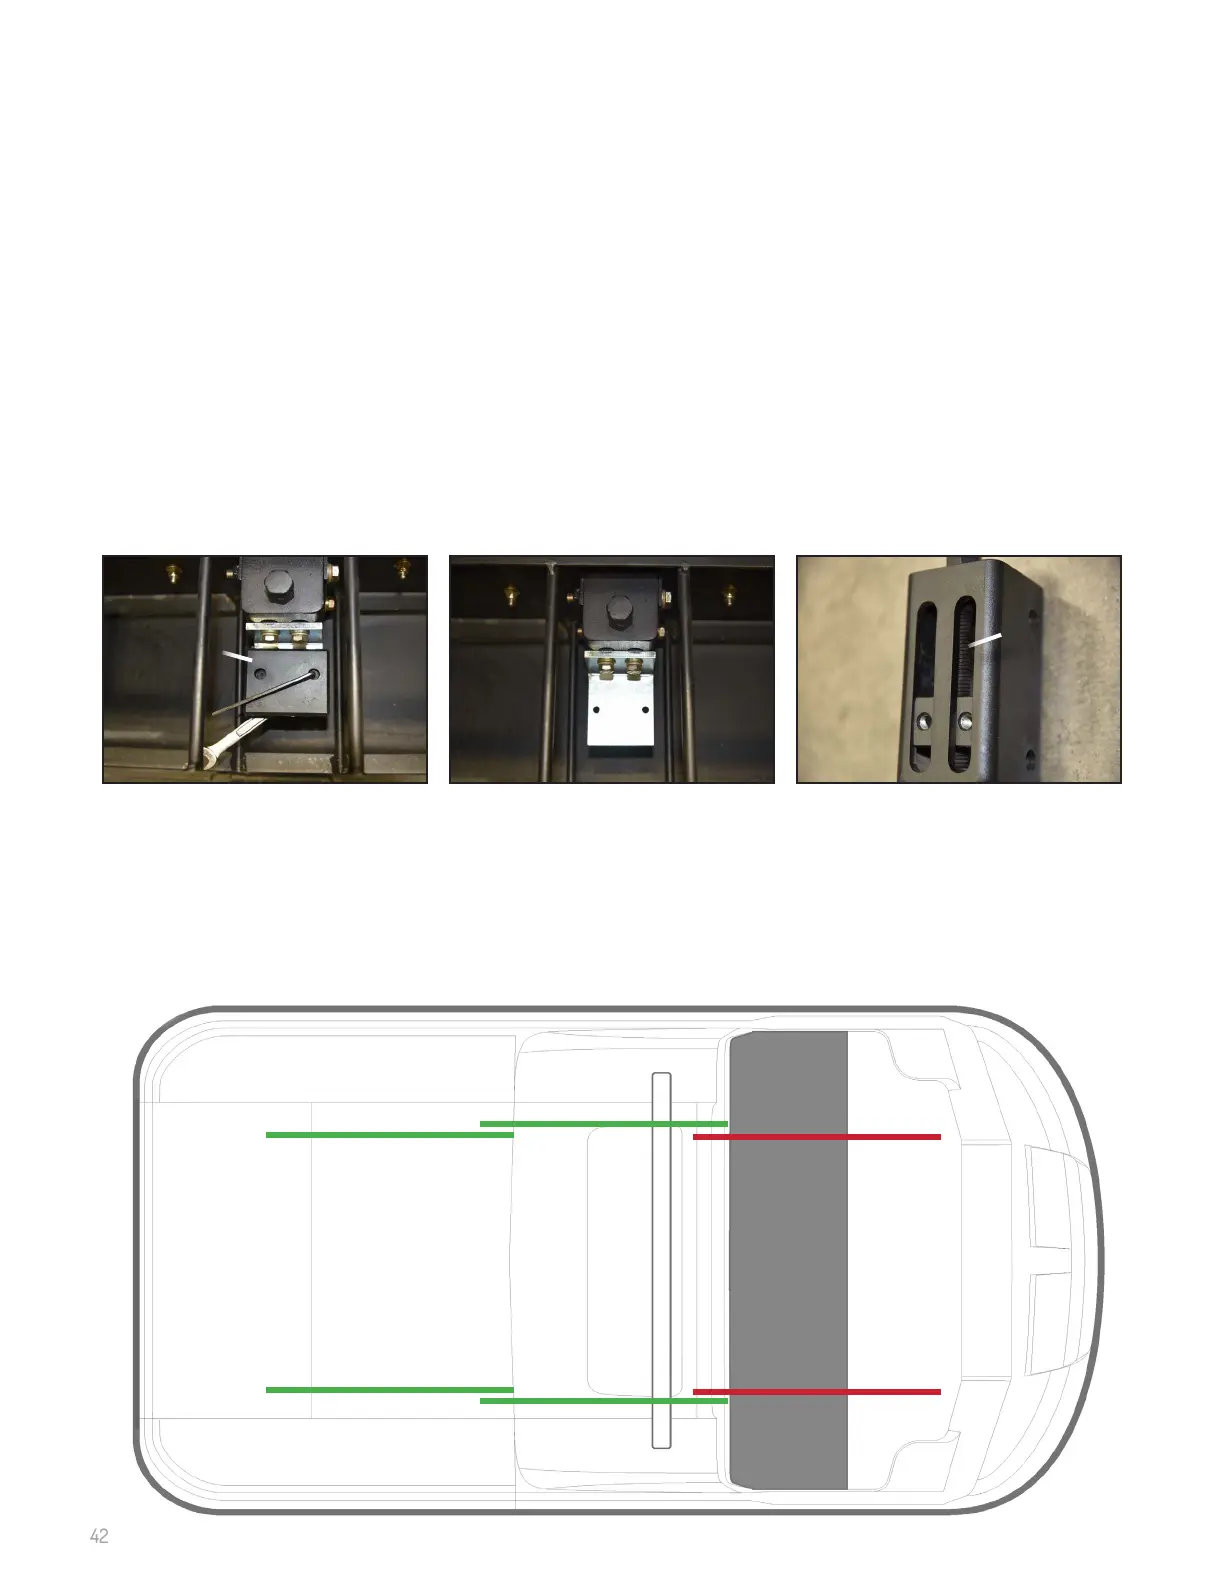
Tensioner Style “B” InspectionTensioner Style “B” Inspection
Plastic pad: The tensioner pad is made of plastic (A in Figure-3). As the chain moves across this pad, it will wear in a
pattern over time. A good tensioner pad should have at least 1/8” of material at its shallowest point. Bad pads may
be: broken in multiple pieces, worn down to metal, and/or a metallic noise is present while the vehicle is in motion.
If the pads are worn, simply use a 1/8” Allen and 7/16” wrench to remove the pads (Figure-4, 5). When installing
new pads, use new nyloc nuts and moderately tighten. Too tight will cause the Allen bolt to pull through the pad.
Note: It is possible to remove this pad with the chain on, but is easier when removed. Figure-4, 5 show the style
tensioner with chain removed.
Lubricating the tensioner: Inside the tensioner itself is a worm gear (B in Figure-5). This should be lubricated to
ensure smooth chain adjustment, and prevent seizing of the adjuster. Use sprayable white lithium grease to cover
the worm gear. If the worn gear is not visible, you must turn the adjusting nut until the L-shaped bracket is out of
the way. See Adjustment for instructions.
Figure-3
Bolt Removal
Figure-4
Pad Removed
Figure-5
Worm Gear
AA
BB