90
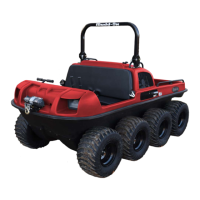
Repairing a Swamped Mudd-Ox XL
“Swamping” refers to the unfortunate event when a Mudd-Ox fills with water. This can be caused by improp-
er use of the vehicle including but not limited to: Entering large bodies of water, water with current, improper
grade entering/exiting water. If safely possible, shut off the Mudd-Ox before it fills with water. A running machine
can receive fatal mechanical failure if submerged in water. It’s not guaranteed the mechanical components will
survive if shut down beforehand. There are steps to clear water out of the system. All warranties are void with a
swamped machine. Proceed at your own risk.
Steps
1. See Towing for instructions on towing the Mudd-Ox back to land.
2. See Water Operation for draining all water out of the Mudd-Ox.
3. Haul to a mechanical repair facility. Remember for each minute that passes by, rust and corrosion is forming
inside major components.
4. Once in a facility, begin with the hydraulic system. Complete Oil Change under Hydrostatics steps #1-13. Do
not continue on, as the engine still has water. Attempting to turn over the engine may be catastrophic. You will
complete these steps later.
5. Now prepare the engine. See the engine owner’s manual for instructions on removing the air filter. It may be
possible to dry out, but replacement is recommended. Clean water out of the air intake system at this time.
6. Complete Oil Change under Engine steps #1-6 only. Note: Simply change the oil and filter. Do not attempt to
start the engine.
7. There is most likely water inside the engine cylinder walls. Leaving it inside can result in damaged engine
internals. See the engine owner’s manual for instructions to remove the spark plugs. When it is time to start
the engine, this will allow water to escape through the spark plug holes. Not doing this may result in damaged
engine internals. See engine owner’s manual for detailed information.
8. See Inspection under Engine Part 2: Coolant
A. If it passes: Continue to step #9.
B. If it does not pass: Complete Coolant Change steps #1-7.
9. Complete Draining the Tank under Fuel.
10. Replace the fuel filter. See Location 2 under Fuel.
11. At this point the hydraulics, engine oil, engine coolant, and fuel system should be prepared. Now, complete
Oil Change under Hydrostatics steps #15. Note: Water will most likely spray out of the spark plug holes. It is
recommended to put cardboard next to the holes to prevent water from spraying inside the vehicle.
12. Clean and reinstall the spark plugs.
13. Fill the tank with fresh fuel.
14. Turn the key to the “run” position, but do not crank the engine. You will hear the fuel pump priming. Do this
a couple times until you hear the fuel return draining back into the fuel tank. This means the fuel system is
properly cycled.
15. Complete Oil Change under Hydrostatics steps #16-18. Due to the physical properties of water and oil natu-
rally separating, it may take a significant amount (3x+ the capacity) of oil to clear the system of water.
16. Check the engine oil dipstick and add more oil if necessary. If it looks like milk, or a mixture of oil and water,
complete Oil Change under Engine and repeat until oil is clean.
17. Finish Oil Change under Hydrostatics steps #19-23.
18. Complete Bleeding the System under Engine Part 2: Coolant if the coolant was changed in step #8.
Note: After completing these steps, it is recommended to check all oils for signs of water as the systems may still
be contaminated. If there are problems with electrical systems not operating, check for bad fuses and relays as
explained in Electrical. Always remember a swamped machine is not guaranteed to work after these procedures.