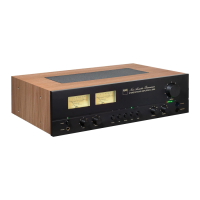
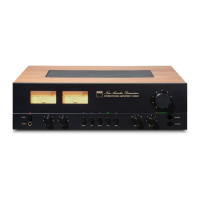
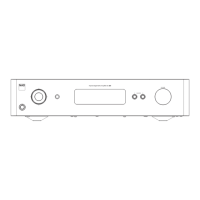
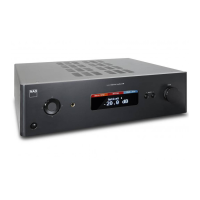
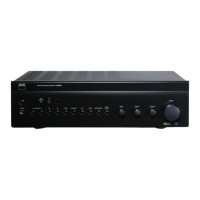
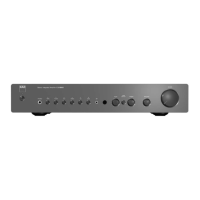
The NAD C 3050 is a stereophonic amplifier designed to deliver high-quality audio performance. It features a classic aesthetic with modern functionalities, including a pair of Power meters on the front panel that monitor input signal or speaker output levels. These meters are calibrated in Watts and dB (decibel) for an 8-ohm load, providing visual feedback on the amplifier's performance.
Usage Features:
The C 3050 offers a comprehensive set of controls for managing audio playback and system settings.
Power Management:
- Power LED Indicator: This indicator lights up amber in standby mode and green when powered on. In case of protection circuitry engagement (due to issues like excessively low loudspeaker impedance or short circuits), the LED will turn red, and sound will be muted. To reset, turn off the rear panel POWER switch, wait for cooling, check speaker connections, then switch the rear panel POWER switch back on and press the front panel POWER button.
- Power Button: With the rear panel POWER switch set to ON, pressing this button powers up the C 3050 from standby (amber LED) to operating mode (green LED, illuminated VU meters). Pressing it again returns the unit to standby.
- Auto Standby: This feature, compliant with European ecodesign regulations, automatically puts the C 3050 into standby mode after 15 minutes of no user interaction or audio activity. It can be enabled or disabled by pressing and holding the front panel PHONO button until its LED flashes twice (enabled) or once (disabled).
- Network Standby Mode: By default, or after a factory reset, the C 3050 enters Network Standby mode if there's no user interaction or active source input for 15 minutes. In this mode, network and Bluetooth connections are maintained at a reduced power consumption level. The unit can be switched back to operating mode by resuming playback, activating a network-connected app, playing a paired Bluetooth source, or pressing any SOURCE or POWER button.
- Deep Standby Mode: This mode offers the lowest power consumption (less than 0.5W). To enter Deep Standby, press and hold the front panel POWER button until the Power LED flashes twice. To exit, press any SOURCE or POWER button. The unit will first switch to Network Standby mode.
Audio Controls:
- PHONES: A 1/4" stereo jack allows headphone listening. It operates in parallel with the selected speakers; to listen only through headphones, rotate the SPEAKERS knob to "OFF." Volume, tone, and balance controls are active for headphone listening. Users can connect headphones with other jack types using a suitable adapter. It is crucial to turn the volume control to minimum before connecting or disconnecting headphones to prevent hearing damage.
- Tone Controls (BASS/TREBLE): These controls adjust the tonal balance. The 12 o'clock position is "flat" (no boost or cut). Rotating clockwise increases the level, while counterclockwise decreases it.
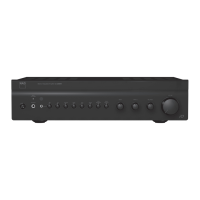
- Source Input Selectors: Dedicated buttons (PHONO, LINE, OPTICAL, COAX, HDMI) allow selection of the active audio source. The corresponding LED indicator above the selected button illuminates green. Pressing any of these buttons will also power up the C 3050 from standby.
- SPEAKERS (A, B, A+B, OFF): This knob selects which speaker set is active. "A" selects SPEAKERS A, "B" selects SPEAKERS B, "A+B" selects both, and "OFF" disables both. Output is always present at the PHONES jack regardless of this setting.
- BALANCE: This control adjusts the relative levels of the left and right speakers. The 12 o'clock position provides equal levels. Rotating clockwise shifts balance to the right, and counterclockwise shifts it to the left.
- BluOS/MDC: This cap-touch sensing button is functional only with an optional MDC2 BluOS D module installed. When installed, pressing this button selects BluOS as the active source. The BluOS/MDC LED indicator provides blink codes to indicate various statuses like Hotspot mode, network connection, upgrade mode, factory reset, upgrading, connected to network, mute mode, and hotspot mode timed out.
- BLUETOOTH: Pressing this cap-touch sensing button selects Bluetooth as the active source. To pair a Bluetooth device, ensure the supplied Bluetooth antenna is connected to the rear panel, activate Bluetooth on your device, scan for devices, select the C 3050's unique device ID, and pair. Once successfully paired, select Bluetooth as the active source to play music.
- VOLUME LEVEL LED INDICATORS: These LEDs illuminate sequentially as the volume increases and extinguish as it decreases. Only the amber LED indicates minimum volume.
- VOLUME: This control adjusts the overall loudness of the signal sent to speakers and headphones. It offers precise signal tracking and channel balance. Rotate clockwise to increase volume and counterclockwise to decrease it.
- VU METER (Rear Panel): This switch directs the front panel VU meter to monitor either the Input Signal (current source input signal) or Speaker Output (current speaker output signal).
Rear Panel Connections:
- HDMI ARC: Connects to a TV supporting HDMI Control (CEC) and Enhanced Audio Return Channel (eARC) functions. Use an Ultra High-Speed HDMI Certified cable. The C 3050 will output audio from the TV via this port. Ensure the audio setting/format of eARC-connected devices is set to PCM only, as only audio output is supported (no video).
- CEC POWER: Allows the C 3050 to be powered up or down by an external TV connected via HDMI eARC. This feature can be enabled/disabled by pressing and holding the front panel HDMI button until its LED flashes twice (enabled) or once (disabled).
- DIGITAL AUDIO IN (OPTICAL/COAXIAL): Connects to digital outputs of sources like CD/BD/DVD players, digital cable boxes, or tuners.
- PHONO IN: Input for Moving Magnet (MM) phono cartridges. Connect your turntable's RCA-to-RCA lead here.
- GROUND TERMINAL: Connects to ground for phono or turntable sources if needed. Ensure the C 3050 is plugged into a grounded AC outlet.
- LINE IN: Inputs for line-level sources like CD players or tuners. Use dual RCA-to-RCA leads.
- MAIN IN: Connections for external preamplifiers or processors. In normal use, these are linked to the PRE OUT sockets. To connect an external processor, remove these links. Always turn off the C 3050 and associated preamplifiers before connecting or disconnecting.
- PRE OUT: Outputs for connecting to analog audio inputs of compatible devices like amplifiers or receivers, allowing the C 3050 to function as a preamplifier. In normal use, these are linked to the MAIN IN sockets.
- SUBW: Connects to the low-level input of a powered subwoofer. Low-frequency information up to 80 Hz is sent to the subwoofer.
- SPEAKERS A, B: Two sets of speaker terminals for "main" speakers (A) and a second pair (B), e.g., extension speakers. Connect "R+" and "R-" terminals to the corresponding right speaker, and similarly for the left speaker. Double-check connections before powering up.
- AC MAINS INPUT: Connect the appropriate mains power cord for your region. Ensure the power cord is firmly connected at both ends. Always disconnect from the mains outlet before disconnecting from the C 3050.
- BLUETOOTH ANTENNA TERMINAL: Connect the supplied Bluetooth antenna here.
- IR IN: Connects to an IR repeater or another compatible device for remote control.
- +12V TRIGGER OUT: Controls external equipment with a +12V trigger input. This output is 12V when the C 3050 is ON and 0V in standby or OFF mode.
MDC2 Upgrade Slots:
The C 3050 supports NAD's MDC2 architecture, allowing for future upgrades through modules like the optional MDC2 BluOS-D. This module enables streaming from services, Wi-Fi, Ethernet, and the BluOS Controller app. It also supports Apple AirPlay 2, Spotify Connect, Tidal Connect, and Dirac Live® Limited Bandwidth (20Hz-500Hz) room correction.
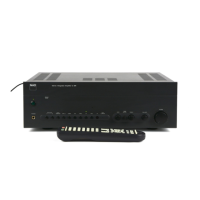
SR 10 Remote Control:
The SR 10 remote controls key functions of the C 3050 and can operate up to 4 devices. It requires two AA alkaline batteries.
- ON/OFF: Powers the C 3050 on or off.
- DEVICE SELECTOR: Selects which component the remote will command (AMP, CD, BLS, AUX).
- MUTE: Temporarily mutes sound. Mute mode is indicated by the amber VOLUME LEVEL LED. Adjusting volume automatically releases mute.
- VOL [/]: Increases or decreases volume.
- SOURCE [/]: Toggles through source input selections.
- EQ: With MDC2 BluOS D installed, selects saved Dirac Filter settings.
- NUMERIC BUTTONS (1-9, 0): Directly selects Source input.
- DIM: Reduces, turns off, or restores display brightness of SOURCE INPUT and VOLUME LEVEL LED indicators (6 levels).
- BluOS Playback Controls: (With MDC2 BluOS D) Play/pause, skip tracks.
- CD Player Control: (For NAD CD Players) Fast forward/reverse, select tracks, open/close disc tray.
- AUX Player Control: (For NAD Tuners) Step through AM/FM frequencies, stored presets, or bands.
Maintenance Features:
- Cleaning: Unplug the product from the wall outlet before cleaning. Use a damp cloth; avoid liquid or aerosol cleaners.
- Location: Place on a firm, level, well-ventilated surface, away from direct sunlight, heat, or dampness. Avoid soft surfaces like carpets. Ensure adequate ventilation, especially if placed in a cabinet.
- Connections: Use high-quality leads and sockets. Ensure all connections are firm and undamaged.
- Bare Wires and Pin Connectors: For speaker terminals, insert bare wires or pins into the hole, then tighten the bushing. Ensure no loose strands touch the back panel or other sockets, and only 1/2" (1cm) of bare cable is exposed.
- Fuse Holder: This is for qualified NAD service technicians only. Opening it voids the warranty.
- Factory Reset: If the C 3050 malfunctions or hangs, it can be factory reset. With the unit in operating mode, switch OFF the rear panel POWER switch. Press and hold the front panel POWER button, then switch ON the rear panel POWER switch. Continue holding the POWER button for over 30 seconds until the VU meter illuminates twice (white with yellow background), then release. The front panel Power LED will turn off and cycle to solid amber, and the VU meter will turn off, indicating completion. Releasing the POWER button too early will enter Upgrade Mode instead.
- SR 10 Remote Control Reset: To restore the remote to factory default settings, press and hold [ON] and buttons. Release when the [AMP] device button lights up. The [CD] button flashing twice confirms the reset.
Important Safety Instructions:
- Read and retain all instructions.
- Heed all warnings.
- Do not use attachments not recommended by the manufacturer.
- Avoid water and moisture.
- Do not place on unstable carts or stands.
- Ensure proper ventilation; do not block openings.
- Operate only from the specified power source with protective earthing.
- Route power cords carefully to prevent damage.
- Unplug and refer servicing to qualified personnel if damaged (e.g., damaged cord, liquid spill, rain exposure, abnormal operation, dropped, or performance change).
- Use manufacturer-specified replacement parts.
- Dispose of batteries according to local regulations.
- Perform safety checks after service.
- Mount on wall or ceiling only as recommended.
- Ground outdoor antennas properly.
- Unplug during lightning storms or long periods of disuse.
- Avoid power lines when installing outdoor antennas.
- Do not overload wall outlets or extension cords.
- Keep naked flame sources away.
- Prevent objects or liquids from entering the product.
- Avoid excessive sound pressure from headphones to prevent hearing loss.
The C 3050 is designed for optimal ventilation, requiring at least 10 cm of space on the left, right, and rear panels, and 10 cm on the top panel.