X GEM-P3200 Programming Instructions
L NAPCO Security Systems
Page 6
WI1184B 2/06
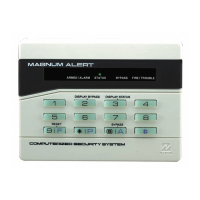
GEM-RP2ASe2/GEM-K2AS Keypad Easy Program Menu
Enter the Dealer Security Code (default = 456789) for a new panel or enter your custom Dealer Program Code if
programmed. Press the PRIOR/NO button repeatedly until “TURNON/PROG” is displayed. NOTE: If you pass
“TURNON/PROG”, you can scroll back by pressing
B. Press the NEXT/YES button to enter the Dealer Program
Mode. In each of the following steps, press R to jump to the next screen, the NEXT/YES button to go
forwards, the PRIOR/NO button to go backwards,
U to save and C twice to exit at any time.
R
COMPUTERIZED SECURITY SYSTEM
A
R
M
E
D
S
T
A
T
U
S
SYSTEM ARMED
01/01/97 12:00AM
12
4
3
56
7890
A
B
C
D
E
F
G
NEXT/YES
PRIOR/NO
AREA
GEMINI
ENT A1
ENT A1
GEM-RP2ASE2/GEM-K2AS KEYPAD EASY PROGRAM MENU
(Direct Entry)
Ent A1
#ZnXX
(Direct Entry)
Ent A2
#ZnXX
(Direct Entry)
Ent Fr
Zn#XX
(Direct Entry)
Ent2WF
Zn#XX
(Press YES or NO)
Report
all Zn
Y/N
(Direct Entry)
EntEE1
Zn#XX
(Direct Entry)
EntFol
Zn#XX
Total Number of Zones in Area 1 (New Program Only)
• Enter the total number of zones to be programmed for Area 1.
• Valid entries are from 08 to 48. Directly enter the total number of zones, including leading zeros.
• The system is based on groups of 4 zones each (after the first 8 zones), and will automatically round up to the
next group of 4. For example, if you enter 18, it will automatically convert this to 20 zones. Press
U to save.
Press the NEXT/YES button to proceed.
Total Number of Zones in Area 2 (New Program Only)
• Enter the total number of zones to be programmed for Area 2.
• Valid entries are from 00 to 48. Directly enter the total number of zones, including leading zeros.
• The system is based on groups of 4 zones each (after the first 8 zones), and will automatically round up to the
next group of 4. For example, if you enter 18, it will automatically convert this to 20 zones. Press
U to save.
Press the NEXT/YES button to proceed.
Fire Zones in Area 1 (New Program Only)
• Enter the zone number of any Fire Zones (including 2-wire, 4-wire or wireless).
• Valid entries are from 01 to 48.
• Directly enter each zone number, including leading zeros, and press U to save, and then repeat for any addi-
tional zone(s). Press the NEXT/YES button to proceed.
2-Wire Fire Zones in Area 1 (New Program Only)
•
Enter the zone number of any Fire Zone (from previous question) to be used with 2-wire smoke detectors.
• Valid entries are 07 and 08. Directly enter each zone number, including leading zeros.
• Press U to save, and repeat for any additional zone(s); press NEXT to proceed.
NOTE: Only zones which have been designated as Fire Zones can be programmed as 2 Wire Fire zones. JP3
must be set to “2-WF” position for 2-wire fire for Zones 7-8 (refer to Installation Instructions).
Local or Central Station Reporting System (New Program Only)
Press the NEXT/YES button for all zones to report; press the PRIOR/NO button for local system.
Exit/Entry Zones in Area 1 (New Program Only)
• Enter the zone numbers of zones to be used as Exit/Entry zones.
• Valid entries are from 01 to 48. Directly enter each zone number, including leading zeros.
• Press U to save and repeat for any additional zone(s); press the NEXT/YES button to proceed.
NOTE: Entry Delay time of 30 seconds and Exit Delay Time of 60 seconds will automatically be programmed.
Interior Zones in Area 1 (New Program Only)
• Enter the zone numbers to be used as Interior Zones.
• Valid entries are from 01 to 48. Directly enter each zone number, including leading zeros.
• Press U to save and then repeat for any additional zone(s).
• Press the NEXT/YES button to proceed.
• All Interior zones will also be automatically programmed as “Exit/Entry Follower” and as "Power Up Delay" zones.
 Loading...