36
Note: Your machine may not match the image. For reference only.
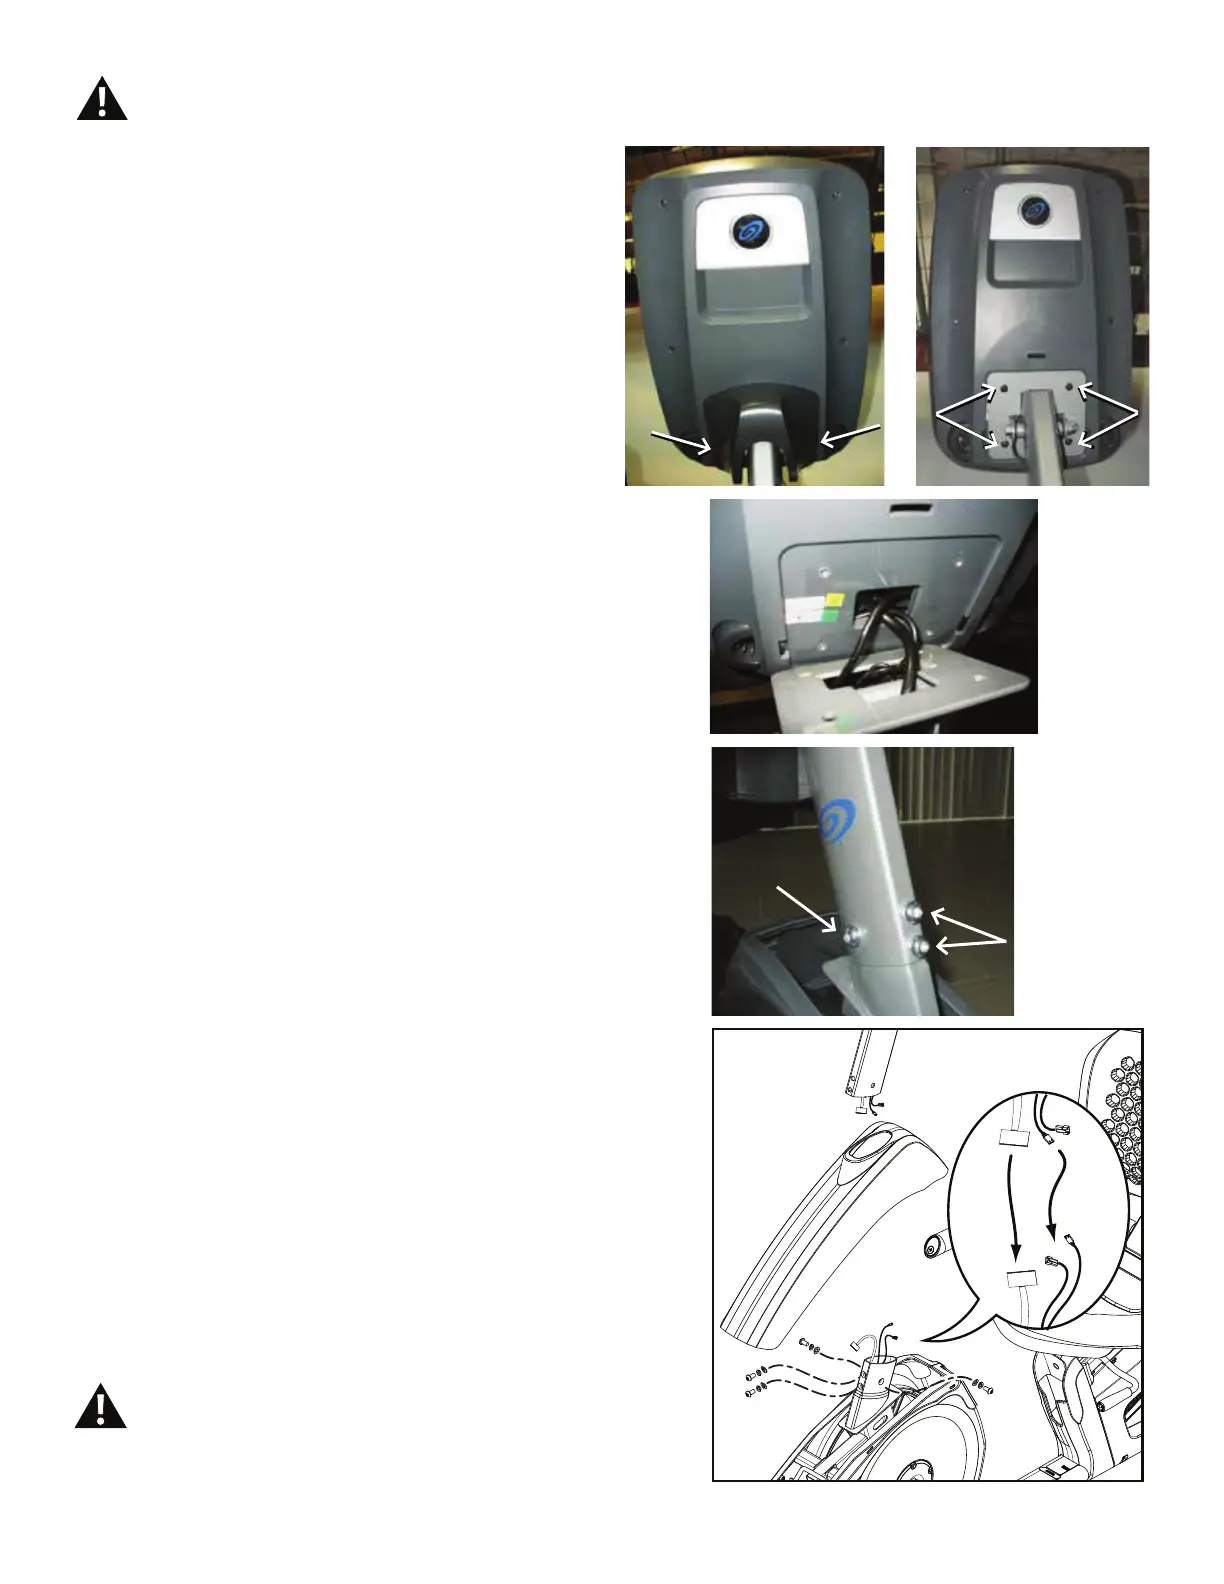
1. Remove screws that attach Console to the Mast.
&DUHIXOO\OLIWWKH&RQVROHRႇWKH0DVW
2. Disconnect the Data Cable, Heart Rate Cable and
Resistance Cable from the back of the Console. Set the
Console and screws safely aside for reassembly.
Note: Do not let the cables fall down inside the Mast or
Frame.
3. Bend the edges of the Top Shroud to disengage the
inside tabs from the Main Assembly, and slide the Top
Shroud up the Mast.
4. Remove the hardware (indicated) from the Mast. Gently
pull the Mast out and disconnect the cables. Set the hard-
ware and Top Shroud safely aside for reassembly. Discard
the old Mast.
NOTICE: Do not crimp the cables.
This step may require two people.
5. Installation is the reverse procedure.
NOTICE: Make sure the cable connectors do not fall into
the Console Mast. Align the clips on the cable
connectors and make sure the connectors lock.
Do not crimp the cables. Be sure the tabs on the
Top Shroud snap into the Main Assembly.
6. Connect the cables to the back of the Console and
attach the Console to the Mast.
NOTICE: Do not crimp the cables.
7. Final Inspection
Inspect your machine to ensure that all hardware is tight and
components are properly assembled.
Do not use until the machine has been fully
assembled and inspected for correct
SHUIRUPDQFHLQDFFRUGDQFHZLWKWKH2ZQHU¶V
Manual.
Disconnect all power to the machine before you service it.
X2

 Loading...