47
1RWH Your machine may not match the image. For reference only.
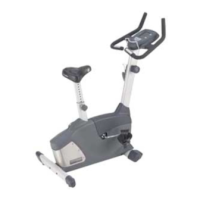
1. Using a #2 Phillips Screwdriver, remove the 2 screws
(*) that secure the Shock Shroud. Turn the Shock Shroud to
H[SRVHWKH6KRFN$VVHPEO\
8VLQJDPPKH[NH\ORRVHQDQGUHPRYHWKHEROW%
that attaches the Shock Assembly (A) and the Seat Recline
Arm (C) on the Seat Back. Set it safely aside.
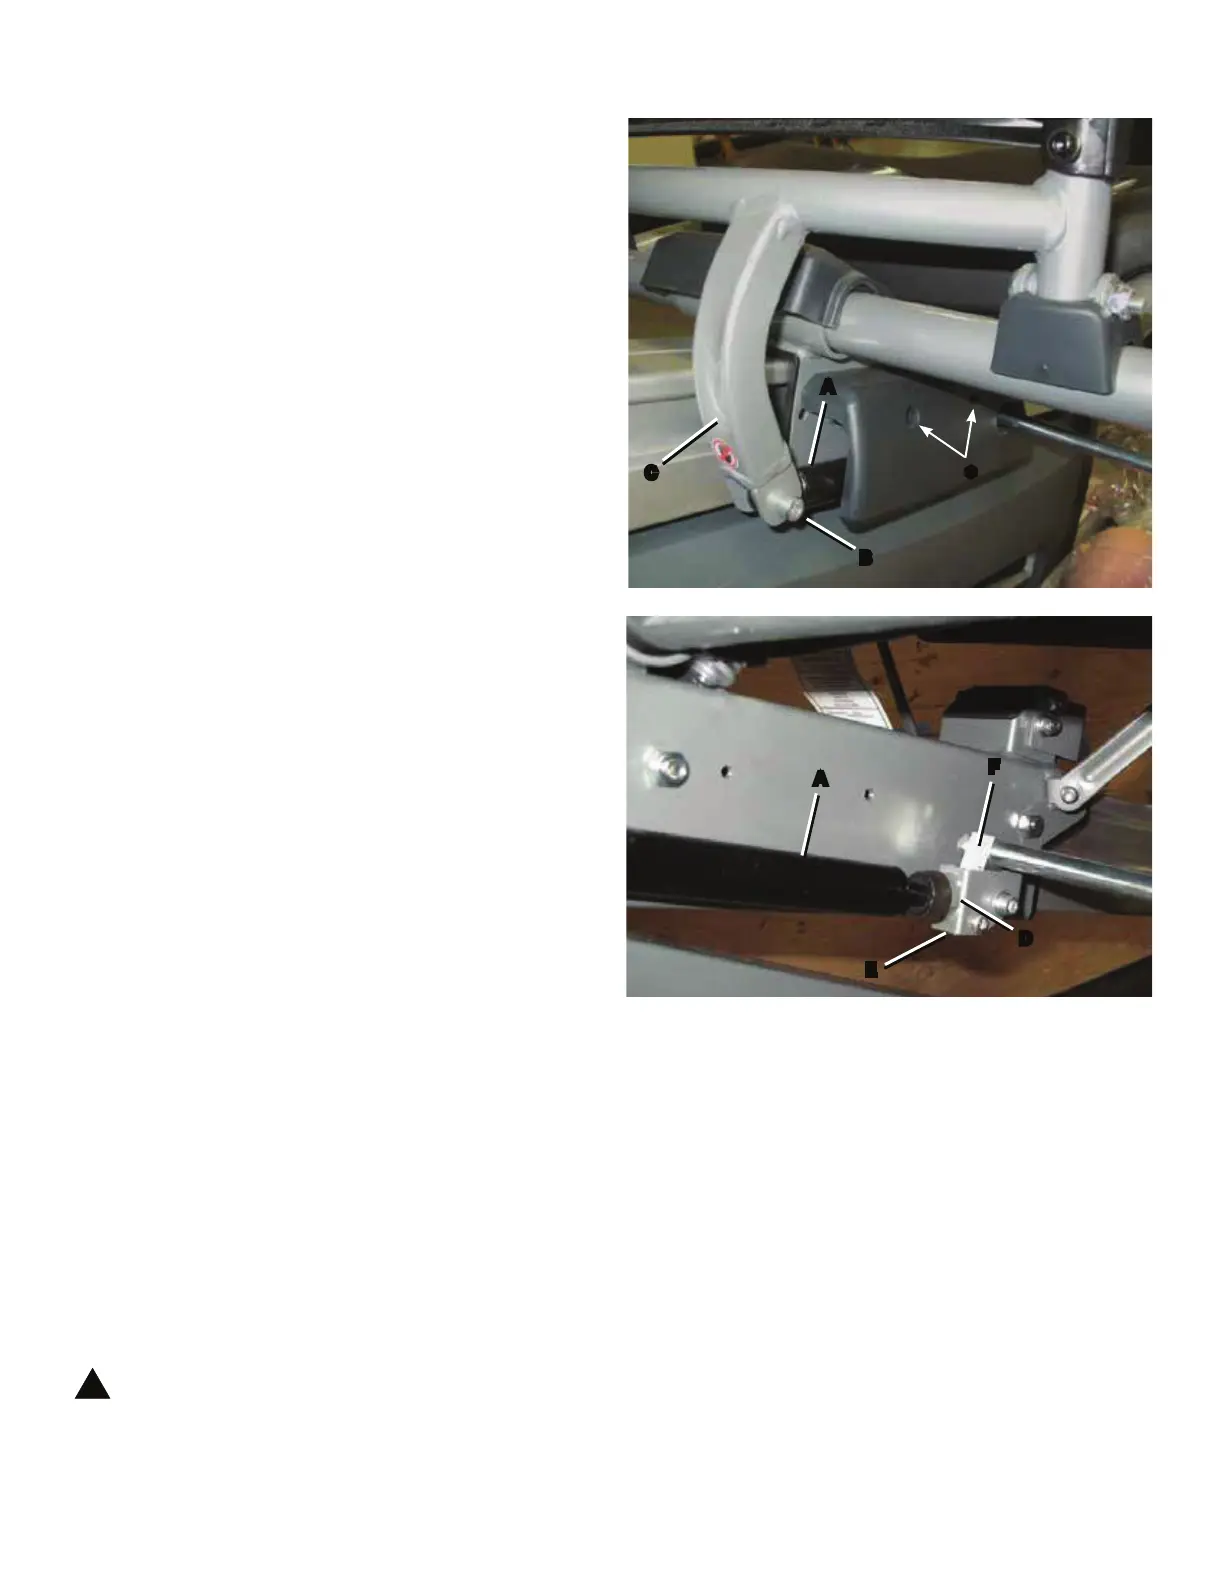
3. Using a 13mm open end wrench, loosen the jam nut
(D) on the Shock Assembly (A). Carefully turn the Shock
Assembly counterclockwise and remove from the Shock
Assembly bracket (E). Set it safely aside.
4. Put the end of the replacement Shock Assembly through
the opening in the Shock Assembly bracket (E). Turn the
Shock Assembly (A) clockwise to tighten until the tip touches
the Seat Recline Handle mount (F) inside the bracket. Make
sure the holes in the end of the Shock Assembly and the
Seat Recline Arm (C) are aligned. Using a 13mm open end
wrench, tighten the jam nut (D) to hold the Shock cylinder in
position.
5. Install the bolt (B) through the holes in the Seat Recline
Arm (C) and Shock Assembly (A).
5. Reinstall the Shock Shroud to the Frame.
6. Dispose of the old parts.
7. Final Inspection
Inspect your machine to ensure that all hardware is tight and
components are properly assembled.
!
Do not use until the machine has been fully
assembled and inspected for correct performance
LQDFFRUGDQFHZLWKWKH2ZQHU¶V0DQXDO
Shrouds not shown.
*
B
A
C
D
A
E
F

 Loading...