49
1RWH Your machine may not match the image. For reference only.
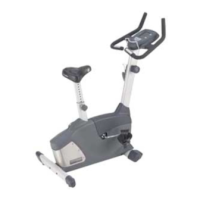
1. Using a #2 Phillips Screwdriver, loosen and remove
the hardware that attaches the padded Seat Bottom to the
Seat Frame Assembly. Set the hardware safely aside for
reassembly.
2. Remove the Seat Bottom from the Seat Frame
Assembly and set it safely aside.
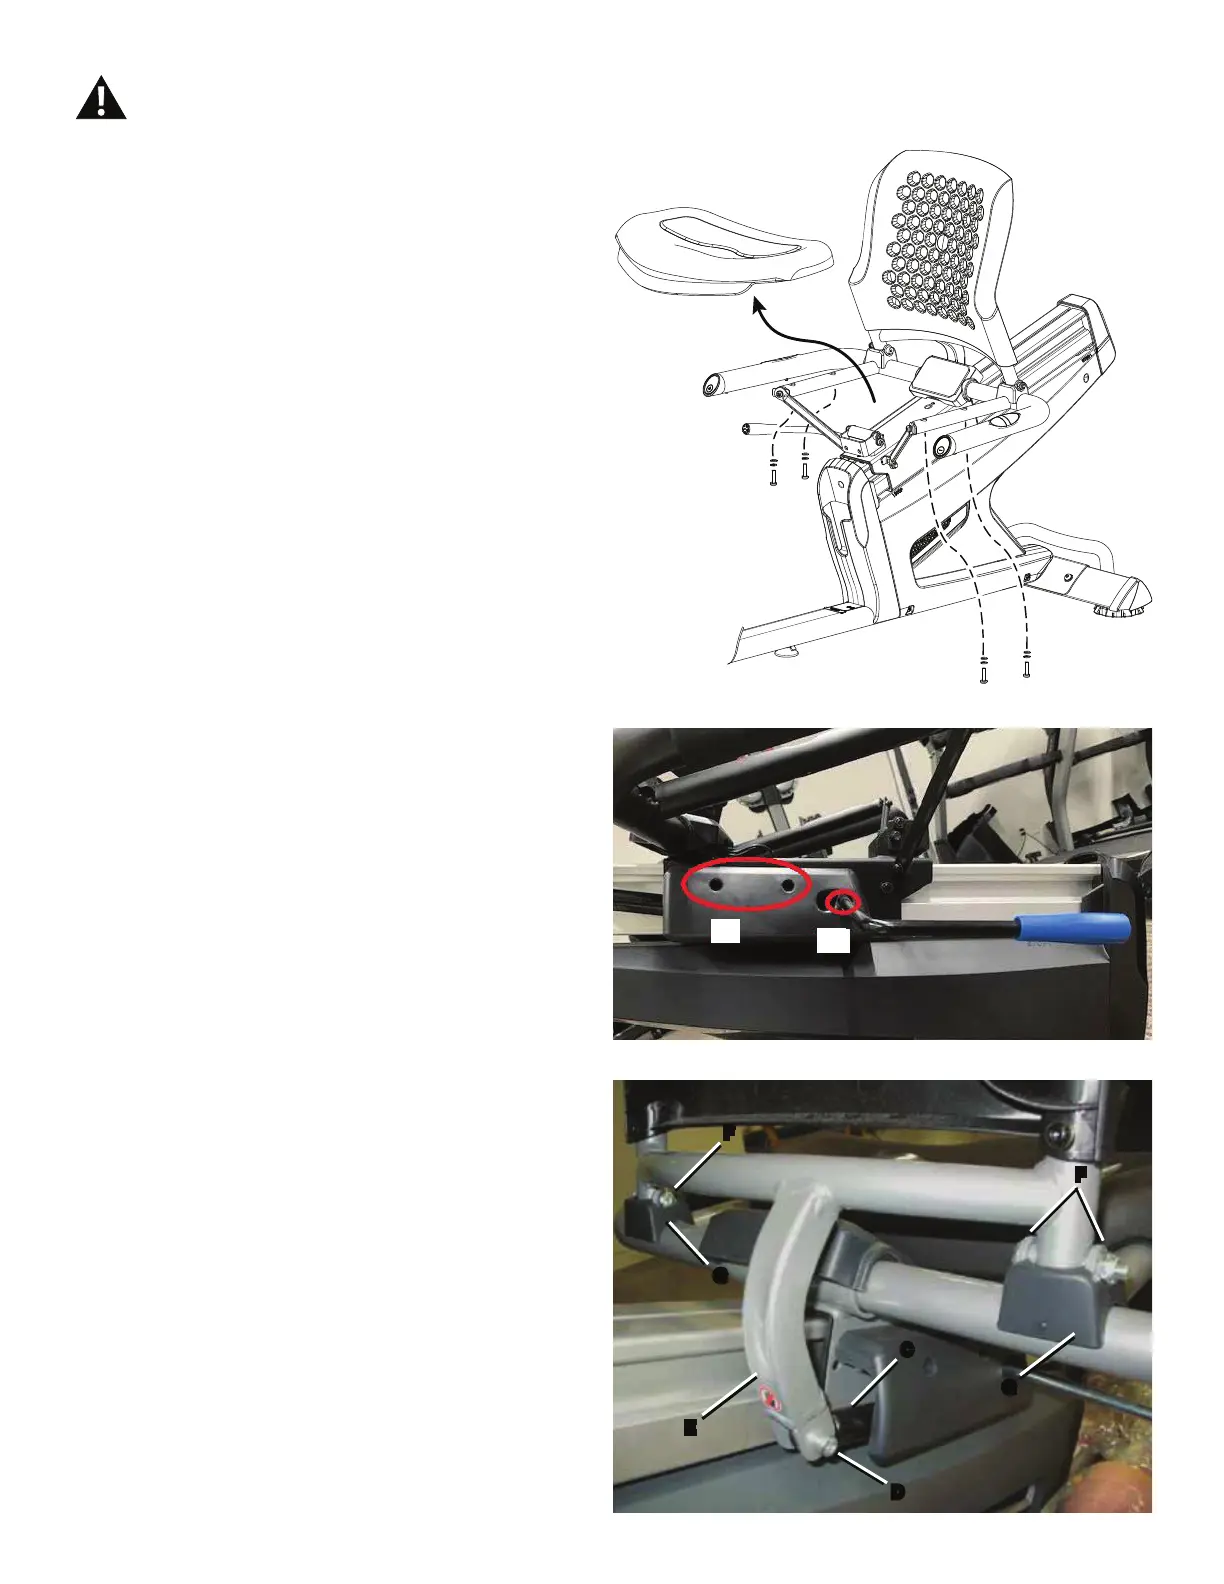
3. Using a #2 ScrewDriver remove the 2 screws (A) from
the Shock Shroud. Slide the Shock Shroud down the Seat
Recline Handle shaft.
Using a 13mm open wrench, remove the nut (B) from the
Seat Recline Handle and set the handle and shroud aside.
4. 8VLQJDPPKH[NH\ORRVHQDQGUHPRYHWKHEROW'
that attaches the Shock Assembly (C) and the Seat Recline
Arm (E) on the Seat Back. Set it safely aside for reassembly.
5. 8VLQJDPPKH[NH\DQGPPZUHQFKORRVHQDQG
remove the hardware (F) that attaches the Seat Back to the
Seat Frame assembly, and remove the Seat Back. Set the
Seat Back and hardware safely aside.
NOTICE: This step may require two people.
6. Remove the Seat Pivot Shrouds (G) and set them safely
aside.
Disconnect all power to the machine before you service it.
C
D
E
F
F
G
G
A
B

 Loading...