65
NOTICE: It is necessary to remove the Shrouds for this procedure. Refer to the “Replace the Shrouds” procedure.
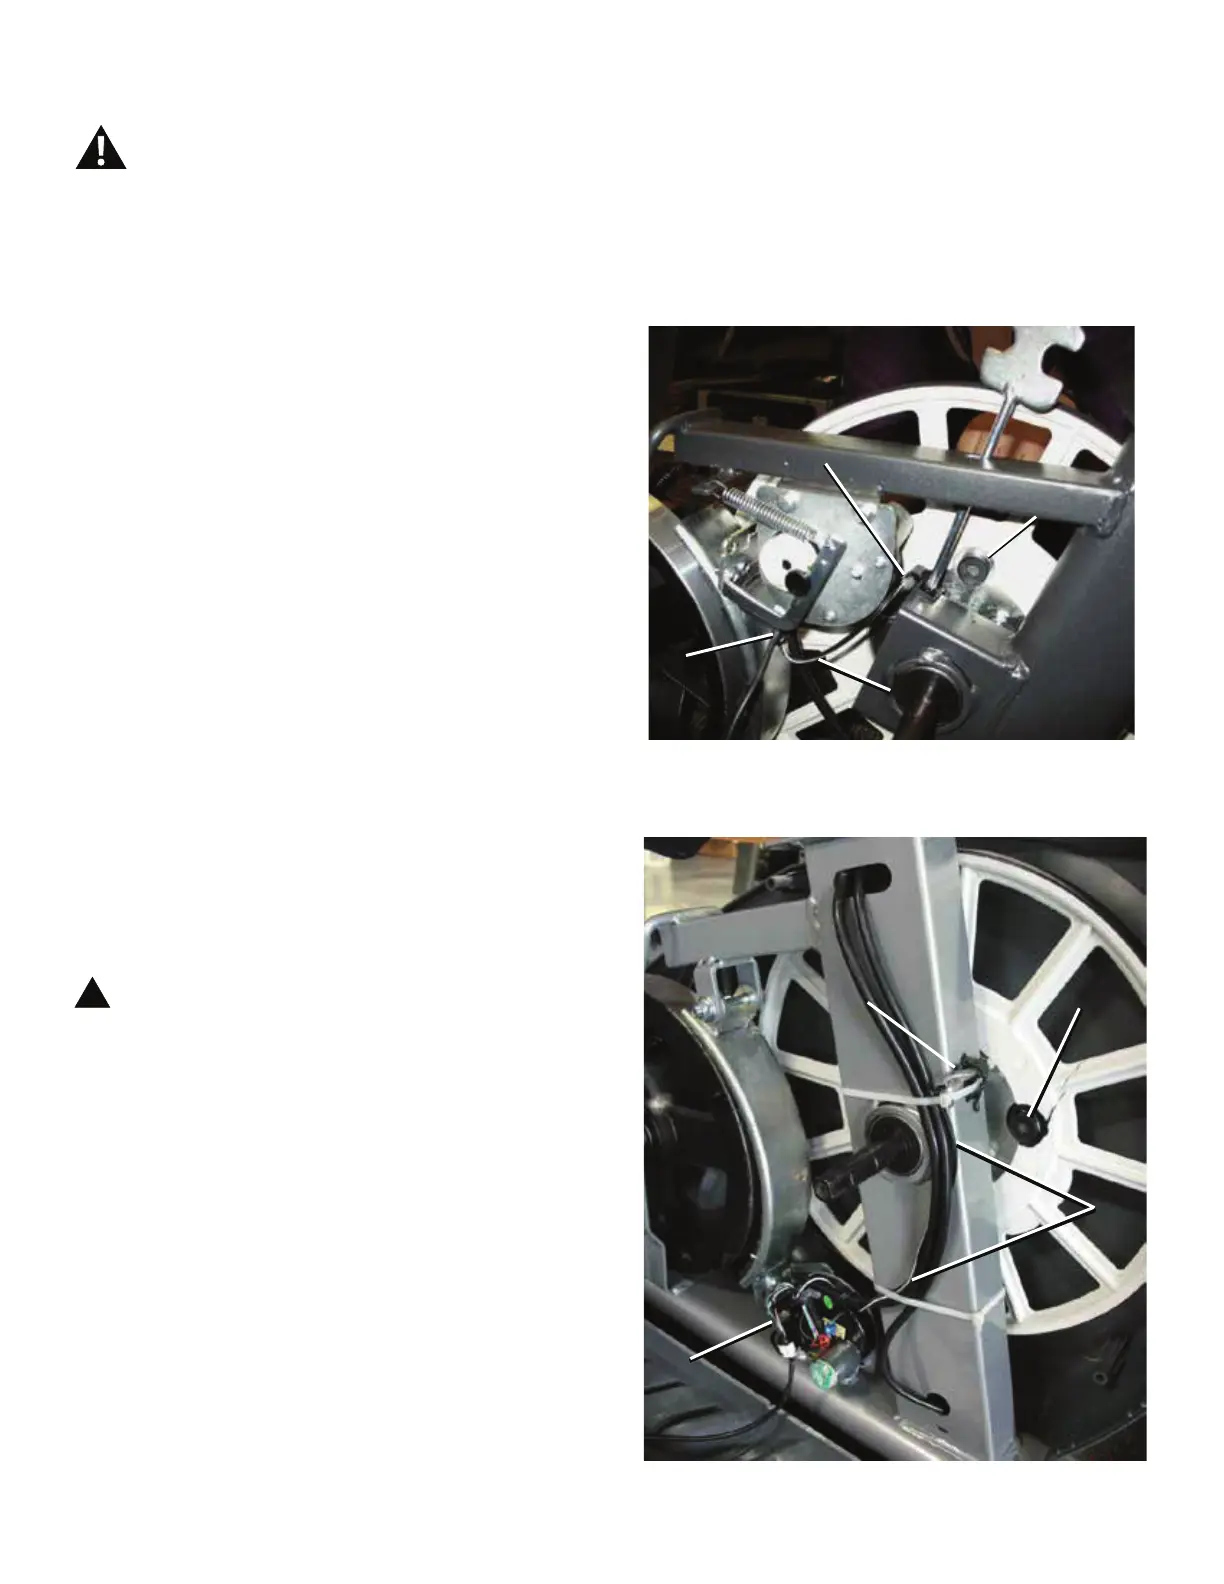
1RWH Your machine may not match the image. For reference only.
1. Carefully remove the Shrouds. Refer to the “Replace the
Shrouds” procedure in this manual.
2. Observe the cable routing from the RPM Sensor (A) to
the wiring harness (C) on your machine. Carefully disconnect
the RPM Sensor cable (B) from the wiring harness.
3. Remove the hardware that attaches the RPM Sensor (A)
to the Main Frame. Carefully remove the old RPM Sensor
and cable and discard it.
NOTICE: Do not crimp any cables.
4. Installation is the reverse procedure.
NOTICE: Do not crimp any cables. Be sure the routing for
the new RPM Sensor cable (B) and other wiring
is correct to prevent interference from moving
parts.
Note: Before fully attaching the Shrouds, verify that the
RPM Sensor (A) and Speed Sensor Magnet (D) on
the Drive Pulley do not touch.
5. Final Inspection
Inspect your machine to ensure that all hardware is tight and
components are properly assembled.
!
Do not use until the machine has been fully
assembled and inspected for correct performance
LQDFFRUGDQFHZLWKWKH2ZQHU¶V0DQXDO
Disconnect all power to the machine before you service it.
5HFXPEHQWELNH
8SULJKWELNH
A
D
B
C
A
D
B
C

 Loading...